opsi-clonezilla (free)
Preconditions for the opsi Extensions opsi-clonezilla
Technical preconditions are opsi 4.0.3 with the following package and product versions:
| opsi-Package | Version |
|---|---|
opsi-linux-bootimage |
>= 20130207-1 |
or opsi 4.0.5 with the following package and product versions:
| opsi packet | version |
|---|---|
opsi-linux-bootimage |
>= 20140805-1 |
opsi-clonezilla |
>= 4.0.5-1 |
For the product opsi-clonezilla the share opsi_images must have write permission for 'pcpatch'. Check your Samba configuration.For use with UEFI you need at least opsi 4.0.7 Set for the property imageshare a share as value. This share should have the format //server/share. Please note the use of slashes instead of back slashes. This share should be mountable by the opsi user pcpatch with the password as known by the opsi-server. This is normally the share opsi_images from the opsi-server.
|
Introduction
Besides of the package based (unattended) installation, opsi had in the past just a rudimentary support for image based installations. With the integration technique of the Open Source product clonezilla (http://clonezilla.org/) into opsi, now a comprehensive and flexible solution for handling partition and disc images is available.
Concept
We have combined the clonezilla scripts with the opsi-linux-bootimage to generate the following benefits:
-
integration into the opsi process control
-
automated mount of the shares for the image repository
-
availability of automated processing
Interactive Proceedings
Starting the opsi-clonezilla per default starts in the interactive mode. This interactive mode allows to choose the desired operations and parameters easily. Knowing the commands and their parameters from this makes it easy to create non-interactive run commands from this.
-
Set for the property
imagesharea share as value. This share should have the format//server/share. Please note the use of slashes instead of back slashes. This share should be mountable by the opsi userpcpatchwith the password as known by the opsi-server. This is normally the share opsi_images from the opsi-server. -
Switch the property
runcommandtoocs-live. This is the interactive mode of clonezilla. -
Start the netboot product.
-
In the first dialog you will be asked, whether anything should be mounted to
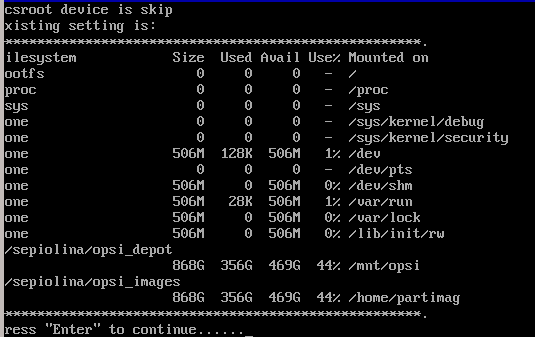
/home/partimg. ChooseSkipbecause the mount has already been done by the opsi boot image.

/home/partimg.The mounted partition will be displayed:
By choosing Expert or Beginner you decide if you want to use all default parameters or have the possibility to modify them.
Since opsi 4.0.5 you may also choose the Beginner mode.

Now you have to choose which basic operation you like to run. In this manual we discuss only the following operations:
-
save disk
-
save partition
-
restore disk
-
restore partition
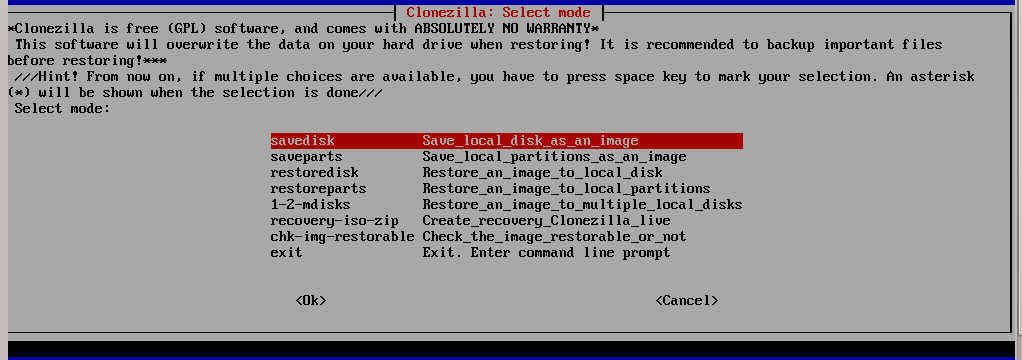
Interactive save disk in the expert mode
Here will be shown (as an example for similar operations) the additional dialogs you will get in the save disk expert mode.


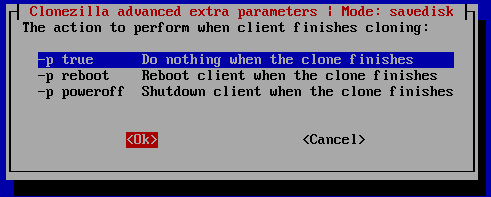
Interactive save disk


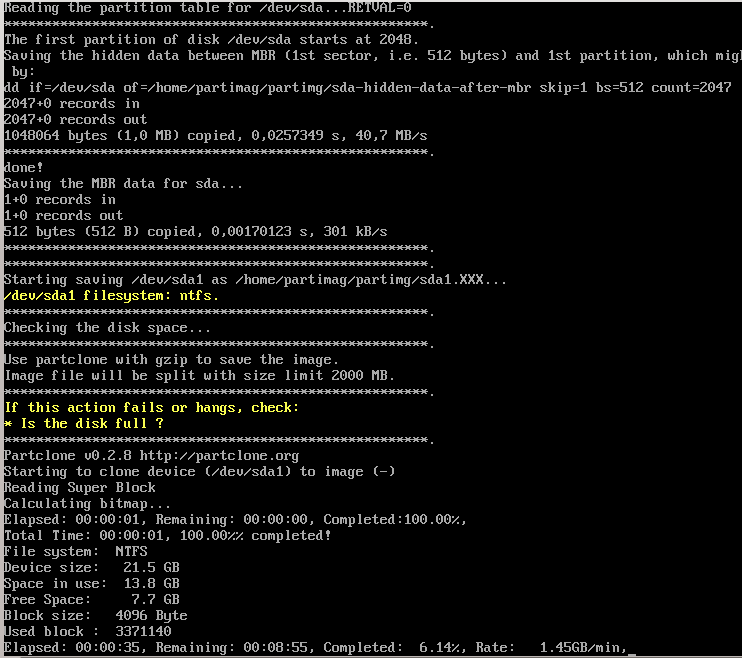
Interactive save part


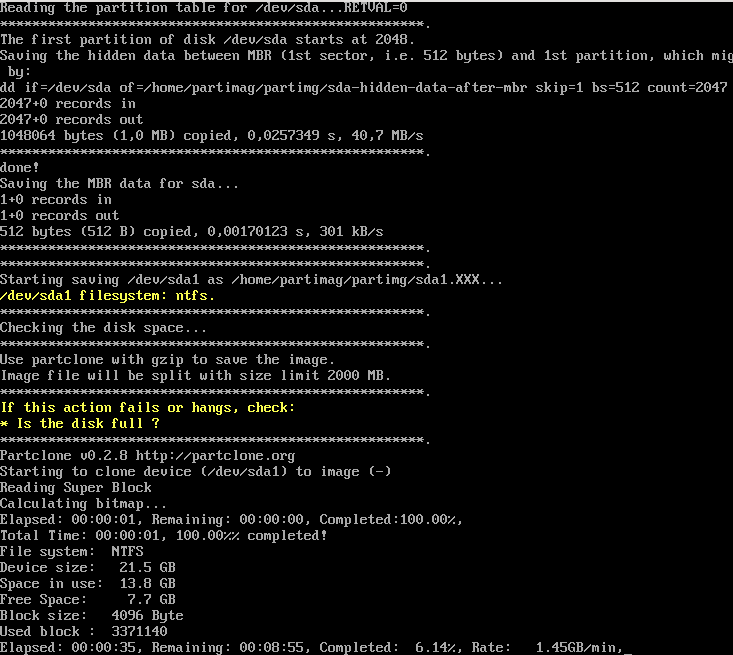
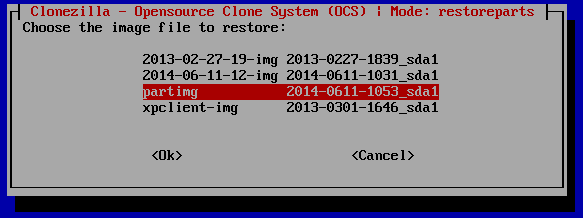
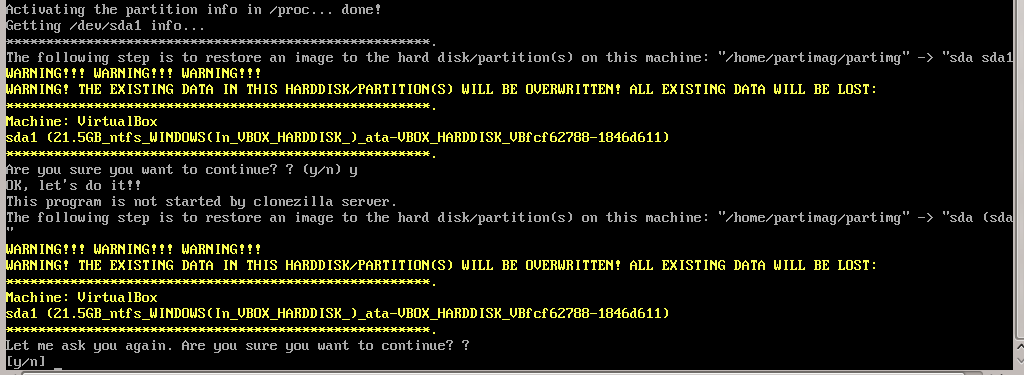
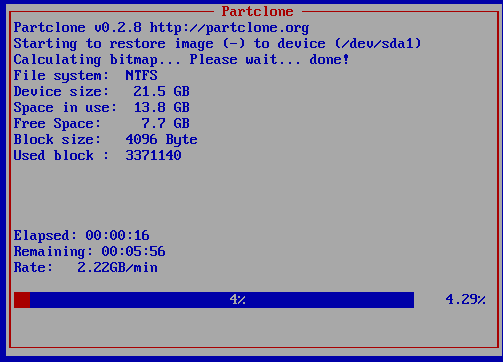
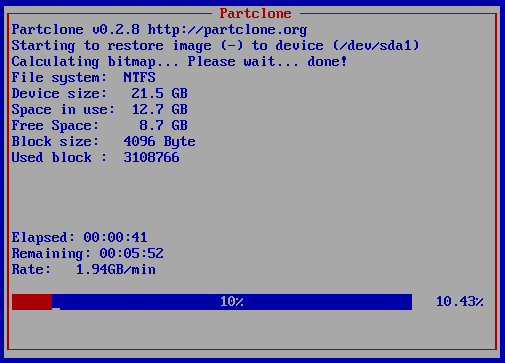
Interactive restore disk


Not interactive processes
By setting the desired command as the product property runcommand opsi-clonezilla is switched to the non interactive mode.
-
Set the property
imageshareto a share, that can be mounted by the userpcpatchwith the password as known by the opsi-server. The format for the share is//server/share(attention: use forward slashes, not backward slashes). -
Set the property
runcommandto the non interactive command. Recommended Parameters:-
Always: '--batch'
-
At restore: '--skip-check-restorable-r'
-
Always remove: '-c'
-
Here are some non interactive versions of the examples from above (without -c and with --batch). Since opsi 4.0.5 the parameter -z1 can be omitted. This accelerates the compression with multi processor kernels:
-
/opt/drbl/sbin/ocs-sr --batch -q2 -j2 -rm-win-swap-hib -z1 -i 2000 -p true save disk 2014-06-11-12-img sda -
/opt/drbl/sbin/ocs-sr --batch -q2 -j2 -rm-win-swap-hib -z1 -i 2000 -p true save parts partimg sda1 -
/opt/drbl/sbin/ocs-sr --batch -g auto -e1 auto -e2 -r -j2 -p true restore disk 2014-06-11-12-img sda -
/opt/drbl/sbin/ocs-sr --batch -g auto -e1 auto -e2 -r -j2 -k -p true restore parts partimg sda1
Furthermore in these examples the image names 2014-06-11-12-img or partimg can be replaced by the string 'imagefile'. In this case the string 'imagefile' will be substituted by the value of the property imagefile.
If you would take the device names sda or rather sda1 for example, and replace them with, the string 'diskdevice' or 'partdevice', then the string 'disk_number' or 'part_number' will be also respectively replaced.
Examples for disk_number=1 and part_number=1:
sda / sda1
cciss/c0d0 / cciss/c0d0p1
As a result you can look at the following examples:
-
ocs-sr -g auto -e1 auto -e2 --skip-check-restorable-r --batch -r -j2 -p true restoredisk imagefile diskdevice -
ocs-sr -q2 --batch -j2 -rm-win-swap-hib -i 2000 -p true savedisk imagefile diskdevice -
ocs-sr -q2 -c -j2 -z1 -i 2000 -sc -p true saveparts imagefile partdevice
opsi-clonezilla properties
-
askbeforeinst-
description: Should there be a confirmation dialog before start installing ? / Faut-il y avoir une confirmation avant de démarrer l’installation ?
-
default: False
-
-
mount_image_share-
description: Should there be a confirmation dialog before start installing ? / Faut-il y avoir une confirmation avant de démarrer l’installation ?
-
default: True
-
-
imageshare-
editable: True
-
description: normally
autoor empty: Defaults to the opsi_images share of the depot server; if notautoor empty: smb/cifs share in the format //server/share -
values: ["", "//opsiserver/opsi_images", "auto"]
-
default: ["auto"]
-
-
runcommand-
editable: True
-
description: Clonezilla command to be executed
-
values: ["", "ocs-live", "ocs-sr -g auto -e1 auto -e2 --skip-check-restorable-r --batch -r -j2 -p true restoredisk imagefile diskdevice", "ocs-sr -q2 --skip-check-restorable-s --batch -j2 -rm-win-swap-hib -i 2000 -p true savedisk imagefile diskdevice", "ocs-sr -q2 -c -j2 -z1 -i 2000 -sc -p true saveparts imagefile partdevice"]
-
default: ["ocs-live"]
-
-
disk_number-
editable: True
-
description: Number (first=1) of the disk ; if string 'diskdevice' in the runcommand it will be replaced by valid device path (eg sda)
-
values: ["1", "2"]
-
default: ["1"]
-
-
part_number-
editable: True
-
description: Number (first=1) of the partition of 'disk_number' ; if string 'partdevice' in the runcommand it will be replaced by valid device path (eg sda1)
-
values: ["1", "2", "3", "4", "5"]
-
default: ["1"]
-
-
imagefile-
editable: True
-
description: name of the imagefile ; will replace the string 'imagefile' in the runcommand
-
values: ["myimagefile"]
-
default: ["myimagefile"]
-
-
drbl_ocs_conf-
editable: True
-
description: Directory for post run scripts (Entries in /etc/drbl/drbl-ocs.conf)
-
values: ["", "OCS_POSTRUN_DIR=\"/home/partimag/postrun\"", "OCS_PRERUN_DIR=\"/home/partimag/prerun\""]
-
-
rebootflag-
editable: False
-
description: Should the Client reboot after running the script
-
values: ["keepalive", "reboot", "shutdown"]
-
default: ["reboot"]
-
-
setup_after_install-
multivalue: True
-
editable: True
-
description: Which opsi product(s) should we switch to setup after clonezilla work is finished ?
-
values: [""]
-
default: [""]
-
-
architecture-
editable: False
-
description: Selection of architecture, influcences the selection of the installation and the installation architecture.
-
values: ["32bit", "64bit"]
-
default: ["32bit"]
-
Clonezilla command reference
Save and restore of images
Clonezilla ocs-sr options
/usr/sbin/ocs-sr:
Usage:
To save or restore image
ocs-sr [OPTION] {savedisk|saveparts|restoredisk|restoreparts} IMAGE_NAME DEVICE
Options for saving:
- -enc, --enc-ocs-img
-
To encrypt the image with passphrase.
- -fsck-src-part, --fsck-src-part
-
Run fsck interactively on the source file system before saving it.
- -fsck-src-part-y, --fsck-src-part-y
-
Run fsck automatically on the source file system before saving it. This option will always attempt to fix any detected filesystem corruption automatically. //NOTE// Use this option in caution.
- -gm, --gen-md5sum
-
Generate the MD5 checksum for the image. Later you can use -cm|--check-md5sum option to check the image when restoring the image. Note! It might take a lot of time to generate if the image size is large.
- -gs, --gen-sha1sum
-
Generate the SHA1 checksum for the image. Later you can use -cs|--check-sha1sum option to check the image when restoring the image. Note! It might take a lot of time to generate if the image size is large.
- -gmf, --gen-chksum-for-files-in-dev
-
Generate the checksum for files in the source device. Later you can use -cmf|--chk-chksum-for-files-in-dev to check the files in the destination device after they are restored. Note! It might take a lot of time to inspect the checksum if there are many files in the destination device.
- -i, --image-size SIZE
-
Set the size in MB to split the partition image file into multiple volumes files. For the FAT32 image repository, the SIZE should not be larger than 4096.
- -j2, --clone-hidden-data
-
Use dd to clone the image of the data between MBR (1st sector, i.e. 512 bytes) and 1st partition, which might be useful for some recovery tool.
- -ntfs-ok, --ntfs-ok
-
Assume the NTFS integrity is OK, do NOT check again (for ntfsclone only)
- -rm-win-swap-hib, --rm-win-swap-hib
-
Try to remove the MS windows swap file in the source partition.
- -q, --use-ntfsclone
-
If the partition to be saved is NTFS, use program ntfsclone instead of partimage (i.e. Priority: ntfsclone > partimage > dd)
- -q1, --force-to-use-dd
-
Force to use dd to save partition(s) (inefficient method, very slow, but works for all the file system).
- -q2, --use-partclone
-
Use partclone to save partition(s) (i.e. partclone > partimage > dd).
- -rescue, --rescue
-
Turn on rescue mode, i.e. try to skip bad sectors.
- -sc, -scs, --skip-check-restorable, --skip-check-restorable-s
-
By default Clonezilla will check the image if restorable after it is created. This option allows you to skip that.
- -z0, --no-compress
-
Don’t compress when saving: very fast but very big image file (NOT compatible with multicast restoring!!!)
- -z1, --gzip-compress
-
Compress using gzip when saving: fast and small image file (default)
- -z1p, --smp-gzip-compress
-
Compress using parallel gzip program (pigz) when saving: fast and small image file, good for multi-core or multi-CPU machine
- -z2, --bz2-compress
-
Compress using bzip2 when saving: slow but smallest image file
- -z2p, --smp-bzip2-compress
-
Compress using parallel bzip2 program (lbzip2) when saving: faster and smallest image file, good for multi-core or multi-CPU machine
- -z3, --lzo-compress
-
Compress using lzop when saving: similar to the size by gzip, but faster than gzip.
- -z4, --lzma-compress
-
Compress using lzma when saving: slow but smallest image file, faster decompression than bzip2.
- -z5, --xz-compress
-
Compress using xz when saving: slow but smallest image file, faster decompression than bzip2.
- -z5p, --smp-xz-compress
-
Compress using parallel xz when saving: slow but smallest image file, faster decompression than bzip2.
- -z6, --lzip-compress
-
Compress using lzip when saving: slow but smallest image file, faster decompression than bzip2.
- -z6p, --smp-lzip-compress
-
Compress using parallel lzip when saving: slow but smallest image file, faster decompression than bzip2.
- -z7, --lrzip-compress
-
Compress using lrzip when saving.
- -i, --image-size SIZE
-
Set the split image file volume size SIZE (MB). When ocs-sr is run with -x, the default SIZE is set as 4096, if without -x, we will not split it. Some words are reserved for IMAGE_NAME, "ask_user" is used to let user to input a name when saving an image. "autoname" is used to automatically generate the image name based on network card MAC address and time. "autohostname" is used to automatically generate the image name based on hostname. "autoproductname" is used to automatically generate the image name based on hardware product model gotten from dmidecode. A word is reserved for DEVICE, "ask_user" could be used to let user to select the source device when saving an image.
Options for restoring:
- -f, --from-part-in-img PARTITION
-
Restore the partition from image. This is especially for "restoreparts" to restore the image of partition (only works for one) to different partition, e.g. sda1 of image to sdb6.
- -g, --grub-install GRUB_PARTITION
-
Install grub in the MBR of the disk containing partition GRUB_PARTITION with root grub directory in the same GRUB_PARTITION when restoration finishs, GRUB_PARTITION can be one of "/dev/hda1", "/dev/hda2"… or "auto" ("auto" will let clonezilla detect the grub root partition automatically). If "auto" is assigned, it will work if grub partition and root partition are not in the same partition.
- -r, --resize-partition
-
Resize the partition when restoration finishes, this will resize the file system size to fit the partition size. It is normally used when when a small partition image is restored to a larger partition.
- -k, --no-fdisk, --no-create-partition
-
Do NOT create partition in target harddisk. If this option is set, you must make sure there is an existing partition table in the current restored harddisk. Default is to create the partition table.
- -icrc, --icrc
-
Skip Partclone CRC checking.
- -irhr, --irhr
-
Skip removing the Linux udev hardware records on the restored GNU/Linux.
- -irvd, --irvd
-
Skip removing the NTFS volume dirty flag after the file system is restored.
- -ius, --ius
-
Skip updating syslinux-related files on the restored GNU/Linux.
- -icds, --ignore-chk-dsk-size-pt
-
Skip checking destination disk size before creating the partition table on it. By default it will be checked and if the size is smaller than the source disk, quit.
- iefi, --ignore-update-efi-nvram
-
Skip updating boot entries in EFI NVRAM after restoring.
- -k1,
-
Create partition table in the target disk proportionally.
- -k2,
-
Enter command line prompt to create partition table manually before restoring image.
- -scr, --skip-check-restorable-r
-
By default Clonezilla will check the image if restorable before restoring. This option allows you to skip that.
- -t, --no-restore-mbr
-
Do NOT restore the MBR (Mater Boot Record) when restoring image. If this option is set, you must make sure there is an existing MBR in the current restored harddisk. Default is Yes
- -u, --select-img-in-client
-
Input the image name in clients
- -e, --load-geometry
-
Force to use the saved CHS (cylinders, heads, sectors) when using sfdisk
- -e1, --change-geometry NTFS-BOOT-PARTITION
-
Force to change the CHS (cylinders, heads, sectors) value of NTFS boot partitoin after image is restored. NTFS-BOOT-PARTITION can be one of "/dev/hda1", "/dev/hda2"… or "auto" ("auto" will let clonezilla detect the NTFS boot partition automatically)
- -e2, --load-geometry-from-edd
-
Force to use the CHS (cylinders, heads, sectors) from EDD (Enhanced Disk Device) when creating partition table by sfdisk
- -y, -y0, --always-restore, --always-restore-default-local
-
Let Clonezilla server as restore server, i.e. client will always has restore mode to choose (However default mode in PXE menu is local boot)
- -y1, --always-restore-default-clone
-
Let Clonezilla server as restore server, i.e. client will always has restore mode to choose (The default mode in PXE menu is clone, so if client boots, it will enter clone always, i.e. clone forever)
- -j, --create-part-by-sfdisk
-
Use sfdisk to create partition table instead of using dd to dump the partition table from saved image (This is default)
- -j0, --create-part-by-dd
-
Use dd to dump the partition table from saved image instead of sfdisk. ///Note/// This does NOT work when logical drives exist.
- -j1, --dump-mbr-in-the-end
-
Use dd to dump the MBR (total 512 bytes, i.e. 446 bytes (executable code area) + 64 bytes (table of primary partitions) + 2 bytes (MBR signature; # 0xAA55) = 512 bytes) after disk image was restored. This is an insurance for some hard drive has different numbers of cylinder, head and sector between image was saved and restored.
- -j2, --clone-hidden-data
-
Use dd to clone the image of the data between MBR (1st sector, i.e. 512 bytes) and 1st partition, which might be useful for some recovery tool.
- -hn0 PREFIX
-
Change the hostname of M$ Windows based on the combination of hostname prefix and IP address, i.e. PREFIX-IP
- -hn1 PREFIX
-
Change the hostname of M$ Windows based on the combination of hostname prefix and NIC MAC address, i.e. PREFIX-MAC
- --max-time-to-wait TIME
-
When not enough clients have connected (but at least one), start anyways when TIME seconds since first client connection have pased. This option is used with --clients-to-wait
- -cm, --check-md5sum
-
Check the MD5 checksum for the image. To use this option, you must enable -gm|--gen-md5sum option when the image is saved. Note! It might take a lot of time to check if the image size is large.
- -cs, --check-sha1sum
-
Check the SHA1 checksum for the image. To use this option, you must enable -gs|--gen-sha1sum option when the image is saved. Note! It might take a lot of time to check if the image size is large.
- -cmf, --chk-chksum-for-files-in-dev
-
Check the checksum for the files in the device. To use this option, you must enable -gmf|--gen-chksum-for-files-in-dev when the image is saved. Note! (1) The file system must be supported by Linux kernel so that it can be mounted as read-only to check the files. (2) It might take a lot of time to check if there are many files in the source device.
- -srel, --save-restore-error-log
-
Save the error logfile in the image dir. By default the logfile won’t be saved when error occurs.
- --mcast-port NO
-
Assign the udp port number for multicast restore. This is used by clonezilla server. Normally it’s not necessary to manually assign this option. Some words are reserved for IMAGE_NAME, "ask_user" is used to let user to input a name when saving an image. "autoproductname" is used to automatically get the image name based on hardware product model from dmidecode. A word is reserved for DEVICE, "ask_user" could be used to let user to select the source device when saving an image.
General options:
- l, --language INDEX
-
Set the language to be shown by index number: [0|en_US.UTF-8]: English, [1|zh_TW.BIG5]: Traditional Chinese (Big5) - Taiwan, [2|zh_TW.UTF-8]: Traditional Chinese (UTF-8, Unicode) - Taiwan [a|ask]: Prompt to ask the language index
- -b, -batch, --batch
-
(DANGEROUS!) Run program in batch mode, i.e. without any prompt or wait for pressing enter key. //NOTE// You have to use '-batch' instead of '-b' when you want to use it in the boot parameters. Otherwise the program init on system will honor '-b', too.
- -c, --confirm
-
Wait for confirmation before saving or restoring
- -d, --debug-mode
-
Enter command mode to debug before saving/restoring
- --debug=LEVEL
-
Output the partimage debug log in directory /var/log/ with debug LEVEL (0,1,2… default=0)
- -m, --module MODULE
-
Force to load kernel module MODULE, this is useful when some SCSI device is not detected. NOTE! Use only one module, more than one may cause parsing problem.
- -o0, --run-prerun-dir
-
Run the script in the direcoty /usr/share/drbl/postrun/ocs/ before clone is started. The command will be run before MBR is created or saved.
- -o1, -o, --run-postrun-dir
-
Run the script in the direcoty /usr/share/drbl/postrun/ocs/ when clone is finished. The command will be run before that assigned in -p or --postaction.
- -w, --wait-time TIME
-
Wait for TIME secs before saving/restoring
- -nogui, --nogui
-
Do not show GUI (TUI) of Partclone or Partimage, use text only
- -a, --no-force-dma-on
-
Do not force to turn on HD DMA
- -mp, --mount-point MOUNT_POINT
-
Use NFS to mount MOUNT_POINT as directory ocsroot (ocsroot is assigned in drbl.conf)
- -or, --ocsroot DIR
-
Specify DIR (absolute path) as directory ocsroot (i.e. overwrite the ocsroot assigned in drbl.conf)
- -p, --postaction [choose|poweroff|reboot|command|CMD]
-
When save/restoration finishs, choose action in the client, poweroff, reboot (default), in command prompt or run CMD
- -ns, --ntfs-progress-in-image-dir
-
Save the ntfsclone progress tmp file in the image dir so that if cloning is in DRBL client, the progress can be check in the server (Default in to be put in local /tmp/, which is local tmpfs).
- -um, --user-mode [beginner|expert]
-
Specify the mode to use. If not specified, default mode is for a beginner.
- -v, --verbose
-
Prints verbose information
- -d0, --dialog
-
Use dialog
- -d1, --Xdialog
-
Use Xdialog
- -d2, --whiptail
-
Use whiptail
- -d3, --gdialog
-
Use gdialog
- -d4, --kdialog
-
Use kdialog
- -x, --interactive
-
Interactive mode to save or restore.
Example:
-
To save or restore image in client (Only that DRBL client will join, and its local partitions is NOT mounted). NOTE!!! You should run the command in DRBL client or you have to make sure the target device is NOT busy!. To save all the data in local first IDE harddrive 'hda' as image 'IMAGE1', use ntfsclone instead of partimage, and lzop compression (NOTE!!! You should run the command in DRBL client or make sure hda is NOT busy/mounted!): ocs-sr --use-ntfsclone -z3 savedisk IMAGE1 hda
-
To save the data in first and second partitions in local first IDE harddrive 'hda' as image 'IMAGE2', use ntfsclone instead of partimage, and lzop compression (NOTE!!! You should run the command in DRBL client, or make sure hda is NOT busy/mounted!): ocs-sr --use-ntfsclone -z3 saveparts IMAGE2 "hda1 hda2"
-
To restore image IMAGE1 to local hda. grub-install will be run after cloning (image IMAGE1 is already in DRBL server. NOTE!!! You should run the command in DRBL client or make sure hda is NOT busy/mounted!): ocs-sr -g auto restoredisk IMAGE1 hda
-
To restore image first and second partitions from IMAGE2 to local hda1 and hda2. grub-install will be run after cloning (image IMAGE2 is already in DRBL server. NOTE!!! You should run the command in DRBL client or make sure hda is NOT busy/mounted!): ocs-sr -g auto restoreparts IMAGE2 "hda1 hda2"
-
To save disk(s)/partitition(s) as an image or restore an image to disk(s)/partitition(s) interactively, use: ocs-sr -x
disk-to-disk Operation
Clone disk or partition on-the-fly
The "ocs-onthefly" is used to do disk to disk or partition to partition copy on-the-fly. This command is different from drbl-ocs (or clonezilla). Clonezilla is used to do massively clone, so it will save the template machine as an image in clonezilla server. On the other hand, ocs-onthefly is used to 1 to 1 copy, so no image will be saved in the server. Just clone disk or partition directly.
There are 2 ways to run ocs-onthefly:
-
Clone locally: Boot the machine as DRBL client, then clone one disk to another disk. This is specially for when you just want to clone disk, and you only have one machine.
-
Clone via network: Boot the source and target machine as DRBL clients, then clone disk from one machine to another machine. This is specially for you have 2 machines, and you want to clone them without dismantling machine.
Usage:
ocs-onthefly [OPTION]
Option:
- -e, --resize-partition
-
resize the target disk in target machine (To solve the small partition image restored to larger partition problem.)
- -f, --source DEV
-
specify the source device as DEV (hda, hda1…)
- -g, --grub-install GRUB_PARTITION
-
install grub in hda with root grub directory in GRUB_PARTITION when restoration finishs, GRUB_PARTITION can be one of "/dev/hda1", "/dev/hda2"… or "auto" ("auto" will clonezilla detects the grub root partition automatically)
- -i, --filter PROGRAM
-
use the PROGRAM (gzip/lzop/bzip2/cat) before sending partition data to netcat (only in network clone mode). The default action is gzip. Use "cat" if you do not want to compress (Good for fast internode network).
- -n, --no-sfdisk
-
skip partition table creation
- -m, --no-mbr-clone
-
do NOT clone MBR
- -o, --load-geometry
-
force to use the saved CHS (cylinders, heads, sectors) when using sfdisk in restoring.
- -p, --port PORT
-
specify the netcat port (Only in network clone mode)
- -r, --server
-
specify the running machine is in network clone server.
- -s, --source-IP
-
IP specify the source IP address (used in target client machine).
- -t, --target DEV
-
specify the target device as DEV (hda, hda1…)
- -v, --verbose
-
prints verbose information
ocs-onthefly [OPTION]
Examples:
-
Clone locally: To clone the 1st harddisk (hda) to 2nd harddisk (hdb), you can boot this machine as DRBL client, then run:
ocs-onthefly -f hda -t hdb -
Clone via network: To clone the 1st harddisk (hda) in machine A to the 1st harddisk (hda) in machine B. Then without dismantling machines, you can do it by:
Boot machine A as DRBL client, and it’s IP address is, say, 192.168.100.1, then run:
ocs-onthefly -r -f hda
Then it will prompt you the command to run in machine B, such as:
ocs-thefly --source-IP 192.168.100.1 -t [TARGET_DEV] (TARGET_DEV is like hda, hdb, hda1, hdb1…)
The "TARGET_DEV" is the target harddisk in machine B, in this case, it hda.
Then, boot machine B as DRBL client, and run:
ocs-onthefly --source-IP 192.168.100.1 -t hda
