Products
Open the Products site to manage localboot and netboot products and to configure them for different opsi servers or clients.
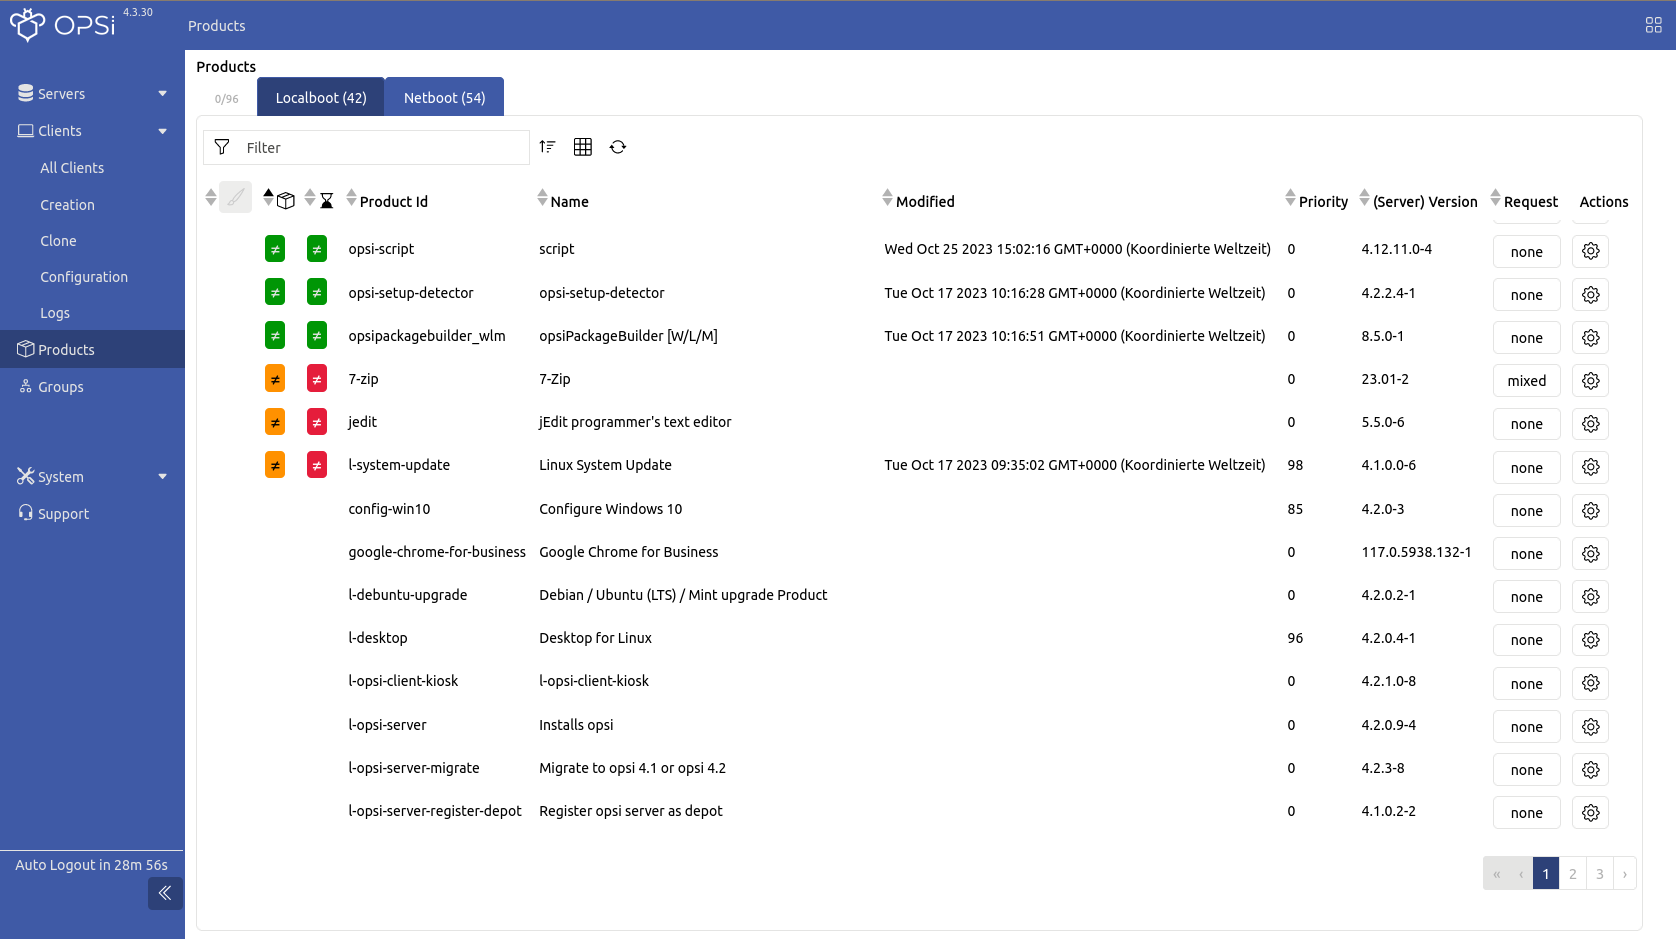
| Open the Clients table and click on the button image::gui:webgui/opsi-webgui_buttonproducts.png[Products] in the top right to display clients and products in two adjacent columns. This makes managing and assigning products easier. |

States
If no client is selected, the Products table lists the products of the selected server(s). If a product has multiple and conflicting values for the currently selected clients/servers, the corresponding field will display a <mixed> status. Hover over it with the mouse to see a tooltip with more information.
The icons in the Products table have the following meanings:
-
Installation status:

At least one of the selected clients has an unknown (
 ) installation status.
All selected clients have either the status installed (
 ) or not installed (not-installed/none/null).
 -
Action Result:

-
At least one of the selected clients has performed an action which failed (
 ).
). 
-
All selected clients have performed a successful action (
 ) or no action (none/null).
-
Product Version: If multiple server and clients have been selected, you can see the installed versions in the tooltip.
-
Client-related:

At least one of the selected clients has an outdated product compared to its server.
-
Server-related:

All selected servers have the same product version.

The selected servers have different product versions.

Not every selected server has this product.
-
The columns are sorted like this:
| Installation status |
installed , unknown, none/not_installed |
| Action Result |
successful, failed, none |
| Product Version |
outdated on clients and unequal on servers, outdated on clients and not on every servers, outdated on clients, unequal on some servers |
In descending order, values appear in reverse order, with none/not_installed still displayed last.
(Un)Installing/Updating Products
To install, uninstall, or update a product on one or more clients, follow these steps:
-
Select clients from the Client Groups or in the table Clients.
-
Open the Products column (Button
 ).
). -
Select the product for which you want to set an action.
-
Optionally, click on the gear icon
 to edit the product properties on the Properties tab (see section Product Properties).
 -
Click the none button in the Request column and choose one of the following actions from the drop-down menu: setup, uninstall, update, once, always, custom, or none.
opsi will then execute the action, considering the Properties and Dependencies. To execute an action immediately, use the on_demand action (see section On Demand).
To apply an action to multiple products, follow these steps:
-
In the Products table, select the products.
-
Click the drop-down menu in the table header of the Request column and select the desired action.
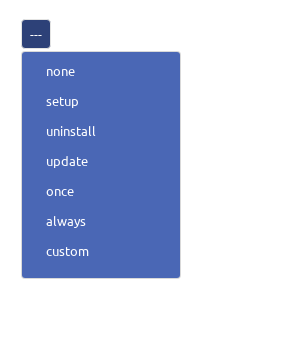
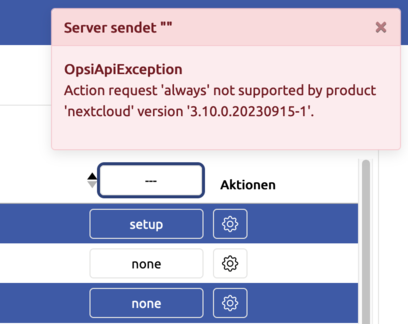
| Not all actions offered in the Request drop-down menu are available for all products. The WebGUI may display a warning if an action is not supported. |
| The Quick save function is activated by default (see section Quick Save). This means that all changes are saved immediately and you cannot see or restore the previous state! |
Product Quick Actions
To change all products with a specific property on the selected/all clients, the WebGUI provides a convenient shortcut. Click on the Product Quick Actions button in the Quick Panel under Quick Actions.
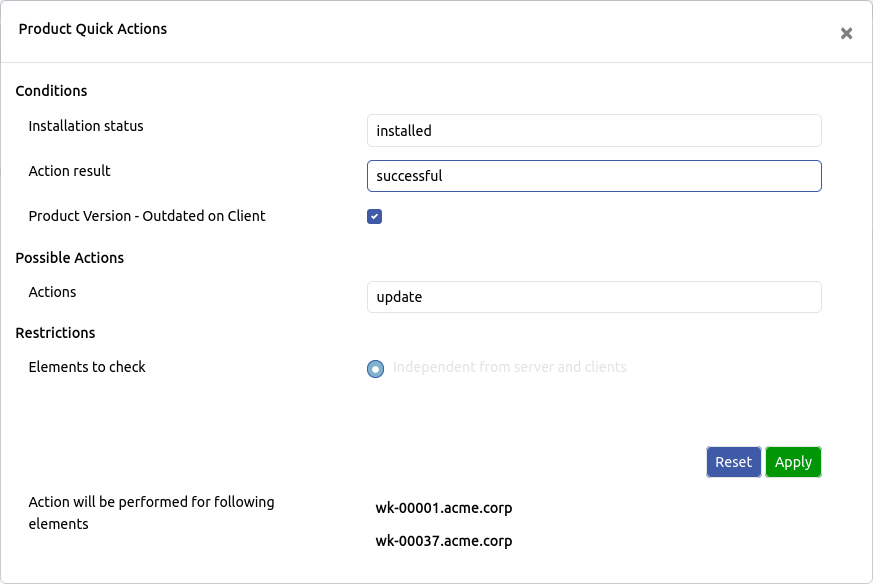
In the dialog that opens, you can select which conditions must be met (linked by a logical AND) and which actions you want to perform. For example, you can set the Installation status to unknown, the Action result to failed, and the Actions to setup to set up all products with an unknown installation status and a failed result. Similarly, as figure Figure 5, “WebGUI: Quick Actions for Products” sbows, you can use the quick actions to update all installed products for which a new version is available.
| All changes are saved immediately when you click Apply, even if you have disabled the Save Immediately function. |
Product Properties
Each product can have properties, such as the application’s language, a specific desktop environment, etc., that can be set for the product, the server, or selected clients. If you do not select any clients in the WebGUI, the system displays the server values. If the server does not have specific properties, you will see the product values. Changing these values will affect the selected server. However, if you select one or more clients, the properties are first transferred from the server to the clients. You can then make changes for the selected clients.
Follow these steps to update product properties:
-
Navigate to the Products page.
-
Select the server and/or clients.
-
Click on the image::gui:webgui/opsi-webgui_buttonconfig.png[Configuration] icon in the row of the desired product.
-
Go to the Property Configuration tab.
-
Change the properties using the provided checkboxes, drop-down menus, etc. Some properties can be defined via input fields. To apply such a value, press [Enter] or click Add.
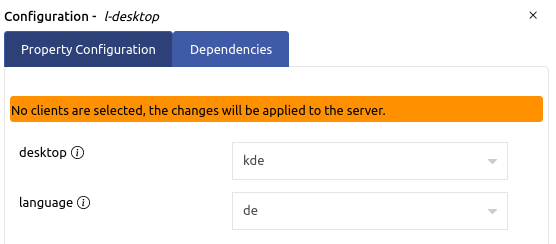
| If you have selected one or more clients, the change will only apply to them. The values for the server will only be updated if no clients are selected. |
| The Quick save function is activated by default (see section Quick Save). This means that all changes are saved immediately and you cannot see or restore the previous state! |
The tab Property Configuration shows the name of the product next to Configuration at the top, and below that, the description. The following warnings may appear below:
-
No clients are selected; changes will apply to the server(s).
-
This product is only installed on 2/5 of the selected servers.
-
Different versions of this product exist. (Not every version may have the same properties.)
The following icons/symbols may also appear:
-
image::gui:webgui/opsi-webgui_buttoninfo.png[Info]: Shows additional details next to the property ID, including the default value defined for the product, the server’s default value, and the description of the property.
-
<mixed>: If the selected clients have different values, the status <mixed> is displayed.
-
image::gui:webgui/opsi-webgui_productstat_version_clientunequal.png[UnequalPropOnClients]: Click on this icon to the right of the drop-down menu to display the different values for the selected clients.
If the product is available in different versions on the selected servers, it is possible that they have different properties or different default values. You can identify this by the following symbols:
-
image::gui:webgui/opsi-webgui_productstat_version_server_unequal.png[UnequalDefaultPropsOnServers]: The selected servers have different default values for this product.
-
image::gui:webgui/opsi-webgui_productstat_version_server_star.png[UnequalPropertyOnServers]: Not every server in the current selection has this property.
Product Dependencies
Dependencies can exist between products, meaning a product may require one or more other products to function correctly. These dependencies also define the installation order of the products. Depending on the product, there are different types of requirements:
-
required: The product requires another product, but the installation order is not relevant.
-
pre-required: The dependent product is installed before the main product.
-
post-required: The dependent product is installed after the main product.
To display product dependencies, click on the configuration icon (image::gui:webgui/opsi-webgui_buttonconfig.png[Konfiguration]) and switch to the Dependencies tab.

Product Groups
To simplify management and installation, you can group multiple products together. In the Quick Panel, the groups and their products appear in a tree structure on the image::gui:webgui/opsi-webgui_quickpanel_tab_products.png[Product Groups] tab; the number next to the icon corresponds to the number of selected products.
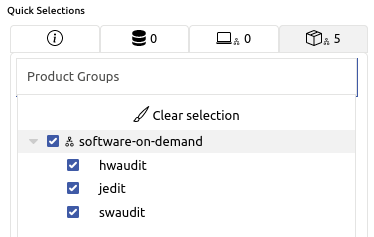
| Sort the Products table by the first column (Selection) to get a detailed view of the products in a group. |
To create a new product group, go to Groups / Product Groups. Click the Create Product Group button, enter a name and an optional description, and confirm by clicking Add. To add products to the group, click on the group and then on the rightmost icon with the plus sign. The dialog that opens will display a list of all products installed on the depot, which you can conveniently add with a mouse click.