Products
Open the Products page to manage localboot and netboot products and to configure them for OPSI servers or clients.
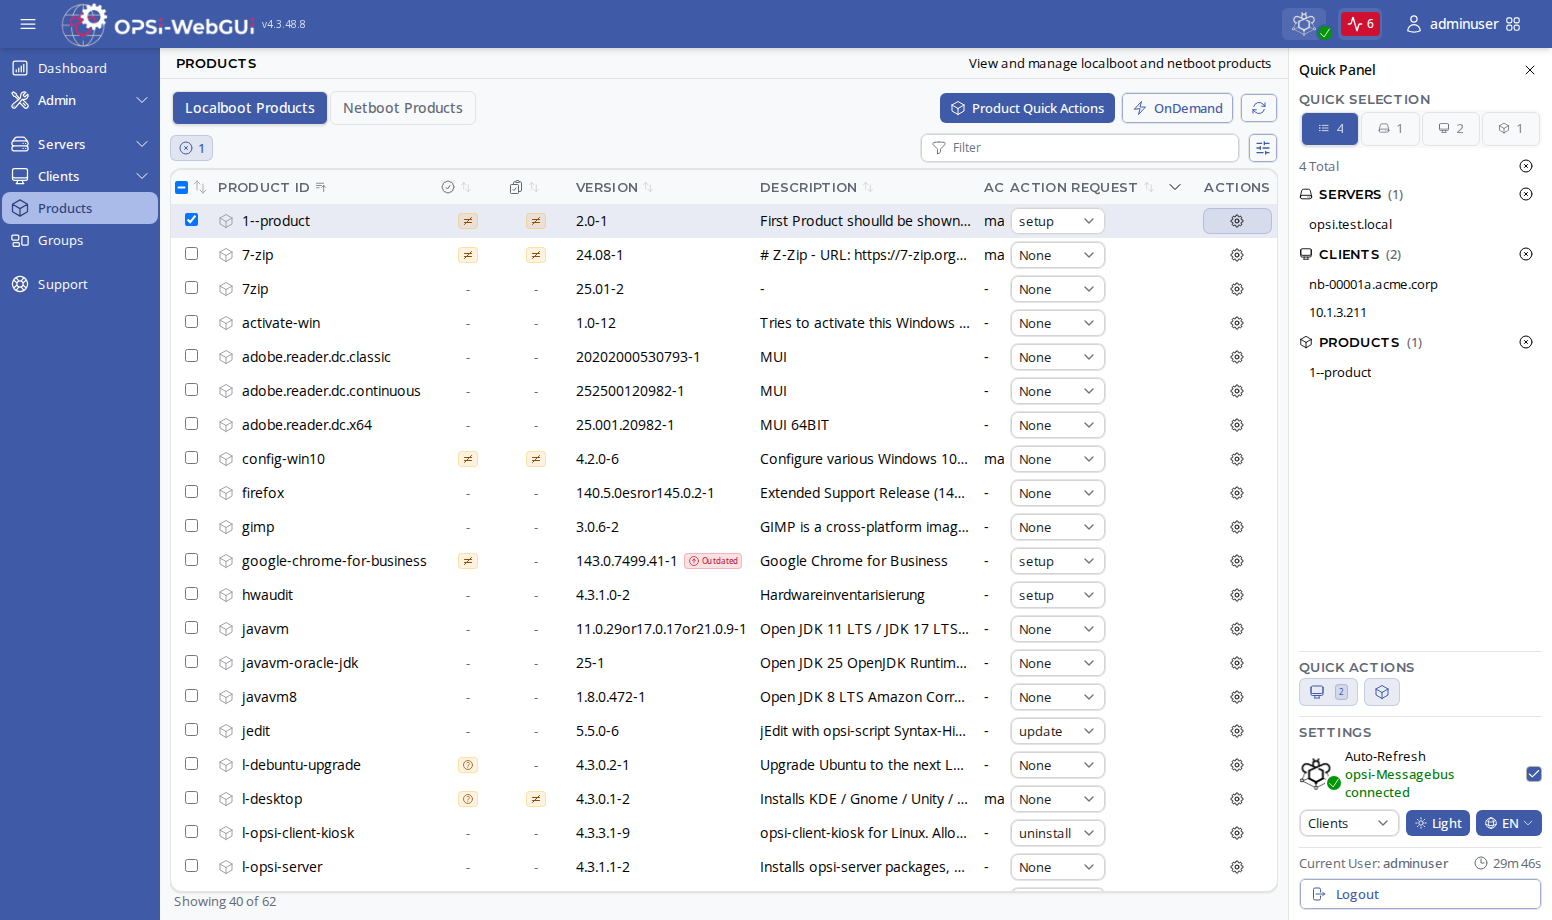
Localboot and netboot products are managed in the same product view; use the tabs at the top of the page to switch between them.
If available, a product logo is shown in the product row.
The logo is displayed when the product metadata (opsi-meta-data.toml) defines an icon file path and the file exists in the product on the depot.
| Open the Clients table and click the Products button in the toolbar to display clients and products in two adjacent columns. This makes assigning products to the selected clients easier. Clicking a status badge in the client table also opens this panel, pre-filtered to the matching products. |
| For performance, product-related data (for example icon mappings) is cached in the WebGUI and refreshed when needed. This reduces repeated backend requests while keeping views up to date. |
States
If no client is selected, the Products table shows the products of the selected server(s). With clients selected, the Installation status, Action result, and Action request columns show the state on those clients.
If the selected clients or servers have conflicting values, the cell shows a mixed badge with an ≠ icon instead of a single value.
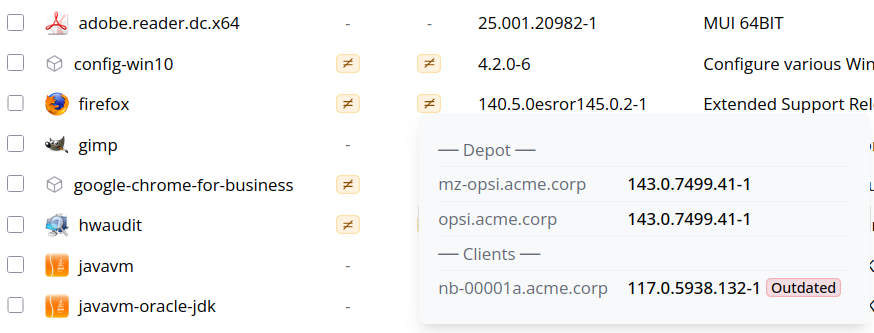
Hover over any status badge or mixed marker to open a tooltip with the per-client or per-server details.
The Version column compares versions:
-
An outdated badge means at least one selected client has an older version installed than its depot provides.
-
With multiple servers or clients selected, the tooltip lists the individual versions.
The mixed (≠) indicators are summary badges. Check the tooltip details before applying actions to a larger selection.
|
(Un)Installing/Updating Products
To install, uninstall, or update a product on one or more clients, follow these steps:
-
Select clients from the client groups or in the Clients table.
-
Open the Products page (or the Products panel in the client table).
-
Click the drop-down in the Action request column of the desired product and choose one of: setup, uninstall, update, once, always, custom, or none.
OPSI will then execute the action, considering the properties and dependencies.
To execute an action immediately, use the on_demand event (see section On Demand).
| The former Quick Save feature has been removed. Configuration changes (attributes, parameters, product properties, and action requests) are now collected locally in the browser first. An Unsaved Changes indicator appears in the toolbar showing how many changes are pending. You can review, selectively discard, or save all pending changes at once using the save/discard buttons or the Unsaved Changes modal dialog. Changes are only written to the server when you explicitly click Save. |
Product Quick Actions
Product Quick Actions are documented in Product Quick Actions. Use that flow if you want to apply one action to many products at once.
Process Actions (on_demand)
From the Products page, you can run process actions immediately via on_demand.
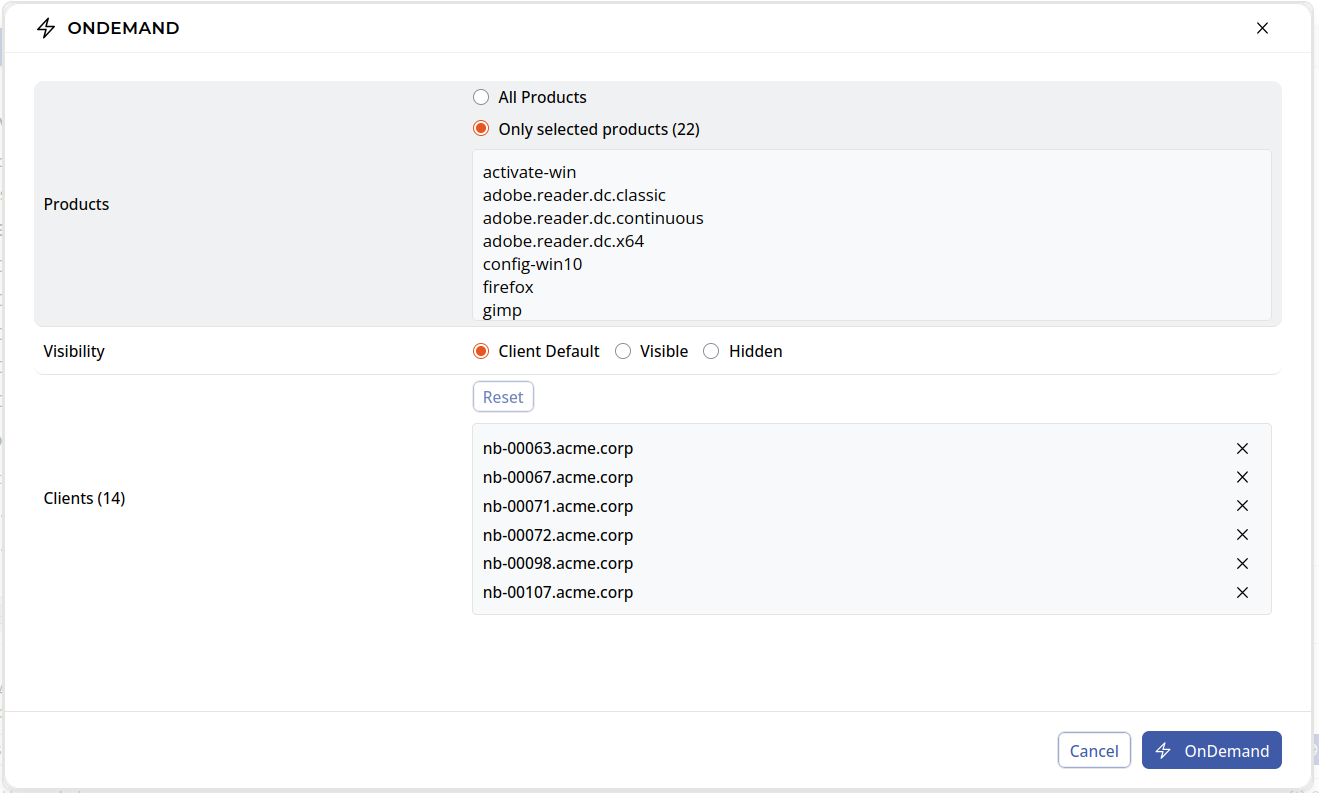
This is useful when you want to execute selected product action requests right away for the currently selected clients instead of waiting for a later event.
In the on_demand dialog, you can:
-
choose whether to include all products or only selected products,
-
review the affected client list,
-
and set visibility (
Client Default,Visible,Hidden) for the process action context.
Product Properties
Each product can have properties, such as the application’s language or a specific desktop environment, that can be set per server or per client. If no clients are selected, the values of the selected server are shown and edited. If one or more clients are selected, you edit the values for those clients; the server values serve as defaults.
Follow these steps to update product properties:
-
Navigate to the Products page.
-
Select the server and/or clients.
-
Click the product ID or the Configuration icon in the product’s row to open the detail panel.
-
Open the Properties tab (the tab shows the number of editable properties).
-
Change the values using the provided checkboxes, drop-down menus, or input fields.
Each property row offers additional information and indicators:
-
Hovering over the property name shows a tooltip with the property description, the product default, and the current values.
-
The property name is shown in italics if at least one selected client differs from the depot value, and in bold if the depot value differs from the product default.
-
If the selected clients have different values, the field shows a mixed state.
-
Changed rows are highlighted; each one has a discard button to revert the single change.
Changes are buffered locally until you save them via the Unsaved Changes button.
| If you have selected one or more clients, the change only applies to them. Server values are only updated if no clients are selected. |
Product Dependencies
Dependencies can exist between products, meaning a product may require one or more other products to function correctly. These dependencies also define the installation order of the products. Depending on the product, there are different types of requirements:
-
required: The product requires another product, but the installation order is not relevant.
-
pre-required: The dependent product is installed before the main product.
-
post-required: The dependent product is installed after the main product.
To display product dependencies, open the product’s detail panel and switch to the Dependencies tab.
Product Groups
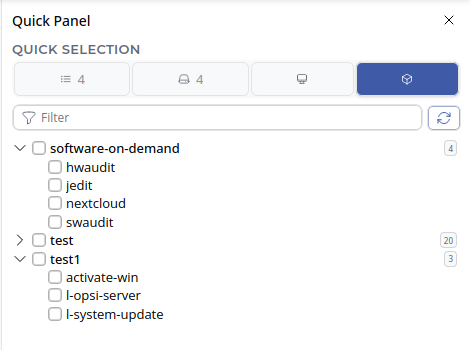
To simplify management and installation, you can group multiple products together. In the Quick Panel, the groups and their products appear in a tree structure on the Products tab; the badge corresponds to the number of selected products.
To create a new product group, go to Groups / Product Groups. Click the Create Product Group button, enter a name and an optional description, and confirm. To add products to the group, select the group and use the add-members action; the dialog lists all products available on the depot. See Groups for details.