Installation
This chapter outlines two approaches for installing the OPSI WebGUI on the config server: using the OPSI repository and the admin page. Installing via the OPSI repository is recommended because it automatically updates the WebGUI whenever the system packages are updated.
Installation from the OPSI Repository
First, ensure you select the correct branch in the repositories to install the WebGUI.
Then, use the distribution’s package manager to install the application. After installation, you can access the WebGUI in your browser at https://<opsi-server>:4447/addons/webgui/app.
Example for Debian/Ubuntu
Begin by configuring the APT package management.
It’s advised to obtain the OPSI WebGUI from the experimental branch and set a specific exception for it.
To do this, create a new file in the /etc/apt/preferences.d/ directory to establish priorities for package sources.
You might name this file 10-opsi-webexp, and it should contain the following:
Package: *
Pin: release l=home:uibmz:opsi:4.3:stable
Pin-Priority: 501

Package: opsi-webgui
Pin: release l=home:uibmz:opsi:4.3:experimental
Pin-Priority: 502
This means that APT installs most packages from the stable repository, but uses experimental for the WebGUI.
| For further information on APT pinning, take a look at this article in the ubuntuusers.de wiki, for example. |
Next, update the list of available packages, install the opsi-webgui, and then restart the opsiconfd service:
sudo apt update
sudo apt install opsi-webgui
sudo opsiconfd restart
To update the opsi-webgui, you can use the following command:
sudo apt update
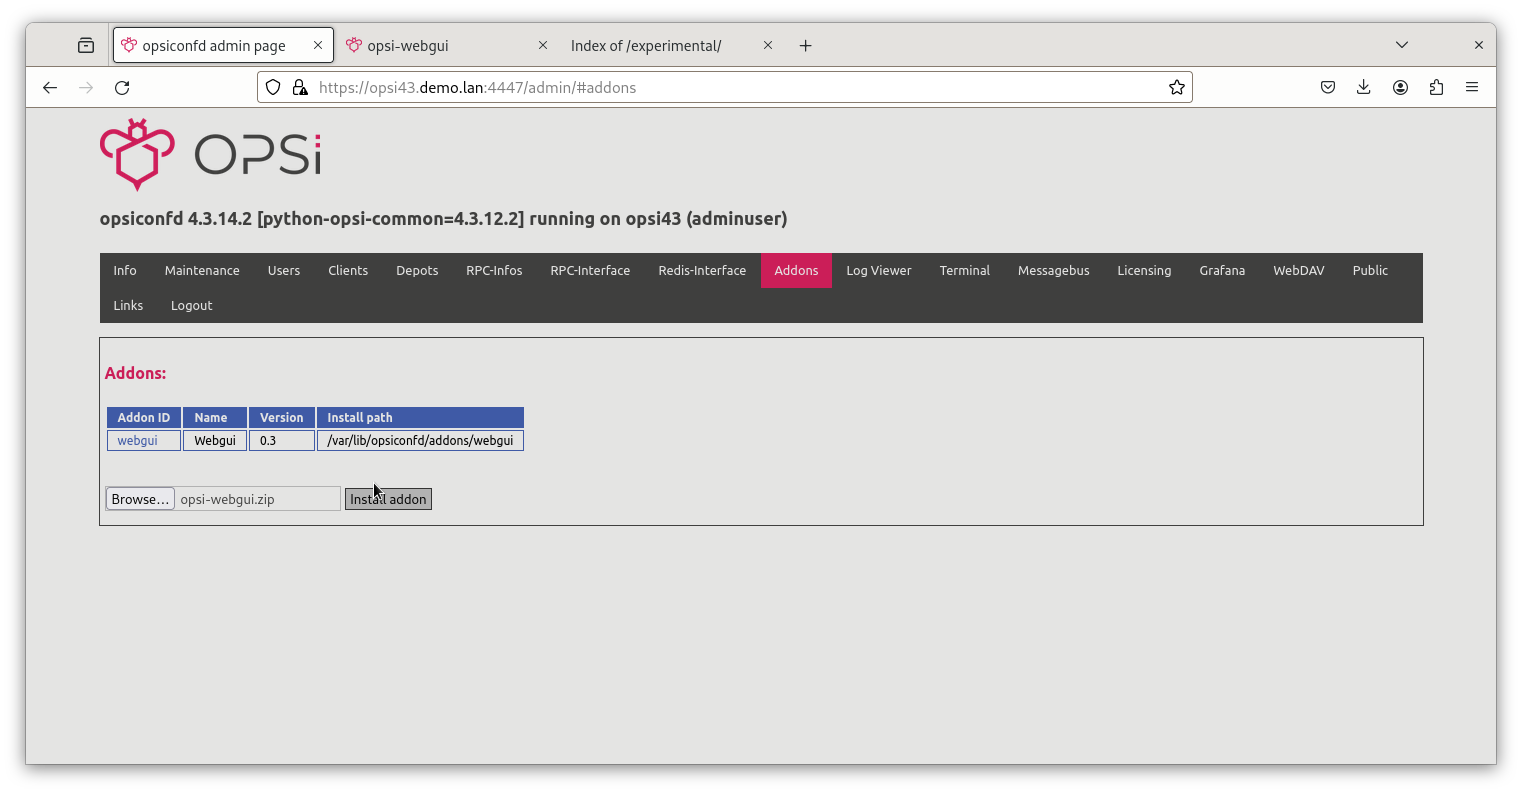
sudo apt upgrade opsi-webguiInstallaion via the Admin Page
Installation via the Admin Page is system-independent. However, this method is for a one-time installation, meaning you’ll typically need to install updates manually, especially if the correct repository isn’t configured. This approach is recommended only if you wish to test specific versions of the WebGUI.
To install the WebGUI from a zip file, follow these steps:
-
Download the latest version of the
opsi-webgui.zipfile from https://tools.43.opsi.org/experimental/. -
Open
https://<opsi-server>:4447/admin/#addonsin your browser. -
Click on Browse and upload the file.
-
Finally, click on Install addon.