Clients
All clients of the selected servers are listed in the Clients table. You can access this view through the left navigation bar under Clients / All Clients.
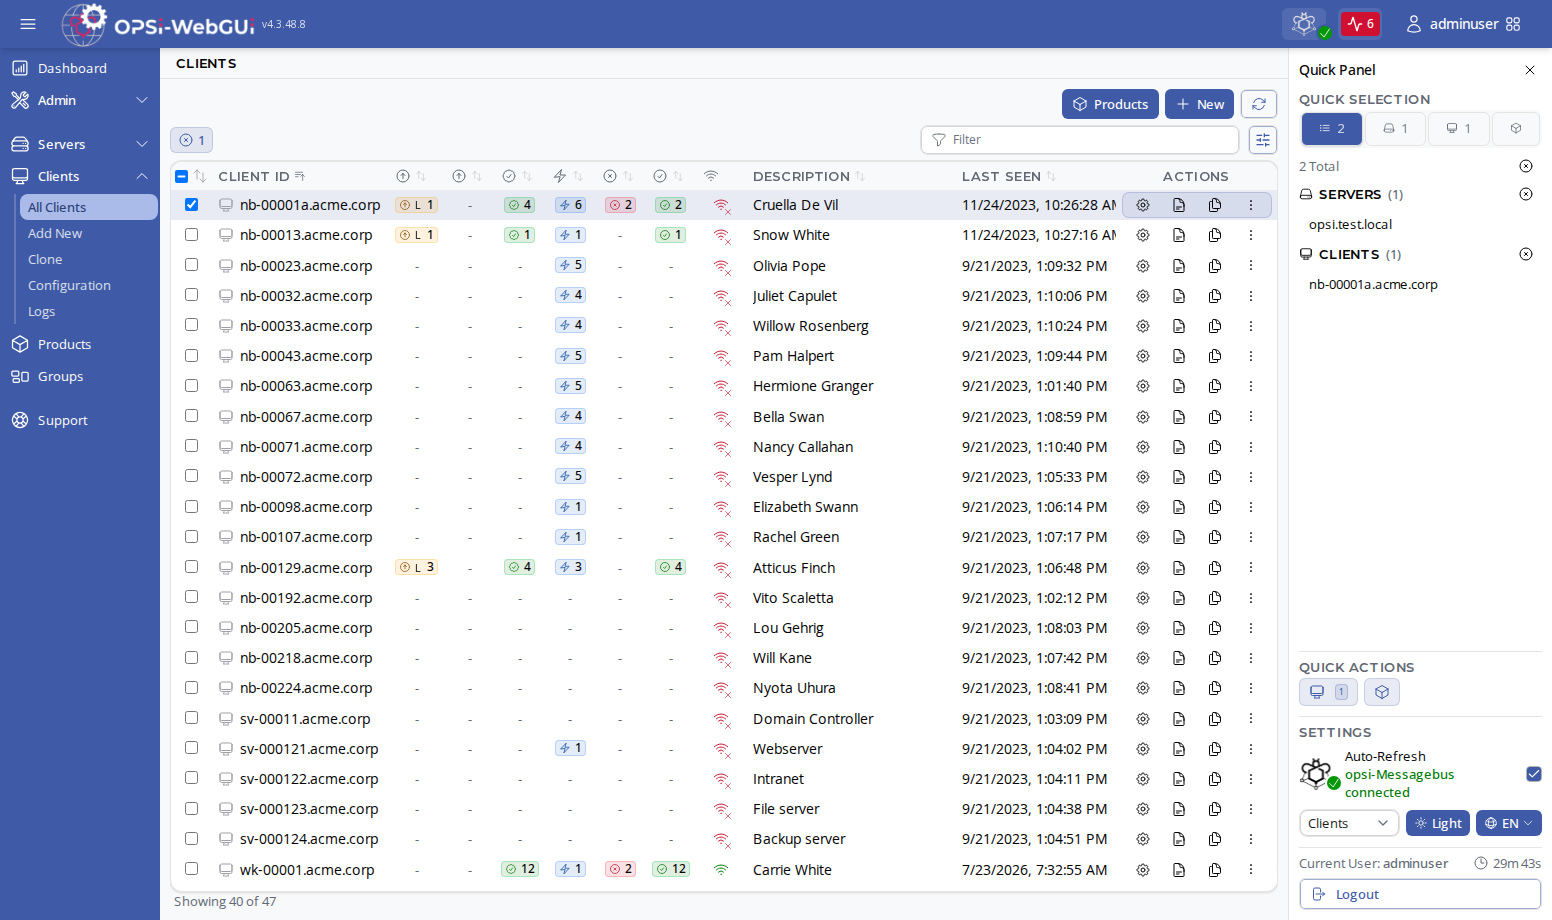
| The status columns (outdated versions, action requests, installation status, failed/successful actions) are clickable: clicking a badge opens the client’s product panel already filtered to the matching products. |
Creating a Client
To manage computers with OPSI, they must be registered as clients in the system. Additionally, a client agent must be running on these computers to enable communication between the server and the client (see chapter OPSI Clients).
In the OPSI-WebGUI, create a new OPSI client by navigating to Clients / Add New (or the Add button in the client table toolbar). Enter the client name and domain (together they form the Client ID), and a description, notes, inventory number, IP and MAC address, and group assignments. Select the depot server the client should belong to.
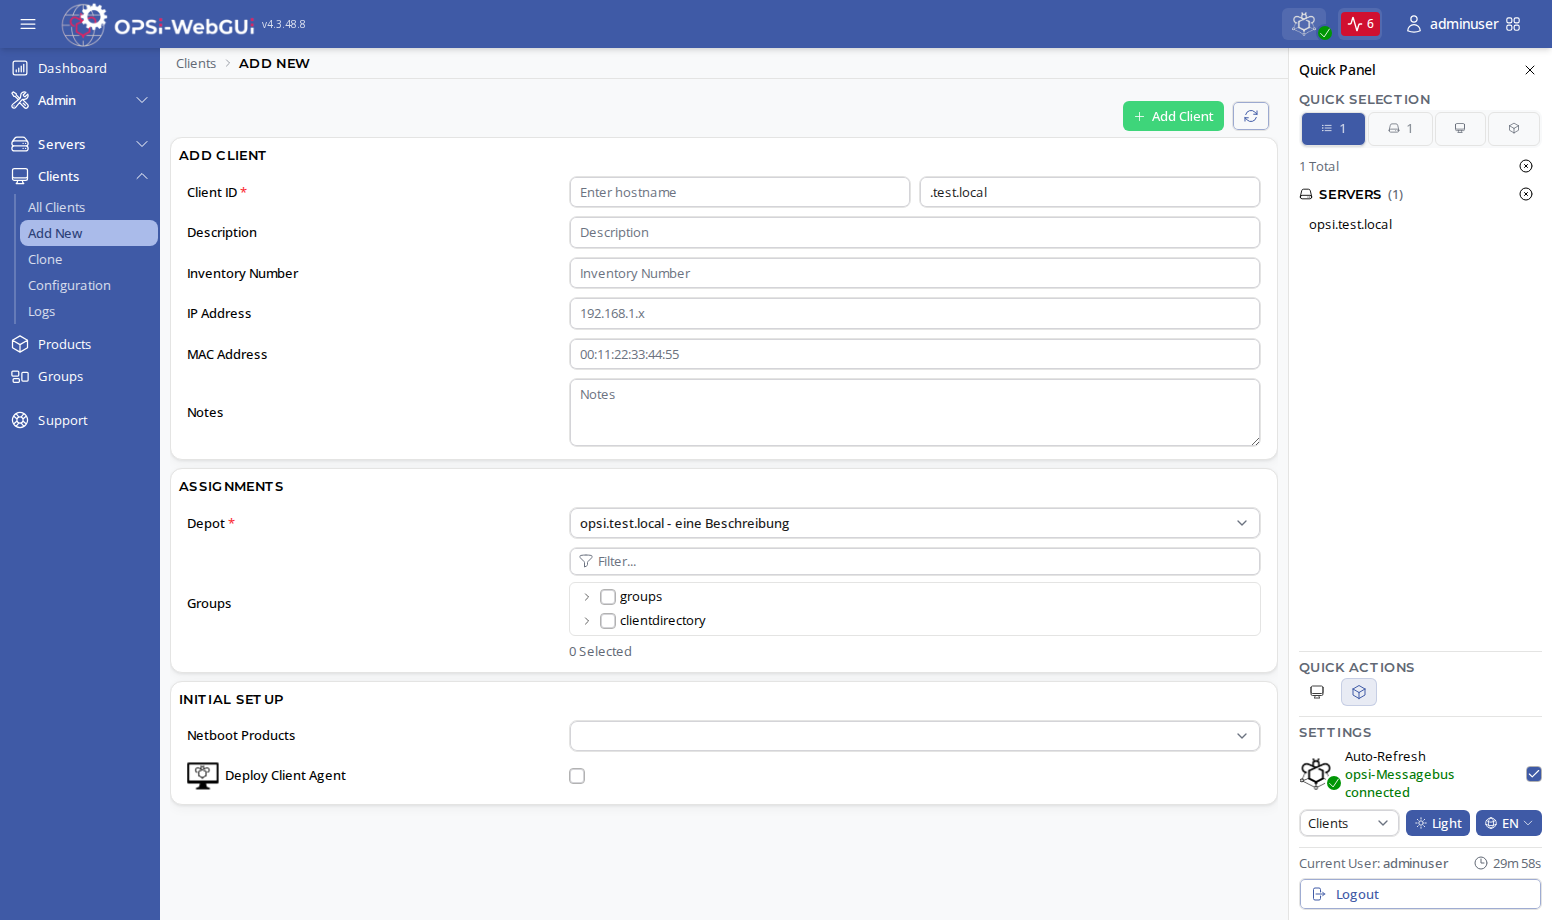
In the Initial Setup section you can select a netboot product for automatic operating system installation and activate Deploy Client Agent (see section Deploy Client Agent); deploying the agent requires the username and password of an administrative account on the client. Finally, click Add Client.
| New clients are added to the selected depot; the config server is preselected. |
Performing Actions
Each table row has an Actions column with icons for Configuration, Logs, and Clone (see Client Detail Panel).
Additionally, more actions are available in the Actions column of each client row and can be applied to the respective client. These actions can also be accessed through the Quick Actions menu when one or multiple clients are selected (Client Quick Actions) to apply them to the selected clients.
To apply a quick action to multiple clients from the table, select the clients and use the actions menu in the table header.
The following sections describe each action in detail.
Deploy Client Agent
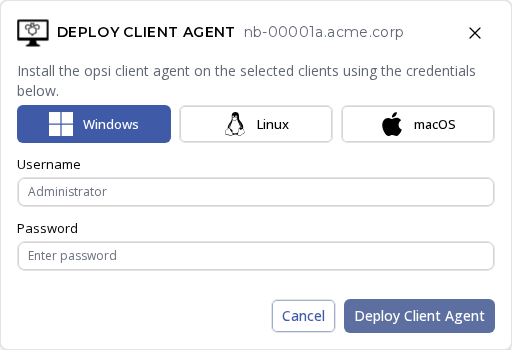
As mentioned, the opsi-client-agent must be installed on a client for OPSI to manage that computer. If you did not request this during client creation, you can do so later using the Deploy Client Agent action. The dialog asks for the username and password of an administrative account on the target client.
| If you use OPSI to deploy the operating system on the client, the client agent is installed automatically and does not need to be requested explicitly. |
On Demand
You can push software installation, updates, etc., on demand using the On Demand action, meaning they will be executed immediately on the client.
To do this, explicitly request the on_demand event (see section Configuring Events).
Timer Event
Select one or more clients in the Clients table and choose Fire timer event from the actions menu in the table header to send a timer event to those clients.
Notify
You can send messages to one or more clients using the Notify action to inform users about upcoming actions. A pop-up window will open, allowing you to type in the message.
Reboot
Click on Reboot in the menu to restart one or more clients. Confirm the action in a pop-up window before the reboot.
Shutdown
Click on Shutdown in the Quick Actions menu to shut down one or more clients. Like the reboot action, a confirmation pop-up will appear before the shutdown is executed.
Cloning a Client
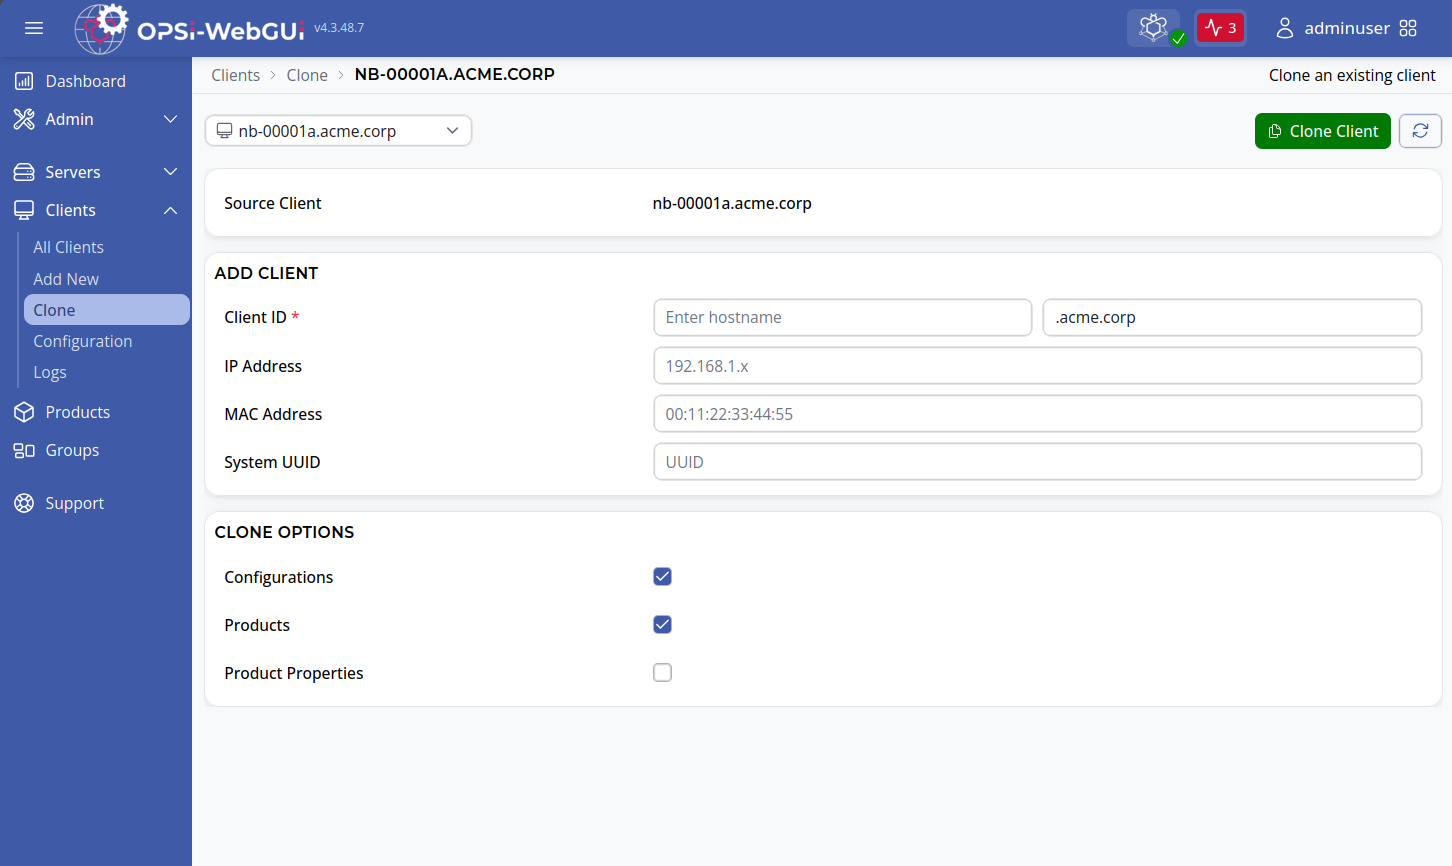
You can clone an existing client by navigating to Clients / Clone or by clicking the clone icon in a client’s Actions column. Cloning copies the source client’s settings to a new client. The following options are available:
-
Configurations: Copies host parameters.
-
Products: Copies action requests.
-
Product Properties: Copies product property settings.
Enter the name and domain of the new client and click Clone Client.
Client Groups
Client groups are organized under two roots: groups and clientdirectory.
A group is uniquely defined by its name and cannot be duplicated.
Under groups, a client can be assigned to multiple groups; under clientdirectory, each client appears exactly once, and clients without a directory assignment are listed under not_assigned.
In the Quick Panel, the Clients tab displays the groups and the assigned clients in a tree structure. The badge on the tab corresponds to the number of selected clients.
For selection behavior in that tree, see Clients Tab. Any selection made in the Quick Panel Client Groups tab is automatically synchronized with the client table, and vice versa.
For more information on managing groups, see the chapter Groups.
Checking Client Reachability
The Clients table includes a Reachable column showing whether the client is currently reachable. The icon has two states:
-
Green (reachable): The client is online and responding.
-
Red (not reachable): The client is offline or the agent is not responding.
Click the icon at any time to re-check a single client’s status.
Client Detail Panel
Clicking a client ID or the configuration/logs icons in the Actions column opens the Detail Panel to the right of the client table. The detail panel provides access to the following views without leaving the client list:
-
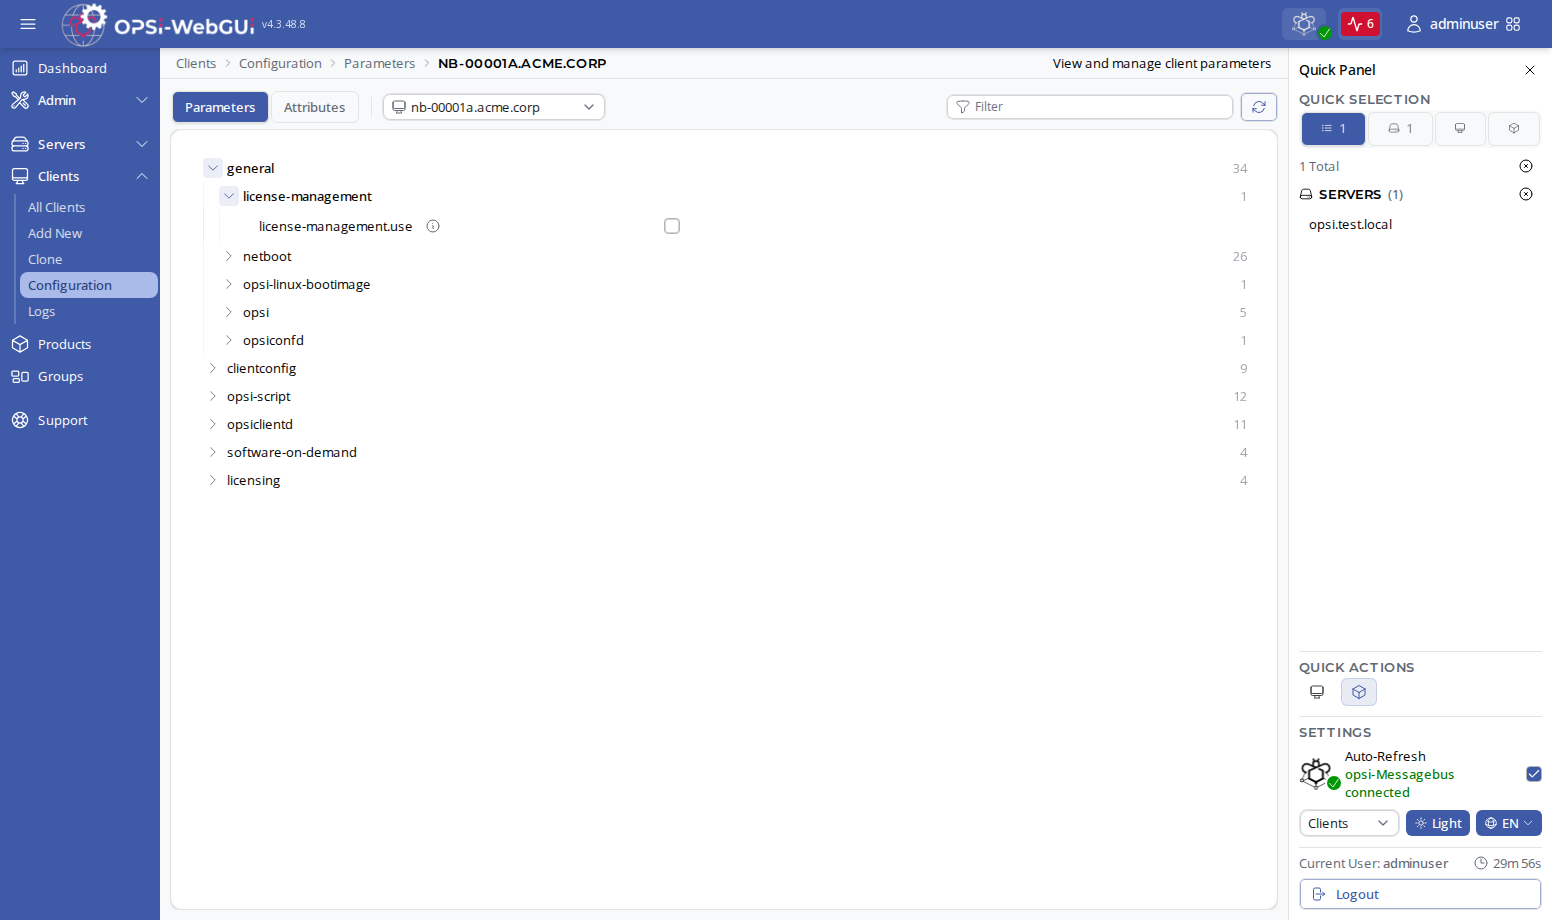
Configuration: Edit host parameters and attributes. A Parameters tab shows all OPSI host parameters (editable inline); an Attributes tab shows attributes such as description, notes, IP, MAC address, and inventory information. Changes are buffered locally; confirm them using the Unsaved Changes button.
-
Logs: View the client’s logfiles directly in the panel. Use the log-type dropdown (instlog (default), clientconnect, userlogin, bootimage, opsiconfd) and the log-level slider (1–9, default 6) to narrow the output.
-
Clone: Create a new client using the current client as a template.
-
Products: Open a full product management view scoped to this client. Within this view, selecting a product opens a nested product detail panel, keeping both panels visible on wider screens.
-
Inventory: View the client’s hardware and software inventory. The status indicates whether the inventory is available, not yet scanned, empty, or stale. In the software view, Microsoft KB updates can be included or excluded. Export the displayed inventory to CSV; the export uses the current filters and sort order.
The detail panel is resizable: drag its left edge to adjust the split between the client list and the panel. On narrow screens and mobile devices, the panel appears as a full-screen overlay.
In the Clients table, an operating-system icon appears next to the client ID when the operating system is known; hover over it to see the operating-system name. Use the advanced filters to narrow the table by reachability, operating system, last-seen time, failed products, or outdated products.
Editing Attributes and Parameters
There are two ways to edit client attributes and parameters: either via Clients / Configuration or via Clients / All Clients and the configuration icon (Configuration). The latter has the advantage of faster switching between clients since the settings appear in a column directly next to the clients.
| The selector on Clients / Configuration and Clients / Logs is local to those pages. Selecting a client there does not change global selections and does not affect action targets until you explicitly select clients in the table or Quick Panel. |
| The former Quick Save feature has been removed. Configuration changes (attributes, parameters, product properties, and action requests) are now collected locally in the browser first. An Unsaved Changes indicator appears in the toolbar showing how many changes are pending. You can review, selectively discard, or save all pending changes at once using the save/discard buttons or the Unsaved Changes modal dialog. Changes are only written to the server when you explicitly click Save. |
In the client configuration Attributes tab, high-level switches are available for WAN mode, SmartCache, installing pending software on shutdown, and health-check monitoring. These switches set the corresponding client attributes without requiring you to configure the underlying values individually.
Viewing Logfiles
To view the logfiles of the clients, open Clients / Logs from the left sidebar, or click on the logs icon (Logs) in the client table (Clients / All Clients). The latter allows for faster switching between different clients, as the logs appear in a column directly next to the clients.
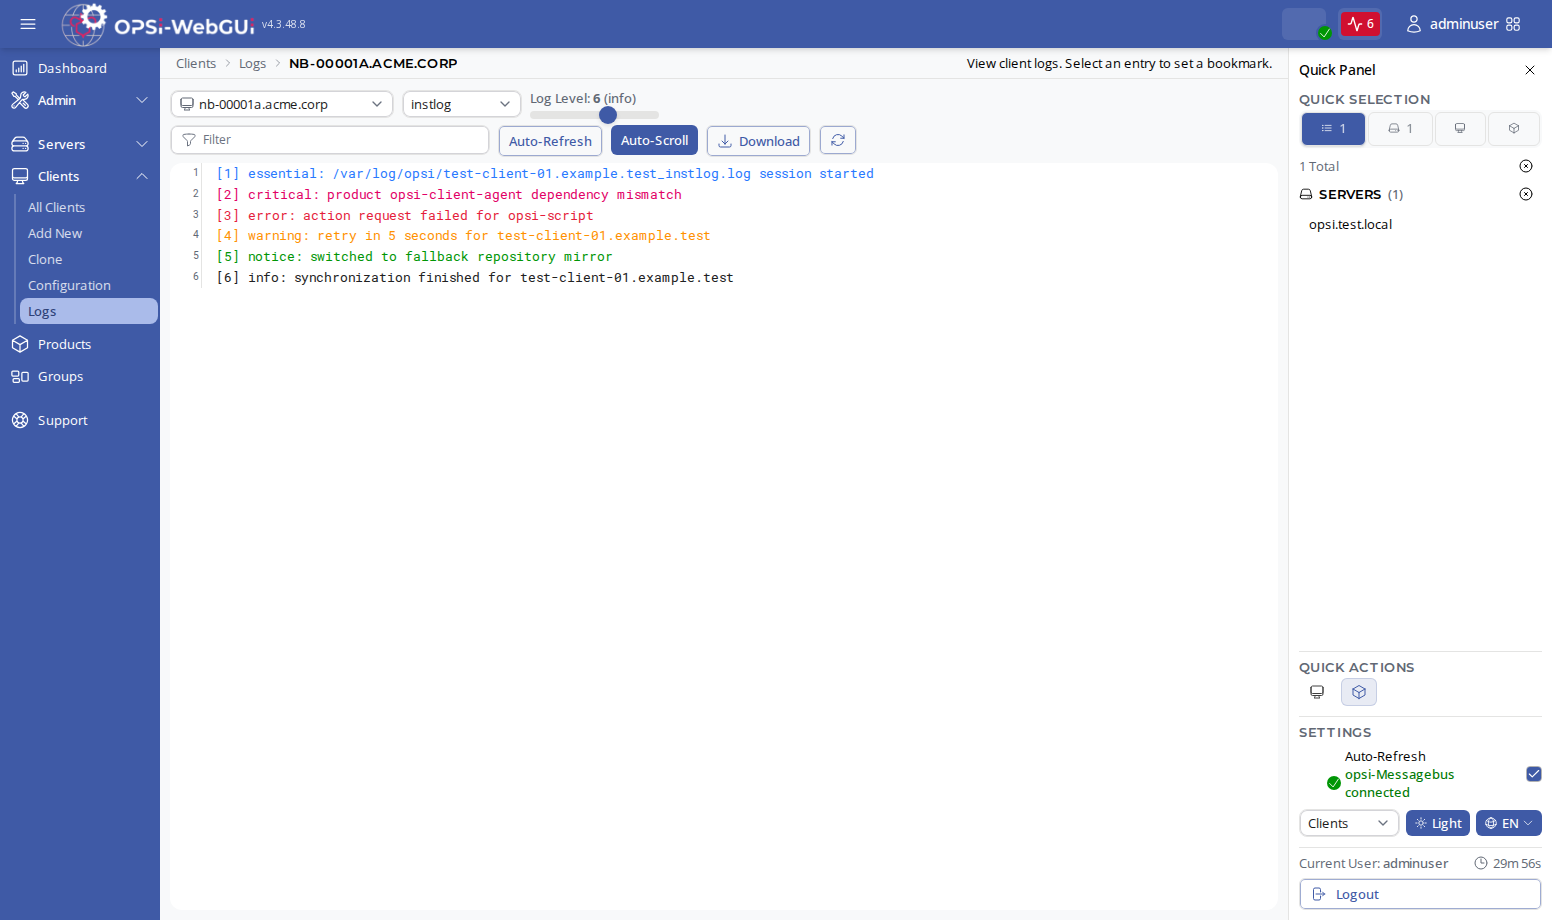
The Clients / Logs page provides these options:
-
Log type dropdown: Select the desired logfile type. Available options are:
-
instlog (default)
-
clientconnect
-
userlogin
-
bootimage
-
opsiconfd
-
-
Log level slider: Set the verbosity from 1 to 9 (default: 6).
-
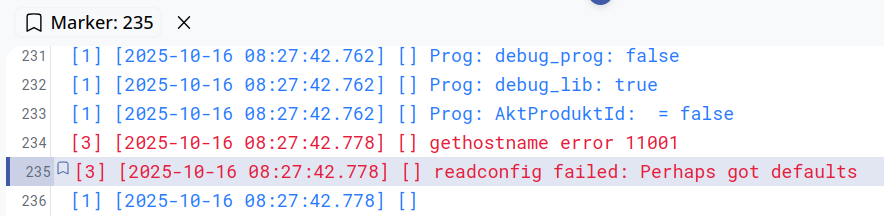
Marker field: Jump to a specific marker/line position in the currently loaded log output (for example
235) to continue analysis at that point.