Adding Clients (Windows)
This chapter explains how to integrate Windows clients into the OPSI environment. The first step involves adding existing clients, followed by instructions on how to add new clients.
| You can also manage Linux and macOS clients with opsi. Details are provided in the two chapters Linux Clients and macOS Clients. |
Integrating existing Clients
To add existing clients with an already installed operating system to opsi, install the client agent on the respective computer. The client will then appear in the client list of the management interface, even if you have not yet added it there.
There are two different methods to install the client agent:
-
Using the Installer on the Client: This method involves installation on the client and is suitable for individual computers.
-
Using opsi-deploy-client-agent: This method involves initiating installation on the server, suitable for mass rollout.
| After the client agent has been installed, you can deploy OPSI products to the client (see chapter Deploying Products (Client)). |
Using the Installer on the Client
This variant is particularly suitable for integrating individual computers as clients in an OPSI environment. Here’s how to proceed:
-
Log in to the client.
-
Download the installer from your OPSI config server. You can find it at
https://<fqdn_or_ip_of_the_config_server>:4447/public/opsi-client-agent/; the Windows program is namedopsi-client-agent-installer.exe. -
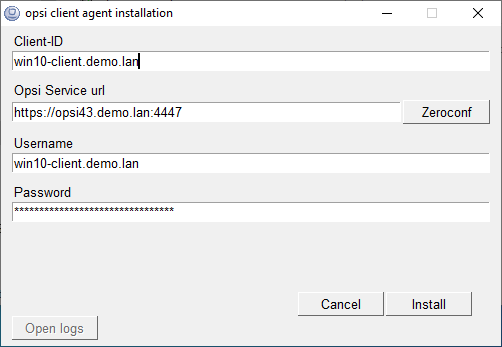
Run the installer; it unpacks itself into a temporary local directory and starts the contained
oca-installation-helper. In the dialog window, enter the values for the client ID, the OPSI service URL, the username, and the password. The fields are pre-filled as much as possible; adjust the values to your environment if necessary:-
The client ID usually corresponds to the FQDN of the client.
-
The OPSI service URL must be in the format
https://<fqdn_or_ip_of_config_server>:4447. -
When installing the client for the first time, the username and password should be from an account that is a member of the
opsiadmingroup (see chapter Authorizations). When reinstalling, you can also use the client ID and the host key.
-
-
The installer contacts the server via the OPSI web service to register the client with the server. It then calls the included
opsi-scriptto execute thesetup.opsiscriptof the client agent.
| When executing the installer, you can specify parameters to automate processes, among other things. Further details are available in chapter Client Agent (Windows). |
Using opsi-deploy-client-agent
The opsi-deploy-client-agent tool distributes the opsi-client-agent directly from the OPSI server to the clients. This method offers a convenient way to integrate a large number of clients directly from the server into the OPSI environment.
If another software distribution option is already in place, it is advisable to perform the initial rollout via the client-agent-installer or the MSI package of the client agent.
|
Requirements for Windows clients:
-
An open
c$share. -
An open
admin$share. -
An administrative account.
-
The services
RpcSsandRpcEptMappermust be running (from Windows 8, this is the default setting). -
A firewall that allows File and Printer Sharing and Windows Management Instrumentation (WMI).
-
The registry key
HKLM:\SOFTWARE\Microsoft\Windows\CurrentVersion\Policies\System\LocalAccountTokenFilterPolicyshould have the value1.
You can find the opsi-deploy-client-agent on the OPSI server in the directory /var/lib/opsi/depot/opsi-client-agent. The program requires root rights; alternatively, it is sufficient if the user is a member of the opsifileadmins group. The tool performs the following steps:
-
It creates clients on the server.
-
It copies the installation and configuration files (e.g., the host key).
-
It starts the installation via
oca-installation-helper(non-interactive).
The opsi-deploy-client-agent tool accepts IP addresses, hostnames, and FQDNs. It attempts to automatically recognize the type of address provided by the user.
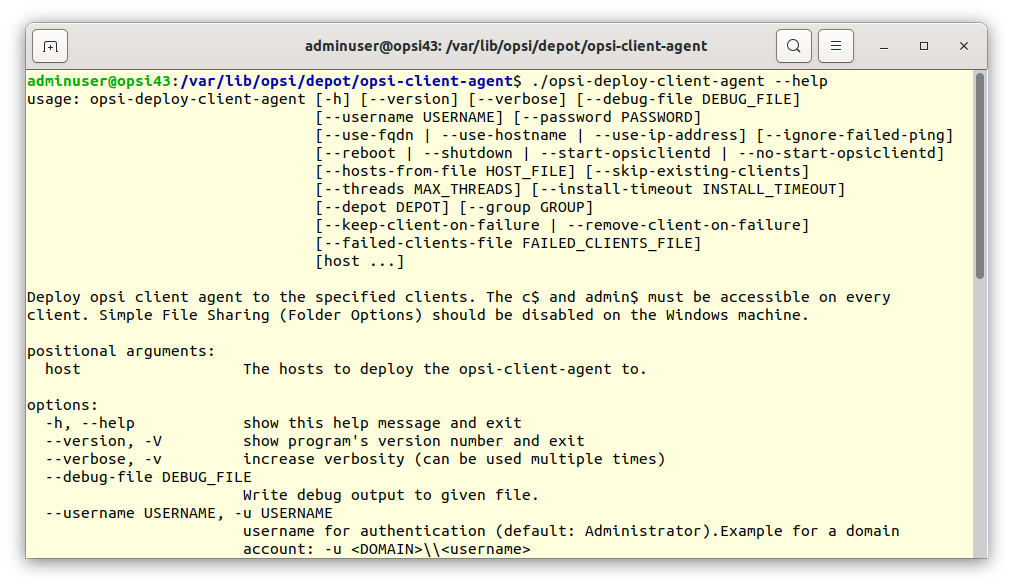
To begin, change to the main directory of the program:
cd /var/lib/opsi/depot/opsi-client-agentInvoke the program with the --help parameter to display the online help:
You can also use opsi-deploy-client-agent to process a list of clients. To do this, either pass the clients as the last parameter or use -f followed by the filename containing the list. In such a file, list each client on a separate line.
|
Adding new Clients
You can also use OPSI to install an operating system on new clients and subsequently integrate them. In this approach, the required client agent is installed automatically.
The following sections describe various methods of creating a client in opsi: via the graphical management interface opsi-configed, on the command line, and with our boot CD. After creating a client, you can then use OPSI to install a new operating system on it.
Graphical Management Interface
To add a new client to the OPSI server via the management interface opsi-configed, select Client / Create a new OPSI client from the menu and enter the following information:
-
Client name
-
DNS domain (if it’s different from the default)
-
Client description
-
IP address (required if DNS can not be used to resolve the client’s address)
-
MAC address (required if the OPSI server is the DHCP server or if you want to use PXE boot with this client)
Once you have confirmed everything, the client is registered with the OPSI server. If the OPSI server also functions as a DHCP server, the client is additionally set up as a PXE client in the DHCP configuration.
| You can view the list of configured OPSI clients at any time in Client Configuration mode on the Clients tab. |
Command Line
You can also use the opsi-cli tool on the command line to create a new client. The general syntax looks like this:
opsi-cli jsonrpc execute host_createOpsiClient <client-id> [opsiHostKey] [description] [notes] [hardwareAddress] [ipAddress] [inventoryNumber] [oneTimePassword] [created] [lastSeen]If you omit any of the optional values in the call, default values are used; as a result, most of the fields will then be empty.
Example: The following opsi-cli command creates the client testclient.domain.local with a random host key, the description testclient, without notes, with the MAC address 00:0c:29:12:34:56, and the IP address 192.0.2.1:
opsi-cli jsonrpc execute host_createOpsiClient testclient.domain.local "null" "testclient" "" 00:0c:29:12:34:56 192.0.2.1Boot CD
You can find an ISO image of the boot CD on the OPSI Tools website. Download the image and burn it to a CD or flash it on a USB drive with a designated tool like Balena Etcher. Boot the computer from this CD or USB drive. The installer will welcome you with the following boot menu:
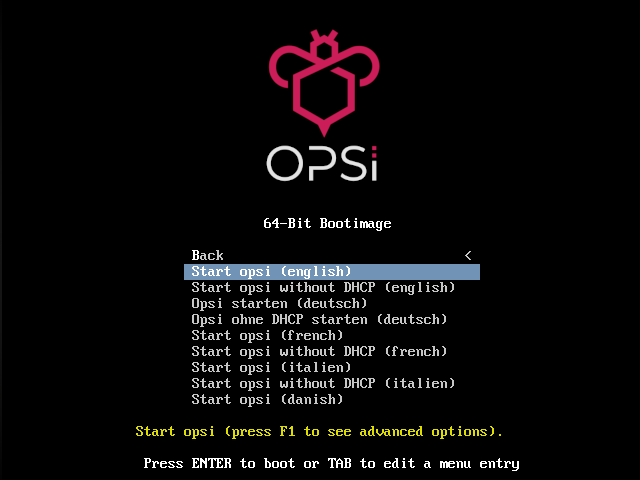
Select Start OPSI (english) and press the [Enter] key. After a while, a dialog box will appear in which you should enter the IP address of the client, the network mask, the hostname, the domain name, the gateway, the DNS server, and the IP address of the OPSI config server (optional). If your DHCP server assigns IP addresses to unknown computers, some of these fields may already show valid values.
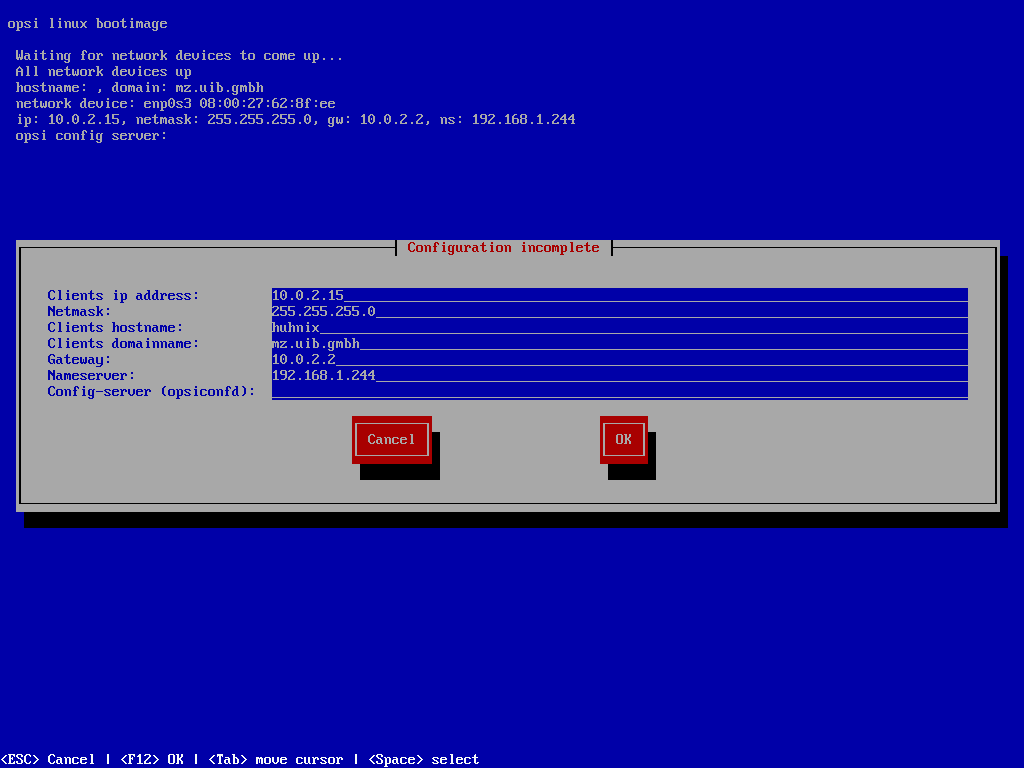
Use the [Tab] key to navigate to the OK option and then press [Enter].
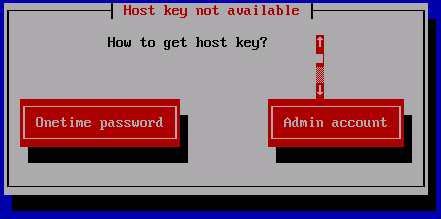
Select Admin account to enable the client to log on to the OPSI server and create itself. This process will be authorized in the following step.
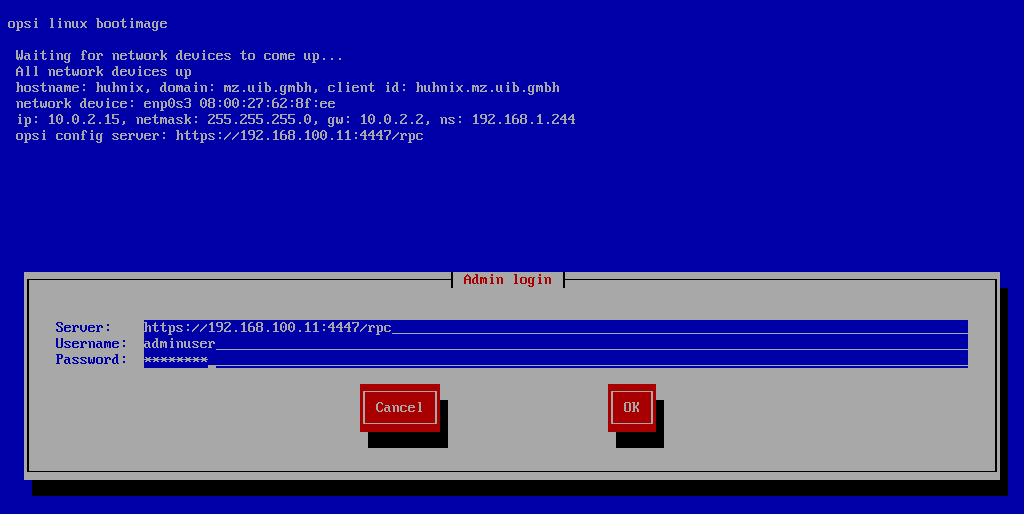
Enter the username and password for an account that is a member of the opsiadmin group (refer to chapter Authorizations for details). Upon successful login, the client will automatically transmit its data to the server, creating its record. You’ll then see a list of available Netboot products. Select the desired products for installation using the space bar.
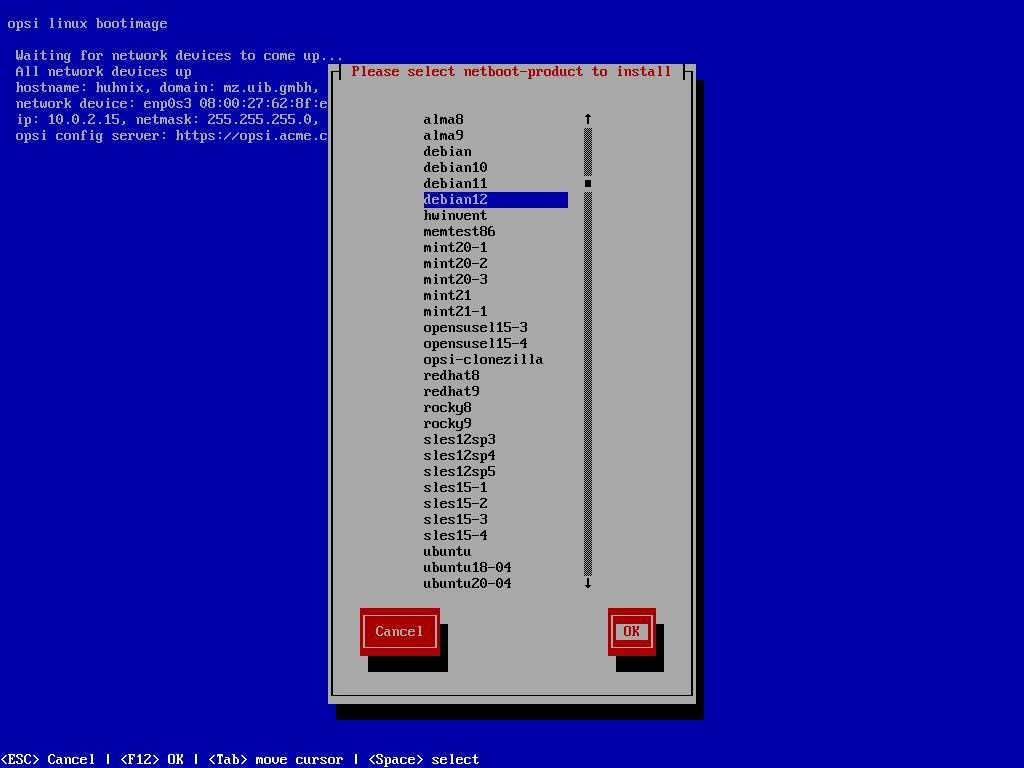
You can now choose either the operating system you wish to install or opt for hardware inventory.