Adding clients to opsi
To be able to manage computers with opsi, they must be known to the opsi system. In addition, an agent must be running on these computers so that communication between the server and client is possible. No management is possible without this client agent.
Depending on the environment in which opsi is to be used, there are different procedures. If there are already clients in the environment with an installed operating system that are to be managed with opsi, they can be integrated in different ways.
The alternative to this is that the computers to be managed by opsi are equipped with a new operating system. As part of the installation of the operating system, the required agent is also installed by opsi. However, any previously installed software (including the operating system) will be removed. To use this procedure you first add a client to opsi and then perform an OS installation.
Creation of a new opsi client
To manage computers, they must be known to the {opsi-Server}. This chapter describes different ways to create a client in opsi for later management. This is particularly helpful if you want to install an operating system on your computer using opsi.
For the integration of clients with an already installed operating system, please read the chapter integration of existing Clients.
Creating a new opsi client via the graphical management interface
A client can be added to the {opsi-Server} through the {opsi-configed} graphical user interface.
From the menu, choose OpsiClient / Create new opsi client and enter:
-
Client name
-
DNS domain (if different from the default)
-
Client description
-
IP address (required if DNS can not be used resolve the address of the client)
-
MAC address (required if the {opsi-Server} is the DHCP server or if you want to use PXE boot with this client)
After completing the input, the client will be created on the {opsi-Server}, and if the {opsi-Server} is also the DHCP server, the client will also be created in the DHCP configuration, as a PXE client.
The list of configured opsi clients can be viewed at any time in the {opsi-configed} mode Client configuration under the clients tab.
Creating a new opsi client via the command line
A client can added through the command line using the tool opsi-admin.
The syntax is the following:
opsi-admin -d method host_createOpsiClient <client-id> [opsiHostKey] [description] [notes] [hardwareAddress] [ipAddress] [inventoryNumber] [oneTimePassword] [created] [lastSeen]Missing values usually use a default value - most fields are then empty.
The following command will create the client testclient.domain.local with a random host key,
the description Testclient, no notes, the MAC address of 00:0c:29:12:34:56 and the IP address 192.0.2.1:
opsi-admin -d method host_createOpsiClient testclient.domain.local "null" "Testclient" "" 00:0c:29:12:34:56 192.0.2.1Creating a new opsi client using the opsi-client-bootcd
On the download page of uib you will find various ISO images of the 'opsi-client-boot-cd' at https://download.uib.de/opsi4.2/boot-cd/. Download the latest and burn it to a CD.
Start the computer from the CD. You then should see the following screen:
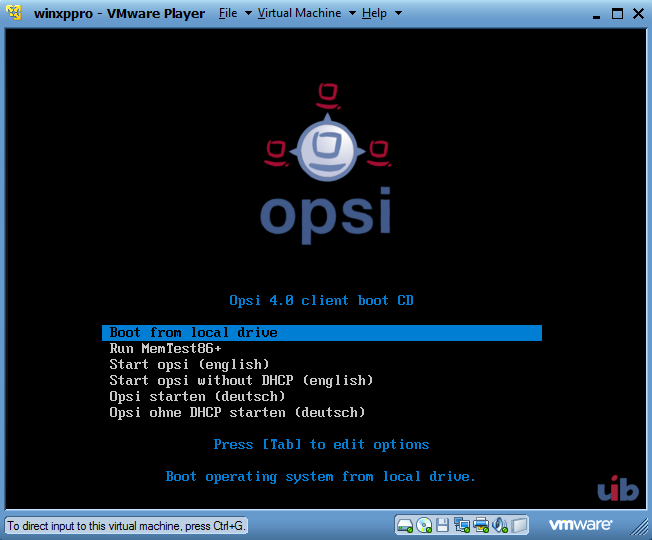
Choose Start opsi (English). After a while, the following screen will appear. If your DHCP server assigns IP addresses to unknown DHCP clients, then most fields will already have valid values. Otherwise you have to complete the missing data by hand. You must at least give the hostname.
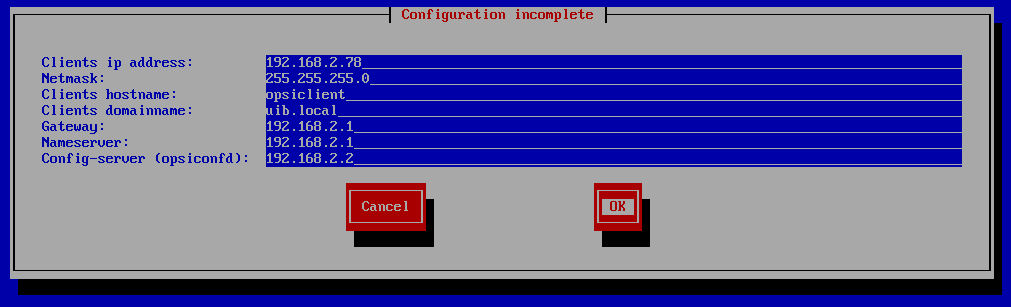
Then choose OK.
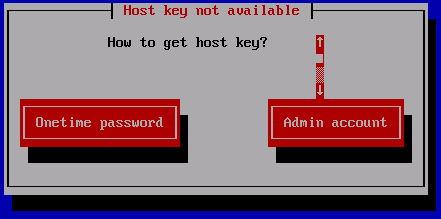
Then choose Admin account. This tells the client to register itself at the {opsi-server} using provided credentials.
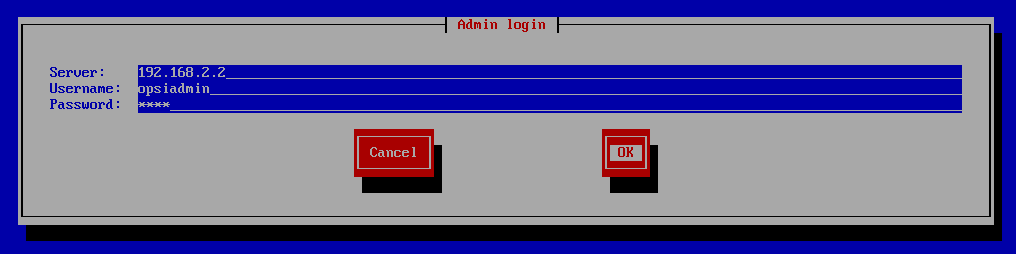
Now you will get a login window, where you must authenticate yourself as a member of the {opsi-admin-group} group. If this was successful, then the client sends its data to the server, at which point the client will be created at the server. In the next step, the client asks the server for the list of available netboot products, and makes them available for you to choose from.
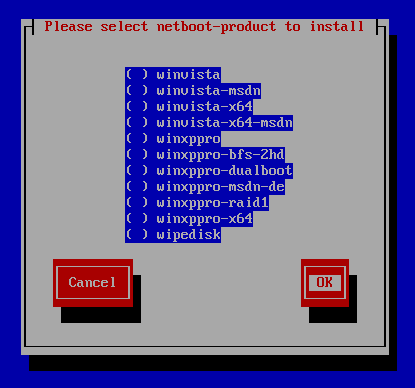
Now you may choose the operating system that you would like to install (or e.g. hwinvent).
Integration of existing Windows clients
To include existing Windows clients in opsi, the {opsi-client-agent} must be installed on them. This can be realised in several ways. After you have installed the {opsi-client-agent} as described below, the client will also appear in the client list of {opsi-configed}, unless you have already added the client there.
Basically there is the possibility to install the agent on the client or to start the installation from the server.
Executing the installation directly on the client is suitable for individual computers.
For a mass rollout of the agent, have a look at opsi-deploy-client-agent.
If there is already another way to distribute software available, then it is also possible to distribute the opsi-client-agent through it and execute the script silent_setup.cmd included in the package.
Once the agent is installed, available opsi products can be installed on these clients.
Using the opsi-client-agent-installer
-
Logon to the client.
-
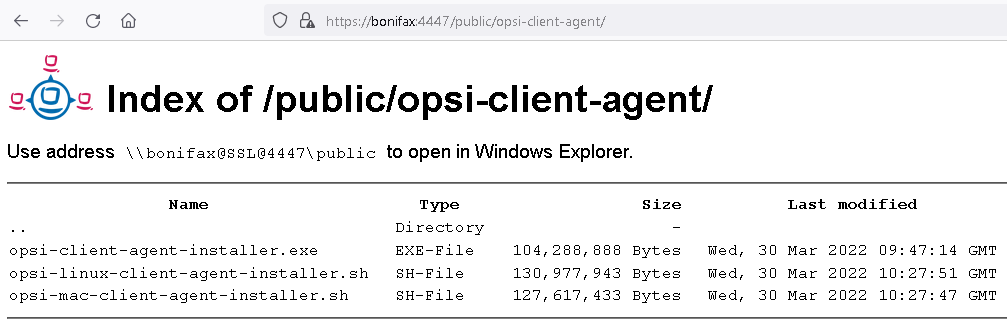
Download the installer from your configserver. It is located at https://<fqdn_or_ip_of_the_configserver>:4447/public/opsi-client-agent/ and has the file name:
Windows: opsi-client-agent-installer.exe
Linux: opsi-linux-client-agent-installer.run
macOS: opsi-mac-client-agent-installer.command
-
Execute the installer (for linux and macos this must be done with root-rights, on windows a UAC-Request may be displayed)
-
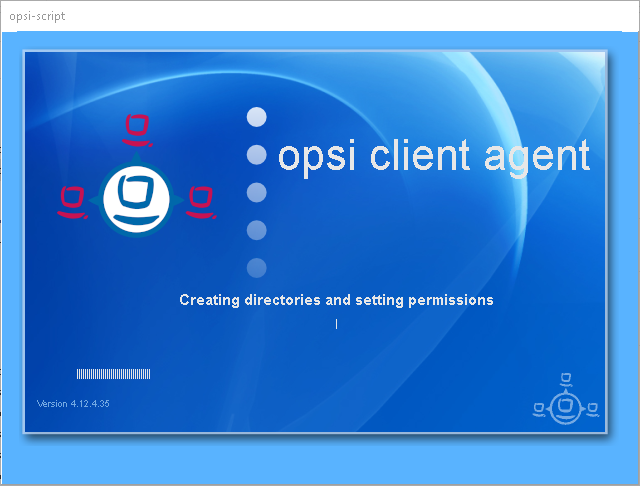
The installer will extract itself into a temporary local directory and start the oca-installation-helper.

This shows a user interface with input fields for Client-ID, Opsi Service URL, Username and Password. The fields are pre-filled (if possible e.g. if a old opsicliend.conf is found), but you may need to add or change some of the data.
-
Client-Id should be the fqdn of the Client.
-
Opsi Service url should have the format https://<fqdn_or_ip_of_the_configserver>:4447.
-
Username and Password should correspond to a user of the group opsiadmin in case of a first installation. For reinstallation it is also possible to use Client-Id and pckey for authentication.
After starting the Installer by clicking the button Install the installer connects to the server to register the client at the server. Afterwards the installer calls the included opsi-script to execute the setup.opsiscript of the opsi-[linux-|mac-]client-agent.
If the installation is finished the installer terminates.
Further information around the opsi-client-agent Installer and the command line parameters and other possibilities to install the opsi-client-agent you will find at the opsi-manual in the chapter Subsequent installation of the opsi-client-agents.
The subsequent described methods: service_setup / silent_setup are only for backward compatibility to opsi 4.1 and the corresponding opsi-client-agent versions 4.1. Please use as possible the opsi-client-agent Installer.
Using service_setup.cmd on Windows NT6 (outdated)
The method described over here is only for backward compatibility to opsi 4.1 and the corresponding opsi-client-agent versions 4.1. Please use as possible the opsi-client-agent Installer.
-
Logon to the Windows client with administrative privileges.
-
Mount the share
\\<opsiserver>\opsi_depoton a drive letter. -
On the drive from the previous step, start the script
opsi-client-agent\service_setup.cmd
Do not start the script elevated (via right mouse click: 'as Administrator') because an elevated script has no access to the network share. -
The script copies the needed files to a temporary local directory and starts from there the opsi-script (opsi-script.exe) elevated in order to do the installation. This may cause an UAC Message at this point.
-
The script connects to the server via the opsi webservice in order to create the client on the serverside and to retrieve the pckey. This is tried first with the user and password provided in config.ini. If the connection fails, a login window will appear, with the Service-URL ({opsi-configserver}), and user and password. The user required here needs to be a member of the group 'opsiadmin'. It is also possible to use a user which only has rights to call the method
host_createOpsiClient.
| After installation the client reboots without notice. |
Using opsi-deploy-client-agent
The opsi-deploy-client-agent script installs the {opsi-client-agent} directly from the {opsi-server} on the clients. This makes it easy to integrate a large number of clients from a server into an opsi environment.
Requirements for the clients are:
-
an open C$ share
-
an open admin$ share
-
an administrative account
-
Running services RpcSs and RpcEptMapper (enabled for win8 and later by default)
-
Firewall permitting "file and printer sharing" and "windows management instrumentation (WMI)"
-
Registry key HKLM:\SOFTWARE\Microsoft\Windows\CurrentVersion\Policies\System\LocalAccountTokenFilterPolicy should have value 1
The opsi-deploy-client-agent script can be found at /var/lib/opsi/depot/opsi-client-agent
Execute the script with 'root' privileges or as a user being part of the "opsifileadmins" group.
If the script is not executable, you can solve this issue by executing the following command:
opsi-set-rights /var/lib/opsi/depot/opsi-client-agent/opsi-deploy-client-agent.
The script creates the client on the server, then copies the installation files and the configuration information, including the pckey, to the client. After copying the necessary information, opsi-deploy-client-agent starts the installation on the client.
There are two ways to copy the installation files. The first method will use the 'mount'-command on the server to mount the C$ share of the client, and copy the files to the share for installation. The second variant will use 'smbclient'-command on the server for mounting C$ share of the client, and copy the files to the share for installation.
With the opsi-deploy-client-agent script you can also install to a list of clients.
To do this, either any number of clients can be passed as the last parameter or the clients can be read from a file using the '-f' option.
When using a file, there must be a client on every line.
The script can work with IP addresses, hostnames or FQDNs. It will try to automatically detect what type of address it is processing.
Possible parameters can be found by using --help:
opsi_server:/home/user# cd /var/lib/opsi/depot/opsi-client-agent
opsi_server:/var/lib/opsi/depot/opsi-linux-client-agent# ./opsi-deploy-client-agent --help

usage: opsi-deploy-client-agent [-h] [--version] [--verbose]
                                [--debug-file DEBUGFILE] [--username USERNAME]
                                [--password PASSWORD]
                                [--use-fqdn | --use-hostname | --use-ip-address]
                                [--ignore-failed-ping]
                                [--reboot | --shutdown | --start-opsiclientd | --no-start-opsiclientd]
                                [--hosts-from-file HOSTFILE]
                                [--skip-existing-clients]
                                [--threads MAXTHREADS] [--depot DEPOT]
                                [--group GROUP] [--smbclient | --mount]
                                [--keep-client-on-failure | --remove-client-on-failure]
                                [host [host ...]]

Deploy opsi client agent to the specified clients. The c$ and admin$ must be
accessible on every client. Simple File Sharing (Folder Options) should be
disabled on the Windows machine.

positional arguments:
  host                  The hosts to deploy the opsi-client-agent to.

optional arguments:
  -h, --help            show this help message and exit
  --version, -V         show program's version number and exit
  --verbose, -v         increase verbosity (can be used multiple times)
  --debug-file DEBUGFILE
                        Write debug output to given file.
  --username USERNAME, -u USERNAME
                        username for authentication (default: Administrator).
                        Example for a domain account: -u
                        "<DOMAIN>\\<username>"
  --password PASSWORD, -p PASSWORD
                        password for authentication
  --use-fqdn, -c        Use FQDN to connect to client.
  --use-hostname        Use hostname to connect to client.
  --use-ip-address      Use IP address to connect to client.
  --ignore-failed-ping, -x
                        try installation even if ping fails
  --reboot, -r          reboot computer after installation
  --shutdown, -s        shutdown computer after installation
  --start-opsiclientd, -o
                        Start opsiclientd service after installation
                        (default).
  --no-start-opsiclientd
                        Do not start opsiclientd service after installation.
  --hosts-from-file HOSTFILE, -f HOSTFILE
                        File containing addresses of hosts (one per line).If
                        there is a space followed by text after the address
                        this will be used as client description for new
                        clients.
  --skip-existing-clients, -S
                        skip known opsi clients
  --threads MAXTHREADS, -t MAXTHREADS
                        number of concurrent deployment threads
  --depot DEPOT         Assign new clients to the given depot.
  --group GROUP         Assign fresh clients to an already existing group.
  --smbclient           Mount the client's C$-share via smbclient.
  --mount               Mount the client's C$-share via normal mount on the
                        server for copying the files. This imitates the
                        behaviour of the 'old' script.
  --keep-client-on-failure
                        If the client was created in opsi through this script
                        it will not be removed in case of failure. (DEFAULT)
  --remove-client-on-failure
                        If the client was created in opsi through this script
                        it will be removed in case of failure.