opsi-server with multiple depots (free)
Concept
Supporting multiple depot shares in opsi aims at the following targets:
-
central configuration data storage and configuration management
-
providing the software depots on local servers
-
automated deployment of software packages from the central server to the local depots
Accordingly, it is implemented:
-
All configuration data is stored on the central 'opsi-configserver'.
-
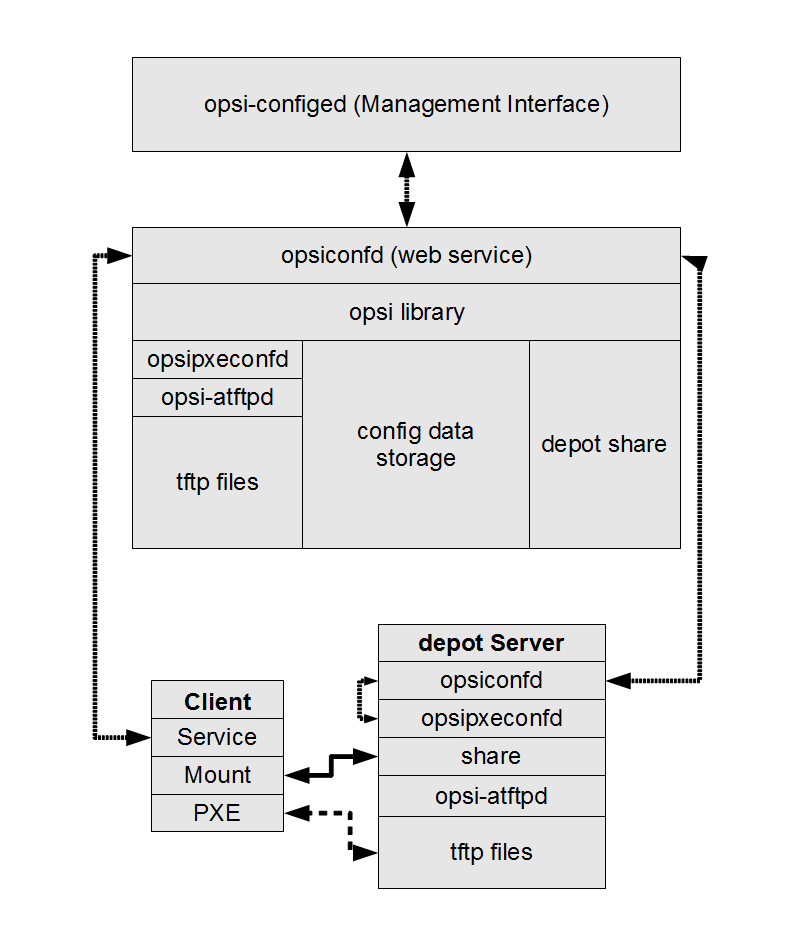
All clients connect to this 'opsi-configserver' in order to request their configuration data. The configuration data comprise the information on method and target of the 'opsi-depotserver' connection.
-
All installable software is stored on 'opsi-depotservers'.
-
The 'opsi-depotservers' have as well an
opsipxeconfdrunning by which they provide boot-images to clients via PXE/tftp. -
opsi-package-manager
A program to (de-)install opsi packages on one ore more 'opsi-depotservers'. -
The opsi packages are copied via webdav protocol to the 'opsi-depotservers' and are installed from the opsiconfd via a web service call.
-
'opsi-configed' supports the management of multiple depots.
-
Clients connected to different depots can be managed in one bundle if the involved depots are synchronized (have all product packages in identical versions).
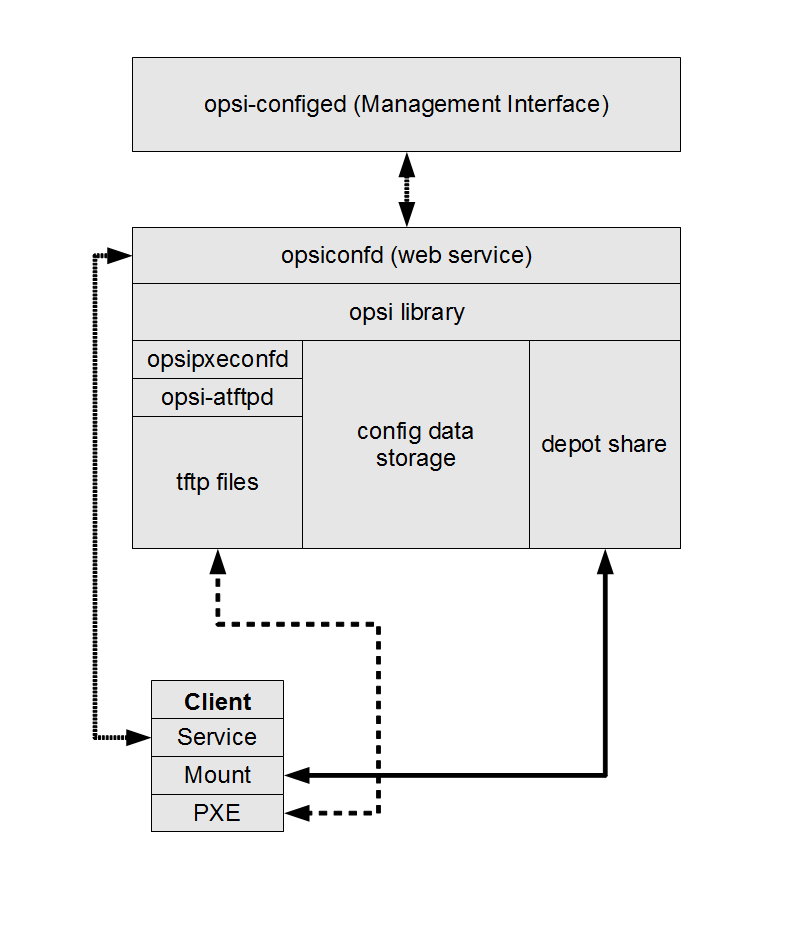
The following schema gives a more detailed view on the communication between the components of a opsi multi depot share environment.


Creating an depot server
In order to create an 'opsi-depotserver' you have to install a standard 'opsi-server'. This 'opsi-server' can be configured to act as 'opsi-depotserver' by calling the script opsi-setup --register-depot as user root on the server which should become the 'opsi-depotserver'. Because this script does not only reconfigure the local server, but also registers this server as 'opsi-depotserver' with the central 'opsi-configserver', username and password of a member of the 'opsiadmin' group have to be supplied here.
On Univention Corporate Server the registration of a 'opsi-depotserver' happens automatically. The first server with an opsi installation is used as 'opsi-configserver' and all following in a UCS domain installed systems will register there as an 'opsi-depotserver'.
Example:
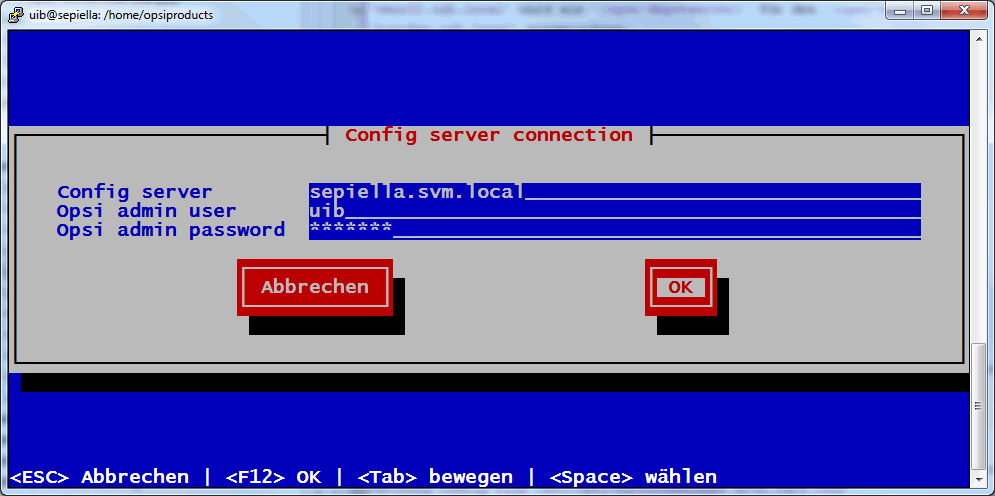
'svmdepotde.svm.local' will be reconfigured as opsi-depotserver and registered at the opsi-configserver 'sepiella.svm.local':
root@svmdepotde.svm.local:~# opsi-setup --register-depotNow you will be prompted for the opsi-configserver you want to connect to . The registration needs to be authorised by supplying the username and password of a member of the group 'opsiadmin' at the opsi-configserver.

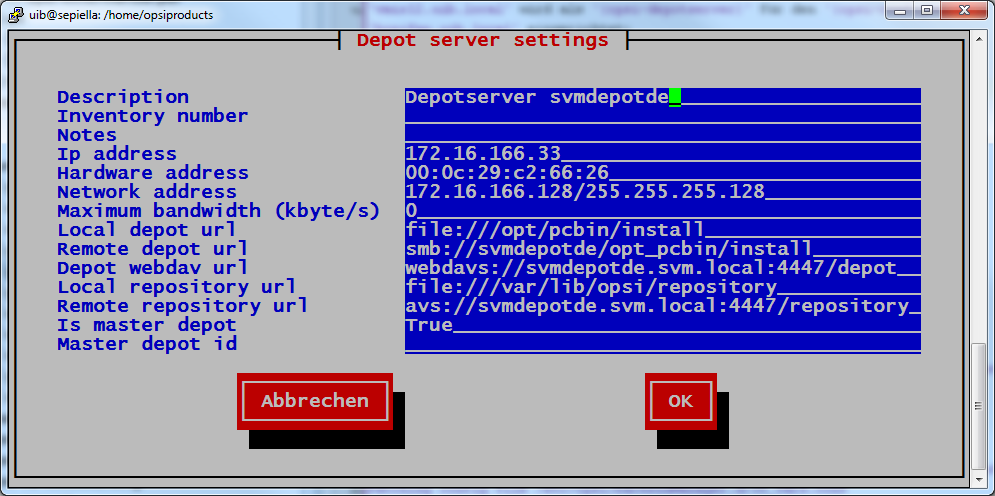
Now the opsi-depotserver settings are being displayed. In most cases no changes have to be made. Note that the new opsi-depotserver will register as a "Master-Depot", so that you’ll be able to assign 'opsi-clients' to it.

After the data input is completed the configuration process will start:
[5] [Apr 06 12:32:19] Getting current system config (opsi-setup|70)
[5] [Apr 06 12:32:19] System information: (opsi-setup|117)
[5] [Apr 06 12:32:19]    distributor  : Debian (opsi-setup|118)
[5] [Apr 06 12:32:19]    distribution : Debian GNU/Linux 5.0.8 (lenny) (opsi-setup|119)
[5] [Apr 06 12:32:19]    ip address   : 172.16.166.33 (opsi-setup|120)
[5] [Apr 06 12:32:19]    netmask      : 255.255.255.0 (opsi-setup|121)
[5] [Apr 06 12:32:19]    subnet       : 172.16.166.0 (opsi-setup|122)
[5] [Apr 06 12:32:19]    broadcast    : 172.16.166.255 (opsi-setup|123)
[5] [Apr 06 12:32:19]    fqdn         : svmdepotde.svm.local (opsi-setup|124)
[5] [Apr 06 12:32:19]    hostname     : svmdepotde (opsi-setup|125)
[5] [Apr 06 12:32:19]    domain       : svm.local (opsi-setup|126)
[5] [Apr 06 12:32:19]    win domain   : OPSI (opsi-setup|127)
[5] [Apr 06 12:46:03] Creating depot 'svmdepotde.svm.local' (opsi-setup|2342)
[5] [Apr 06 12:46:03] Getting depot 'svmdepotde.svm.local' (opsi-setup|2345)
[5] [Apr 06 12:46:03] Testing connection to config server as user 'svmdepotde.svm.local' (opsi-setup|2354)
[5] [Apr 06 12:46:04] Successfully connected to config server as user 'svmdepotde.svm.local' (opsi-setup|2359)
[5] [Apr 06 12:46:04] Updating backend config '/etc/opsi/backends/jsonrpc.conf' (opsi-setup|2361)
[5] [Apr 06 12:46:04] Backend config '/etc/opsi/backends/jsonrpc.conf' updated (opsi-setup|2373)
[5] [Apr 06 12:46:04] Updating dispatch config '/etc/opsi/backendManager/dispatch.conf' (opsi-setup|2375)
[5] [Apr 06 12:46:04] Dispatch config '/etc/opsi/backendManager/dispatch.conf' updated (opsi-setup|2388)
[5] [Apr 06 12:46:04] Setting rights (opsi-setup|410)
[5] [Apr 06 12:46:06] Setting rights on directory '/tftpboot/linux' (opsi-setup|482)
[5] [Apr 06 12:46:06] Setting rights on directory '/home/opsiproducts' (opsi-setup|482)
[5] [Apr 06 12:46:06] Setting rights on directory '/var/log/opsi' (opsi-setup|482)
[5] [Apr 06 12:46:06] Setting rights on directory '/etc/opsi' (opsi-setup|482)
[5] [Apr 06 12:46:06] Setting rights on directory '/var/lib/opsi' (opsi-setup|482)
[5] [Apr 06 12:46:06] Setting rights on directory '/var/lib/opsi/depot' (opsi-setup|482)
[5] [Apr 06 12:46:27] Restarting services (opsi-setup|2392)
[5] [Apr 06 12:46:35] Configuring client user pcpatch (opsi-setup|347)
[5] [Apr 06 12:46:35]    Creating RSA private key for user pcpatch in '/var/lib/opsi/.ssh/id_rsa' (opsi-setup|361)
[5] [Apr 06 12:46:35] Setting rights (opsi-setup|410)
[5] [Apr 06 12:46:38] Setting rights on directory '/var/lib/opsi/.ssh' (opsi-setup|482)
Usually the configuration files in /etc/opsi/package-updater.repos.d/ on the new depot should be checked.
If the new depot should only update its packages from the main server, only the repository in /etc/opsi/package-updater.repos.d/opsi-server.repo should remain active.
A possible configuration can look like this:
[repository_opsi_server]
active = true
opsiDepotId = bonifax.uib.local
autoInstall = true
autoUpdate = true
autoSetup = false
; Inherit ProductProperty defaults from master repository
inheritProductProperties = false
Non-interactive registration of a opsi-depotserver
Since opsi-depotserver 4.0.7.2 it is possible to register a depot without interaction.
To do this the data for the connection to the opsi-configserver has to be passed as JSON object alongside the parameter --unattended.
opsi-setup --register-depot --unattended '{"address": "config.server.address:4447/rpc", "username": "adminuserinopsi", "password": "pwoftheuser"}'The opsi-depotserver will be created with defaults.
It is possible to set custom attributes for the opsi-depotserver.
For this the JSON object needs to get the key depot and as a value another
JSON object with the custom values.
The following example illustrates how to set a custom description:
opsi-setup --register-depot --unattended '{"address": "config.server.address:4447/rpc", "username": "adminuserinopsi", "password": "pwoftheuser", "depot": {"description": "Added with unattended registration."}}'package management with multiple depots
see also:
opsi-package-manager
opsi-package-updater
In or to manage opsi-packages with different 'opsi-depotserver' the opsi-package-manager got the option -d ( or --depot). With this option you can give the target 'opsi-depotserver' for the installation. Using the keyword 'ALL' the opsi package will be copied to /var/lib/opsi/repository on all known 'opsi-depotservers' and then installed via a web service call.
If you don’t give the option -d, the opsi package will be only installed on the local server (without upload to /var/lib/opsi/repository).
Example:
Install the package softprod_1.0-5.opsi on all known 'opsi-depotservers':
opsi-package-manager -d ALL -i softprod_1.0-5.opsiIn order to get information’s about what are the differences between depots you may call opsi-package-manager with the option -D (or --differences).
Example:
Show the differences between all known depots regarding the product mshotfix
opsi-package-manager -D -d ALL mshotfix
mshotfix
    vmix12.uib.local :  200804-1
    vmix13.uib.local :  200804-1
    bonifax.uib.local:  200805-2