Integration of existing macOS clients into opsi.
To include existing macOS clients in opsi, the opsi-client-agent must be installed on them. This can be performed in several ways. After you have installed the opsi-client-agent, as described below, the client will also appear in the client list of the opsi-configed, in the case you had not already added it there previously.
Basically, is possible to run on the client or from the server to trigger the installation of the agent.
Running the installation directly on the client is appropriate for individual machines. For a mass deployment of the agent, the opsi-deploy-client-agent is generally more suitable. If the necessary unlocks are available on the macOS clients.
If there is already another way to deploy software, it’s also possible to deploy the opsi-client-agent and run the silent_setup.sh script included in the package.
Once the agent is installed, existing opsi products can be installed on these clients.
Using opsi-client-agent-installer on macOS
-
Logon to the client.
-
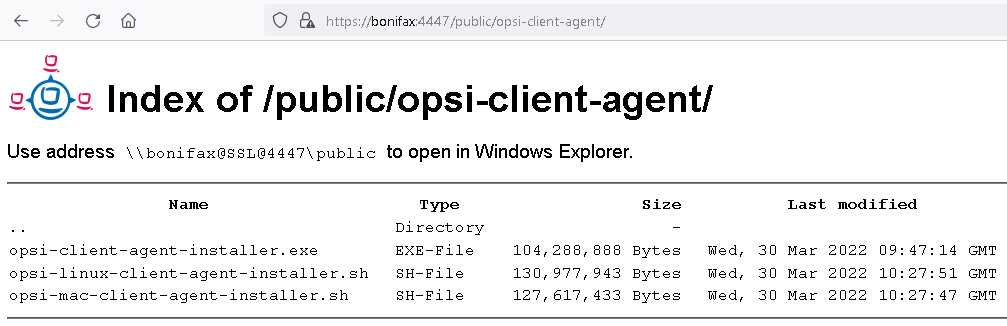
Download the installer from your configserver. It is located at https://<fqdn_or_ip_of_the_configserver>:4447/public/opsi-client-agent/ and has the file name:
Windows: opsi-client-agent-installer.exe
Linux: opsi-linux-client-agent-installer.run
macOS: opsi-mac-client-agent-installer.command
-
Execute the installer (for linux and macos this must be done with root-rights, on windows a UAC-Request may be displayed)
-
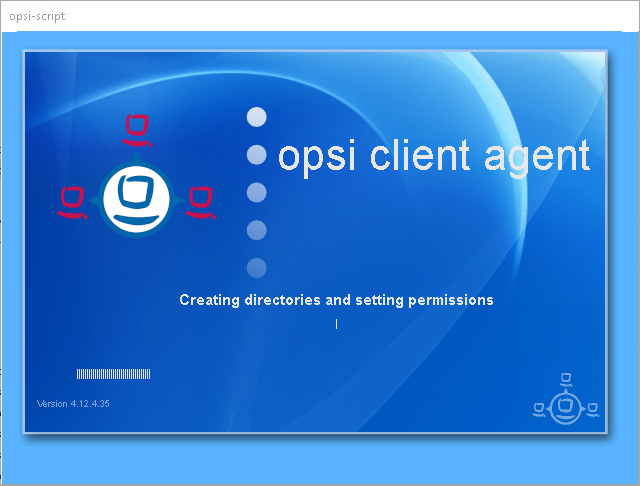
The installer will extract itself into a temporary local directory and start the oca-installation-helper.
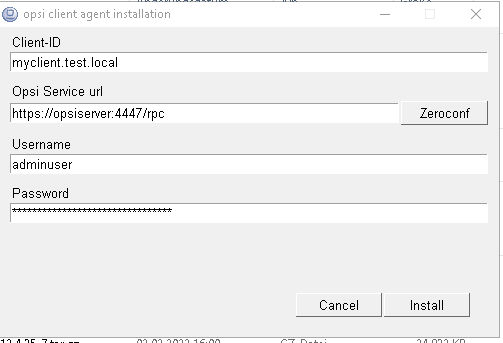
This shows a user interface with input fields for Client-ID, Opsi Service URL, Username and Password. The fields are pre-filled (if possible e.g. if a old opsicliend.conf is found), but you may need to add or change some of the data.
-
Client-Id should be the fqdn of the Client.
-
Opsi Service url should have the format https://<fqdn_or_ip_of_the_configserver>:4447.
-
Username and Password should correspond to a user of the group opsiadmin in case of a first installation. For reinstallation it is also possible to use Client-Id and pckey for authentication.
After starting the Installer by clicking the button Install the installer connects to the server to register the client at the server. Afterwards the installer calls the included opsi-script to execute the setup.opsiscript of the opsi-[linux-|mac-]client-agent.
If the installation is finished the installer terminates.
Further information around the opsi-client-agent Installer and the command line parameters and other possibilities to install the opsi-client-agent you will find at the opsi-manual in the chapter Subsequent installation of the opsi-client-agents.
Using service_setup.sh on macOS
The method described over here is only for backward compatibility to opsi 4.1 and the corresponding opsi-client-agent versions 4.1. Please use as possible the opsi-client-agent Installer.
Using service_setup.sh on macOS (initial installation).
Due to macOS security restrictions, the ability to run scripts from mounted shares is limited. Trying to do the following with a share mounted via Finder to /Volumes (or similar) will therefore fail (depending on the macOS version).
-
Log in to the client.
-
Start the terminal program
-
For the following commands you need to replace the following placeholders:
-
<username>with your login name. -
<mnt>with a directory name that does not exist yet e.g. 'mnt'. -
<serviceuser>with a username that is known on the opsi-server. -
<servicepass>with the password of the <serviceuser>. You can also omit:<servicepass>together with the mount option-N, then you will be prompt to input the password -
<opsi-server>the name or IP number of the opsi-server.
-
sudo su
cd /Users/<username>
mkdir <mnt>
mount_smbfs //<serviceuser>@<opsi-server>/opsi_depot /Users/<username>/<mnt>
cd /Users/<username>/<mnt>/opsi-mac-client-agent
./service_setup.sh
cd
umount /Users/<username>/<mnt>
without password query
sudo su
cd /Users/<username>
mkdir <mnt>
mount_smbfs -N //<serviceuser>:<servicepass>@<opsi-server>/opsi_depot /Users/<username>/<mnt>
cd /Users/<username>/<mnt>/opsi-mac-client-agent
./service_setup.sh
cd
umount /Users/<username>/<mnt>
Example:
sudo su
cd /Users/uib
mkdir mnt
mount_smbfs  //adminuser@sepia/opsi_depot /Users/uib/mnt
cd /Users/uib/mnt/opsi-mac-client-agent
./service_setup.sh
cd
umount /Users/uib/mnt-
Start from the mounted share the script
opsi-mac-client-agent\service_setup.sh
Confirm with 2 x Enter -
The script copies the necessary files into a temporary local directory and then starts opsi-script for the actual installation.
-
The script contacts the server via opsi webservice to create the client on the server side and to find out the pckey. This is done first with the user/password combination entered in
config.ini. If this fails, a login window appears with service URL (opsi-configserver), user name and password. Here a user is needed which is a member of the group 'opsiadmin'. It is possible to also operate with a user which is only allowed to execute the methodhost_createOpsiClient.
| The client reboots after the installation. |
Using service_setup.sh on macOS (repair installation).
-
Log in to the client.
-
Start the terminal program
-
For the following commands you need to replace the following placeholders:
-
<serviceuser>with a username known on the opsi-server. -
<servicepass>with the password of the <serviceuser>. You can also omit:<servicepass>, then you will be asked for the password -
<opsi-server>with the name or IP number of the opsi server.
-
-
During the first installation opsi created a hidden pseudo user named opsisetupadmin, in whose
home directory/var/opsisetupadminis also the mount directory.
sudo su
mount_smbfs -N //<serviceuser>:<servicepass>@<opsi-server>/opsi_depot /var/opsisetupadmin/opsi_depot
cd /var/opsisetupadmin/opsi_depot/opsi-mac-client-agent
./service_setup.sh
cd
umount /var/opsisetupadmin/opsi_depot
Example:
sudo su
mount_smbfs -N //adminuser:linux123@sepia/opsi_depot /var/opsisetupadmin/opsi_depot
cd /var/opsisetupadmin/opsi_depot/opsi-mac-client-agent
./service_setup.sh
cd
umount /var/opsisetupadmin/opsi_depot-
Start the script
opsi-mac-client-agent\service_setup.sh
Confirm with 2 x Enter -
The script copies the necessary files into a temporary local directory and then starts the opsi-script for the actual installation.
-
The script contacts the server via opsi webservice to create the client on the server side and to find out the pckey. This is done first with the user/password combination entered in
config.ini. If this fails, a login window appears with the corresponding service URL (opsi-configserver), user name and password. Here a user is needed which is a member of the group 'opsiadmin'. It is also possible to utilize a user which is only allowed to execute the methodhost_createOpsiClient.
|
The client needs a reboot after the installation to become active. The reboot is not triggered automatically. |
Using opsi-deploy-client-agent for macOS.
The opsi-deploy-client-agent script deploys the opsi-client-agent directly from the opsi-server to the clients.
It’s easy to integrate a large number of clients from the server into an opsi environment.
As a prerequisite for the clients is needed:
-
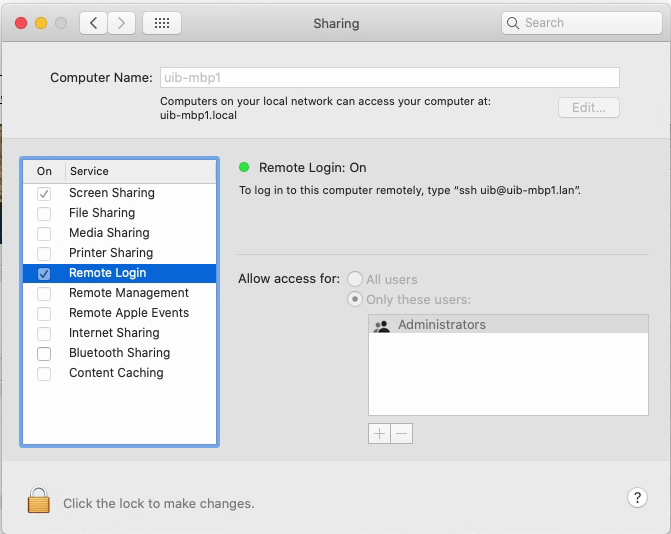
an activated ssh access
Unfortunately on macOS the ssh accesses are deactivated by default.
To use the opsi-deploy-client-agent command these accesses must be first activated.
This can be performed interactively in the 'System preferences / sharing':
On the command line, this can be done as follows:
sudo launchctl load -w /System/Library/LaunchDaemons/ssh.plistA checkup of the current status of the ssh access is possible with the command:
sudo systemsetup -getremoteloginDisabling ssh access on the command line looks like this:
sudo launchctl unload /System/Library/LaunchDaemons/ssh.plistThe opsi-deploy-client-agent script can be found at /var/lib/opsi/depot/opsi-client-agent
Run the script with 'root' privileges or as a user being part of the "opsifileadmins" group.
If the script is not executable, you can fix this problem with the following command:
opsi-set-rights /var/lib/opsi/depot/opsi-client-agent/opsi-deploy-client-agent
The script creates the client on the server side, copies the installation files and configuration information, such as the pckey, to the client and starts the installation there.
The installation runs in the background without any interaction from user and transparently.
The command opsi-deploy-client-agent has several call parameters.
All following examples assume that you have switched to the root directory of the opsi-client-agent product:
cd /var/lib/opsi/depot/opsi-mac-client-agentTypical calls are:
-
For a single client:
./opsi-deploy-client-agent -v --user=uib uib-mmini1Results in the following output:
Password is required for deployment.
Password:
[5] [2021-02-04 16:43:43.121] [               ] Starting deployment to host uib-mmini1.uib.local   (posix.py:84)
[5] [2021-02-04 16:43:43.121] [               ] Querying for ip address of host uib-mmini1.uib.local   (common.py:158)
[5] [2021-02-04 16:43:43.122] [               ] Got ip address 192.168.10.70 from syscall   (common.py:167)
[5] [2021-02-04 16:43:43.123] [               ] Pinging host 192.168.10.70 ...   (common.py:183)
[5] [2021-02-04 16:43:44.146] [               ] Host 192.168.10.70 is up   (common.py:194)
[5] [2021-02-04 16:43:44.153] [               ] Patching config.ini   (posix.py:91)
[5] [2021-02-04 16:43:44.157] [               ] Copying installation scripts...   (posix.py:107)
[5] [2021-02-04 16:43:48.316] [               ] Running installation script...   (posix.py:147)
[5] [2021-02-04 16:43:53.382] [               ] opsi-client-agent successfully installed on uib-mmini1.uib.local   (posix.py:176)
[5] [2021-02-04 16:43:53.395] [               ] Restarting opsiclientd service on computer: uib-mmini1   (posix.py:331)
[5] [2021-02-04 16:43:55.620] [ ] 1/1 deployments successfully (__init__.py:210)-
For a list of clients:
./opsi-deploy-client-agent -v --user=uib --hosts-from-file HOSTFILE.TXT --skip-existing-clientsHere HOSTFILE.TXT is a file with one client name (FQDN) per line. As long as the clients are not known to the opsi-server, it tries to install the opsi-mac-client-agent on this machine
-
Display all command line parameters:
./opsi-deploy-client-agent --help