opsi-server Basic installation
In this section different variants of the installation of an 'opsi-server' are shown. You will end up with a server system ready for final configuration and commissioning. To evaluate opsi we recommend using the pre-installed virtual machine. Otherwise, you should select the operating system you are most familiar with. In this case please make sure that the packages of the server are up to date.
If a proxy server is used in your network to access the Internet, remember to enter this on your opsi-server as well.
In particular the environment variables http_proxy and https_proxy.
In case of problems you can check the free support provided by the community.
Starting up the uib preconfigured Virtual Machine
An 'opsi-server' can be installed as a virtual machine, because the load on the system is low. A ready-to-use and pre-configured virtual machine is provided by uib. You can download the VMware or Virtualbox files from the uib website or opsi.org. The free of charge VMware player or Virtualbox is sufficient to run this machine. You may also use VMware server or ESXi.
First Start
VMware
If you have a server running VMware or VMware player, it only takes a few mouse clicks to install a base 'opsi-server':
-
Download the opsi server VM from opsi.org
-
Unzip the file and a directory 'opsivm' will be generated.
-
Start VMware player. Open "Open a Virtual Machine", look for the directory
opsivmand in it the fileopsivm.ovfin its file selection dialog. You may have to change the file types to be displayed to ovf. You can now import the server under its own name. The virtual server can then be started.
ESXi-Server
-
Download the opsi server VM from opsi.org
-
Unzip the file and a directory 'opsivm' will be generated.
-
Start vSphere Client.
Install a new client with 'File' / 'Deploy OVF Template….' and answer the next questions.
Virtualbox
-
Download the opsi server VM from opsi.org
-
Unzip the file and a directory 'opsivm' will be generated.
-
Start Virtualbox.
At the menu 'File' / 'Import Appliance' select youropsivm.ovffile and import it.
General
The VMware player is free of charge and available for all common operating systems at vmware.com. Usually it can be installed without any problems, as long as the resources of the host computer (especially memory) meet the needs of running software systems in parallel.
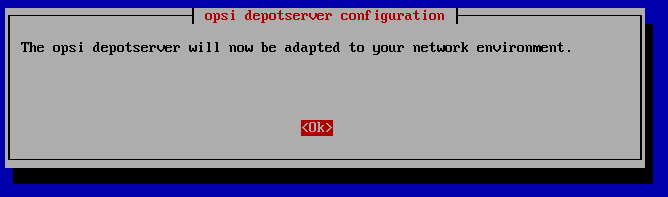
First boot
The opsi-server needs to be connected to the Internet to work properly. The script 1stboot.py will automatically start at the first boot in order to configure the opsi-server network settings.
If something goes wrong while running '1stboot.py', then you may run 1stboot.py again from the command line.
The log file of 1stboot.py is located at /var/lib/1stboot/1stboot.log.
You cannot use 1stboot.py to rename your 'opsi-server' afterwards!
|
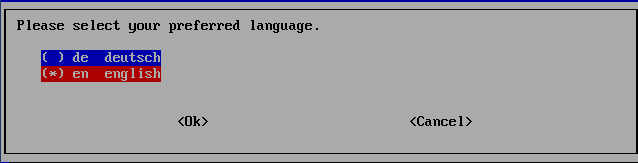
Fill in the configuration information for your network and answer the questions.
In the following, you will be asked for:
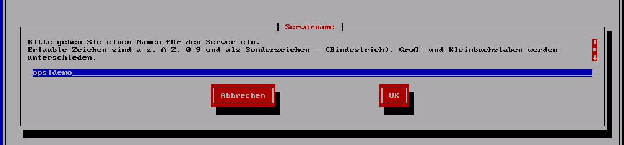
- server name
-
Name of this server (without domain) e.g. opsidemo
- domain
-
DNS-Domain (not Windows-Domain) the name has to include a dot e.g. opsi.local
- ip address
-
Address of this server e.g. 192.168.1.50
- netmask
-
Netmask of this server e.g. 255.255.255.0
- windows domain
-
Name of the Windows Domain (not the DNS domain)
- gateway
-
IP-address of the Internet gateway e.g. 192.168.1.1
- proxy
-
If required for Internet access, the proxy information: e.g.
http://myuser:mypass@<proxy-address>:8080 - DNS server
-
IP address of the name server e.g. 192.168.1.1
- mail relay
-
IP address of the mail server e.g. 192.168.1.1
- tftp server
-
IP address of the tftp server (usually the server)
- Password of root
-
Password of root
- Password of adminuser
-
Password of local opsi-admin.
After the program '1stboot.py' finishes, the virtual machine will be rebooted.
Second Start
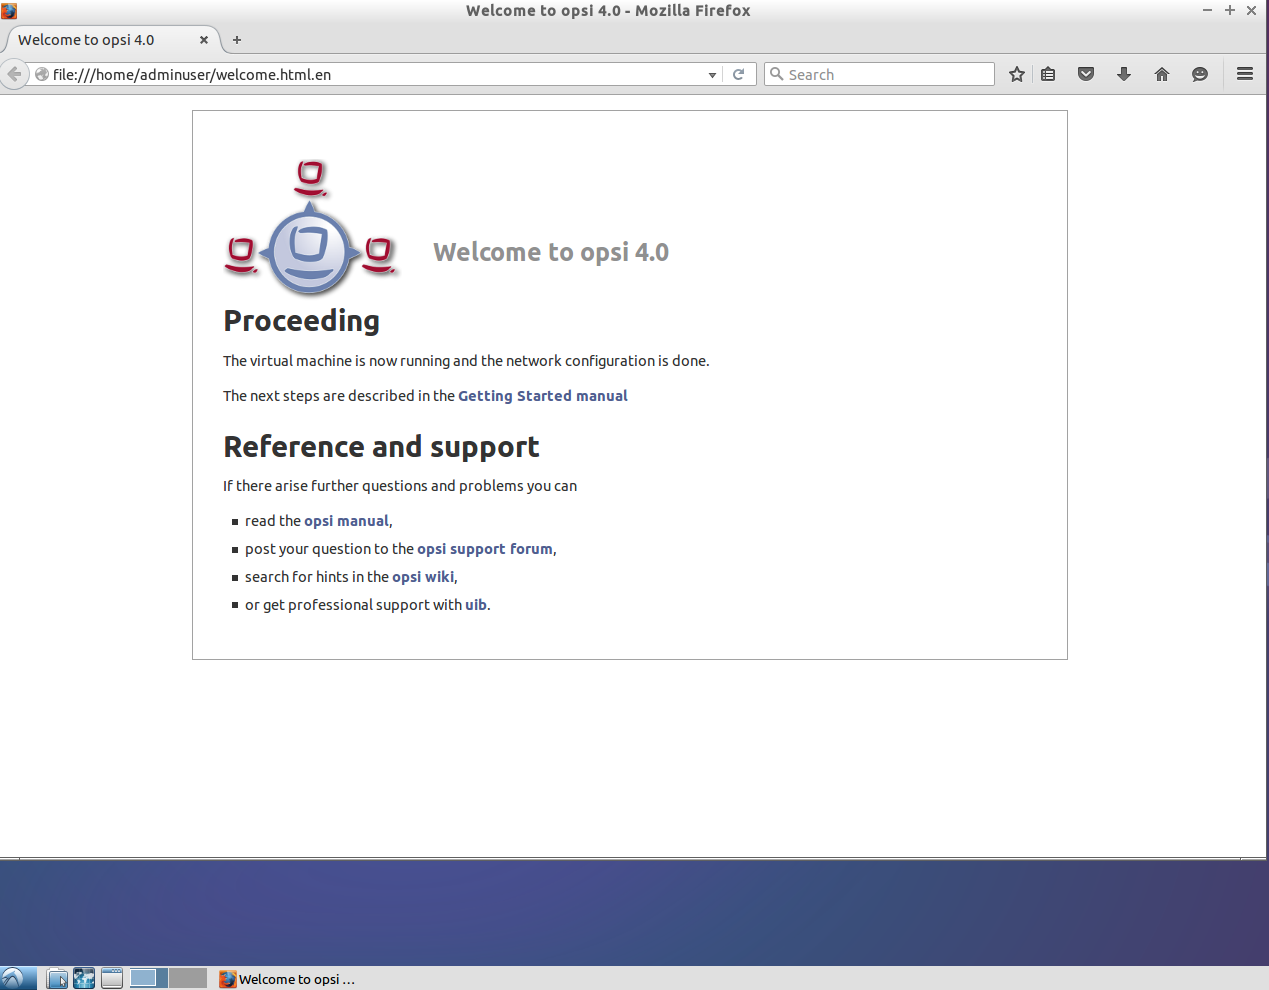
After the reboot, or after completing the network configuration, login as 'adminuser' with your password.
The graphical user interface of the opsi-server should have already started (a lightweight window manager is used). A "Firefox" browser window appears at startup, and displays this document and further information.
If you get a message that there is no network connection, this might be caused by the special configuration of the virtual appliance. Before trying other options, you should reboot the server again. (i.e. use the shutdown button in the GUI)
If the network was correctly configured in the previous steps, then you should be able to remotely access the opsi-server, for example:
-
use 'ssh' at the command line to access the server ('ssh' should already be installed on linux systems, for Windows use putty)
Use 'root' as the user name, and authenticate with the root password.
Terminal Window
In the following sections, some commands have to be entered into a command line interface. It may be the easiest way to work through these instructions.
The commands are input into a window called a "terminal window". Here are examples that explain how to access a terminal window:
-
Remote access per ssh on the opsi-server (see previous section)
-
Open a terminal window in the opsi-server graphical interface with a click on the terminal icon in the icon bar.
-
Open a terminal window in the opsi-server graphical interface with a right mouse click inside the interface, and choose "Terminal".
Note: the graphical interface has multiple desktops that are reachable using the variety of buttons in the upper-left-hand corner of the display.
We recommend cutting and pasting commands from this handbook directly into the opsi-server terminal window (most applications support cut and paste).
Example snippets from configuration files are formatted like this:
depoturl = smb://smbhost/sharename/pathExample snippets for commands that you have to execute are formatted like this:
cd /tmp
ls -l
Angle brackets '< >' mark abstract names. When entering commands, please replace the '<abstract name>' with a real name.
For example: The file share, where opsi places the software packages, may abstractly be noted as '<opsi-depot-share>'. If the real file share is /var/lib/opsi/depot, then you have to replace the abstract name by this exact string.
The location of the package '<opsi-depot-share>/ooffice' becomes /var/lib/opsi/depot/ooffice. .
Check the Network Connection
If the network configuration is correct, and the computer is connected to the Internet, then you can access any website using the browser in the start window.
If not everything is working, then you have to open a terminal window (maybe this is not yet possible from a remote connection, only from the server GUI) and then perform the necessary network connection checks and fixes.
You can re-enter the network configuration by entering this command in the terminal window:
1stboot.pyA reboot is forced with the command:
rebootIf the network connection works, then you can install opsi packages or update them, and configure the environment for the first installation test. If you want to use the virtual machine (and not install the opsi-server directly to your host system), then skip to Update and Configuration of the opsi-server.
Update the opsi-Server
To update your opsi-server you need to double click the Icon 'Update OS' on the desktop. To do this please enter the current password for the adminuser and confirm if necessary.
If necessary for your Internet access, adapt the file /etc/apt/apt.conf to your network circumstances (enter correct proxy or comment / delete line).
You can edit these using the program any text editor for example, 'midnight commander':
mcedit /etc/apt/apt.confInstall the standard opsi-products
By performing a double click the Icon 'First package installation' the minimal opsi-products will be installed. To do this please enter the current password for the adminuser. This automatically fetches the current opsi packages, including templates for OS deployments, from the opsi repositories and installs them on the server.
For more information see Importing the minimal opsi products.
Starting opsi-Server Interface
You can start the management interface by double clicking on the icon 'Opsi Configuration Editor'. For a description of the management interface check Installation of the management interface opsi-configed.
You have a running opsi server now, i.e. the opsi application itself is fully configured.
You can now proceed with:
opsi QuickInstall
opsi QuickInstall is a program to quickly and easily install an opsi-server on a Linux system—via a graphical setup tool or on the command line.
You can find our supported Linux distributions here:
Supported Linux Distributions
Preparations
First, make sure that the opsi-server has a valid DNS hostname. To do this, either check the entries in the /etc/hosts file or enter the following command:
getent hosts $(hostname -f)The result should look like this for example:
192.168.1.1 server.domain.tld serverThe output on your system should show the server’s IP address to which the opsi clients connect later on. It’s followed by the associated hostname, and the third field contains an optional alias (here: server), under which the computer can also be reached.
The file may look different on your distribution. If it contains only entries for 127.0.0.1 or localhost, edit the file /etc/hosts in the text editor of your choice. For the opsi-server, enter at least the IP address and the full host name, optionally an alias.
Download opsi QuickInstall
opsi-QuickInstall can be found on our servers under the following link: https://download.uib.de/opsi4.2/stable/quickinstall/
Download the zip file to your computer and unpack it, for example using this command on the shell:
unzip opsi-quick-install.zipAlternatively unpack the archive via the file manager of your graphical desktop environment (right click / Unpack here). You can install opsi QuickInstall wither with a graphical user interface or via the command line. The next two sections explain both ways.
The installer asks for so-called properties. For more information, please read the chapter on The product l-opsi-server. Here you can also find the default values of the properties. Note that for opsi QuickInstall the default for allow_reboot is set to false.
|
opsi QuickInstall: Graphical Setup Program
-
Change into the directory
guiin the file manager of your desktop environment and execute the installeropsi_quick_install_project, e.g. with a double click. -
In the following dialog box, select the language for the setup program from the upper drop-down menu. Choose the setup type as well. If you select Custom, then you can make more detailed settings.
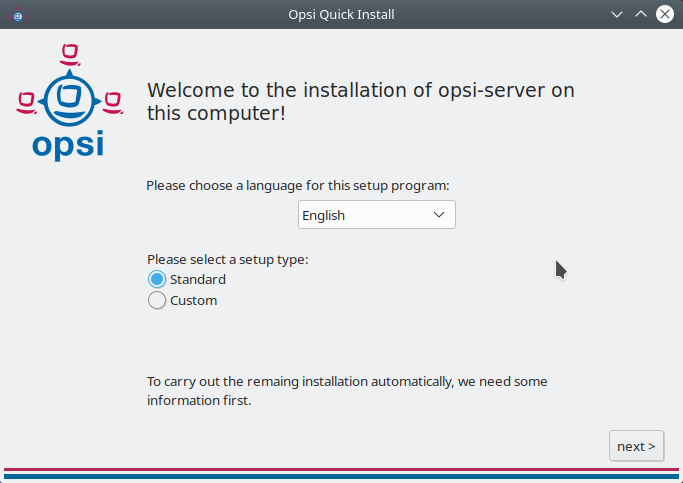 Figure 5. Choose the language and a setup type.
 -
Click on next > and fill in the dialogs.
Next to some fields you will find an iicon, which displays a tooltip with more information about the related topic.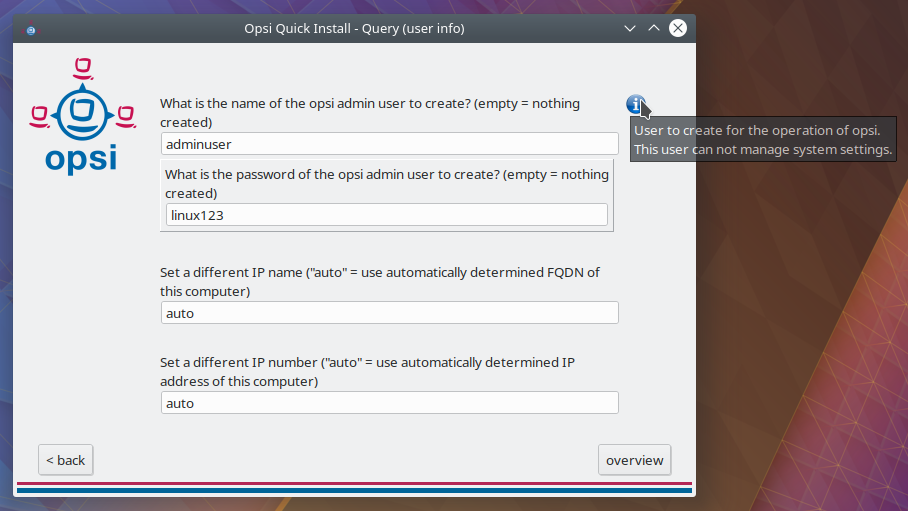 Figure 6. Hover the mouse over the small icon to display more information.
 -
In the last dialog window you fill in the fields opsi admin user and opsi admin password, among other things.
Be sure to choose a name other than the one shown in this example (Hover the mouse over the small icon to display more information.) and choose a strong password and not the one shown in this example. -
Click Overview to double-check your settings. If everything is correct, click finish, enter your password and confirm by clicking finish again. After that the opsi-server installation will start.
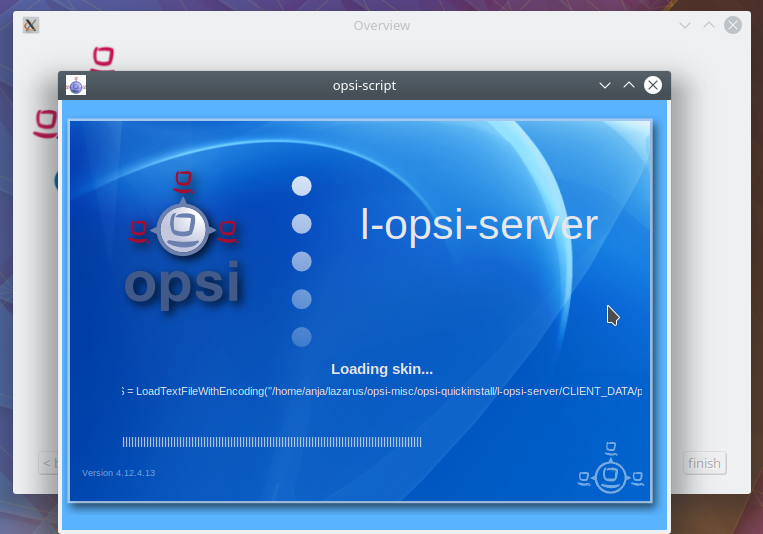
The installation may take a few minutes. When it’s finished, opsi QuickInstall will tell you if it was successful. If you see the message success, then your opsi-server is configured and ready for operation. You can now start with the installation of opsi products.
If you see a dialog like in If the installation fails, please check the log files for error messages. instead, please check the log files for error messages. You can find the logs in the two files /var/log/opsi-quick-install-l-opsi-server.log and /tmp/opsi_quickinstall.log.
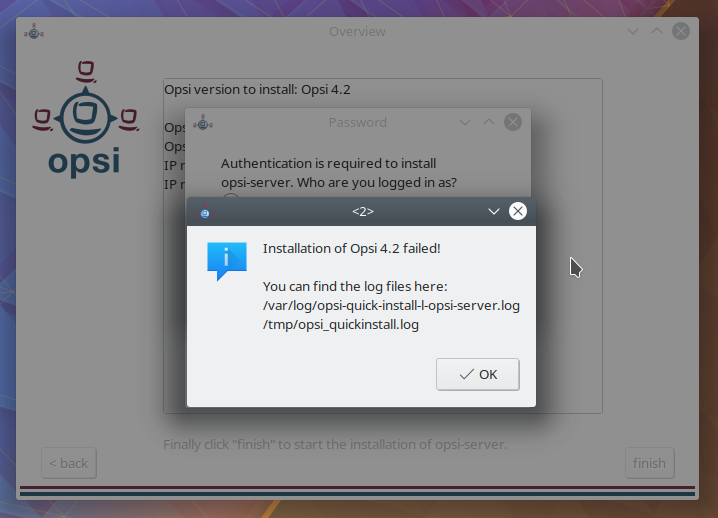
| If you have a support contract, you can also contact the uib support. |
opsi QuickInstall: Installation on the Command Line
The directory nogui contains the program opsi_quick_install_project, which supports the following parameters:
-
-d: The setup program uses the default values for the opsi-server installation. It sets up the opsi admin user with the usernameAlexandra(opsi QuickInstall version 4.2.0.1) oradminuser(from version 4.2.0.1-2) and the passwordlinux123.For security reasons change these default values after the installation. -
-f <file>: The setup program uses the values from the specified file for the opsi-server installation. -
-n: The setup program starts in interactive mode and asks for some parameters during the installation (recommended).
Starting the Setup Program in Interactive Mode
To start the setup program in interactive mode, enter this command:
sudo ./opsi_quick_install_project -nAfter that, answer the questions. You can enter the following commands at any time:
-
-b: jumps back to the previous question -
-h: displays additional information for questions that are marked with* -
[Enter]: uses the default values for a question
A summary at the end shows all your answers for a final check. If everything is correct, click [Enter] to start the installation of the opsi-server.
The installation may take a few minutes. When it’s finished, opsi QuickInstall will tell you if it was successful. If you see the message success, then your opsi-server is configured and ready for operation. You can now start with the installation of opsi products.
If you see the message failed instead, instead, please check the log files /var/log/opsi-quick-install-l-opsi-server.log and /tmp/opsi_quickinstall.log for error messages.
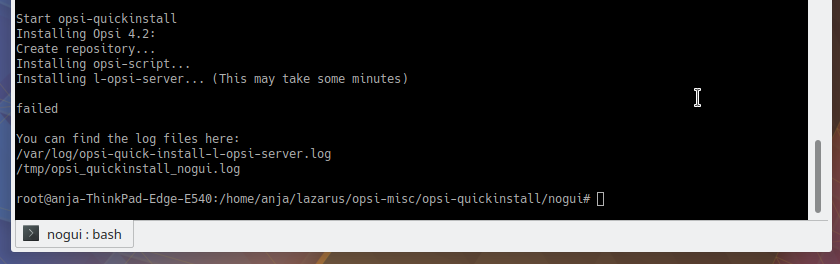
| If you have a support contract, you can also contact the uib support. |
Supported Linux Distributions
opsi QuickInstall works under the following distributions (names according to the output of the lsb_release command or according to the file os-release, since QuickInstall itself uses these names):
-
AlmaLinux 8, AlmaLinux 9,
-
Debian 9, Debian 10, Debian 11,
-
openSUSE 15.2, openSUSE 15.3, openSUSE 15.4,
-
RedHatEnterprise 8, RHEL 9,
-
Rocky 8, Rocky 9,
-
SUSE 15.1, SUSE 15.2, SUSE 15.3, SUSE 15.4,
-
Ubuntu 18.04, Ubuntu 20.04, Ubuntu 22.04,
-
Univention 4.4, Univention 5.0
-
AlmaLinux 8,
-
Debian 10, Debian 11,
-
openSUSE 15.2, openSUSE 15.3, openSUSE 15.4,
-
RedHatEnterprise 8,
-
Rocky 8,
-
SUSE 15.1, SUSE 15.2,
-
Ubuntu 18.04, Ubuntu 20.04, Ubuntu 22.04,
-
Univention 4.4, Univention 5.0
-
AlmaLinux 8,
-
Debian 10, Debian 11,
-
openSUSE 15.2, openSUSE 15.3,
-
RedHatEnterprise 8,
-
Rocky 8,
-
SUSE 15.1, SUSE 15.2,
-
Ubuntu 18.04, Ubuntu 20.04, Ubuntu 22.04,
-
Univention 4.4, Univention 5.0
-
Debian 10, Debian 11,
-
openSUSE 15.2, openSUSE 15.3,
-
SUSE 15.1, SUSE 15.2,
-
Ubuntu 18.04, Ubuntu 20.04,
-
Univention 4.4
Prerequisites for an installation on a server
From version 4.2 the opsi-server needs access to a Redis and a Grafana instance. If these services will also be provided by the opsi server, we recommend switching to the opsi-server-full package during the migration. This package installs and configures everything that is necessary on the opsi server (this will be referred to as a single server setup). This recommendation applies to all supported operating systems, except for Univention UCS. As previously, the opsi4ucs package should be installed on these systems.
|
The opsi-server-full package installs all necessary components to run opsi on one server. If certain components should not be installed, for example if Redis, MySQL or Grafana should run on another server, the packages opsi-server or opsi-server-expert can be used instead. |
We recommend using the official Grafana repositories for Grafana:
Debian/Ubuntu/UCS:
mkdir -p /usr/local/share/keyrings
REPO_URL=https://apt.grafana.com
REPO_KEY=/usr/local/share/keyrings/grafana.gpg
apt install -y apt-transport-https software-properties-common curl gpg
curl -fsSL ${REPO_URL}/gpg.key | gpg --dearmor | tee ${REPO_KEY} > /dev/null
echo "deb [signed-by=${REPO_KEY}] ${REPO_URL} stable main" > /etc/apt/sources.list.d/grafana.list
RHEL/CentOS/Alma/Rocky:
yum install wget
cd /etc/yum.repos.d
cat <<EOF > grafana.repo
[grafana]
name=grafana
baseurl=https://rpm.grafana.com
repo_gpgcheck=1
enabled=1
gpgcheck=1
gpgkey=https://rpm.grafana.com/gpg.key
sslverify=1
sslcacert=/etc/pki/tls/certs/ca-bundle.crt
EOF
openSUSE/SLES:
zypper install wget
cd /etc/zypp/repos.d
cat <<EOF > grafana.repo
[grafana]
name=grafana
baseurl=https://rpm.grafana.com
repo_gpgcheck=1
enabled=1
gpgcheck=1
gpgkey=https://rpm.grafana.com/gpg.key
sslverify=1
sslcacert=/etc/pki/tls/certs/ca-bundle.crt
EOF
If you want to use mysql instead of mariaDB, then you must specify a user with mysql_native_password when using opsi-setup --configure-mysql.
|
To activate mysql_native_password for the root user, the following steps are necessary:
-
enter
skip-grant-tablesin the mysql configuration under[mysqld]. -
restart mysql service
-
log in as root with mysql -u root -p
-
flush privileges;and -
ALTER USER 'root'@'localhost' IDENTIFIED WITH mysql_native_password BY 'NewPassword';execute. -
Remove
skip-grant-tablesagain and restart the service.
Installation on Debian / Ubuntu
In this chapter, we assume you are familiar with the debian package system (you will find information about this in the appropriate Debian books, in the manual pages, or under debian documentation).
| Please check the requirements and preperations! |
We recommend to install the following packages:
apt install host pigz apt-transport-https software-properties-common curl gpg
mkdir -p /usr/local/share/keyrings
Furthermore, samba needs to be installed:
apt install samba samba-common smbclient cifs-utilsTo start with the installation of opsi add the opsi repository to apt:
Ubuntu 22.04 LTS Jammy Jellyfish:
REPO_URL=https://download.opensuse.org/repositories/home:/uibmz:/opsi:/4.2:/stable/xUbuntu_22.04
REPO_KEY=/usr/local/share/keyrings/opsi.gpg
echo "deb [signed-by=$REPO_KEY] $REPO_URL/ /" > /etc/apt/sources.list.d/opsi.list
curl -fsSL $REPO_URL/Release.key | gpg --dearmor | sudo tee $REPO_KEY > /dev/null
Ubuntu 20.04 LTS Focal Fossa:
REPO_URL=https://download.opensuse.org/repositories/home:/uibmz:/opsi:/4.2:/stable/xUbuntu_20.04
REPO_KEY=/usr/local/share/keyrings/opsi.gpg
echo "deb [signed-by=$REPO_KEY] $REPO_URL/ /" > /etc/apt/sources.list.d/opsi.list
curl -fsSL $REPO_URL/Release.key | gpg --dearmor | sudo tee $REPO_KEY > /dev/null
Ubuntu 18.04 LTS Bionic Beaver:
REPO_URL=https://download.opensuse.org/repositories/home:/uibmz:/opsi:/4.2:/stable/xUbuntu_18.04
REPO_KEY=/usr/local/share/keyrings/opsi.gpg
echo "deb [signed-by=$REPO_KEY] $REPO_URL/ /" > /etc/apt/sources.list.d/opsi.list
curl -fsSL $REPO_URL/Release.key | gpg --dearmor | sudo tee $REPO_KEY > /dev/null
Debian 11 Bullseye:
REPO_URL=https://download.opensuse.org/repositories/home:/uibmz:/opsi:/4.2:/stable/Debian_11
REPO_KEY=/usr/local/share/keyrings/opsi.gpg
echo "deb [signed-by=$REPO_KEY] $REPO_URL/ /" > /etc/apt/sources.list.d/opsi.list
curl -fsSL $REPO_URL/Release.key | gpg --dearmor | sudo tee $REPO_KEY > /dev/null
Debian 10 Buster:
REPO_URL=https://download.opensuse.org/repositories/home:/uibmz:/opsi:/4.2:/stable/Debian_10
REPO_KEY=/usr/local/share/keyrings/opsi.gpg
echo "deb [signed-by=$REPO_KEY] $REPO_URL/ /" > /etc/apt/sources.list.d/opsi.list
curl -fsSL $REPO_URL/Release.key | gpg --dearmor | sudo tee $REPO_KEY > /dev/null
Check for success of the key import:
gpg /usr/local/share/keyrings/opsi.gpg 2>/dev/nullshould contain the output:
pub   rsa2048 2017-09-30 [SC] [expires: 2023-11-09]
      2E98F7B5A5B2C8FE7F609705D1F933E6D8361F81
uid           home:uibmz:opsi OBS Project <home:uibmz:opsi@build.opensuse.org>
If necessary for your Internet access, adapt the file /etc/apt/apt.conf to your network circumstances (enter correct proxy or comment / delete line).
You can edit these using the program any text editor for example, 'midnight commander':
mcedit /etc/apt/apt.confBefore installing the opsi packages, make sure that your server has a valid FQDN:
hostname -fThe output FQDN must contain at least two dots (see: requirements).
Execute the following commands in order to install opsi on your server:
Single server setup:
apt update
apt install opsi-server-full
Manual setup:
apt update
apt install redis-server redis-timeseries grafana mariadb-server
systemctl daemon-reload
systemctl enable grafana-server
systemctl start grafana-server
apt install opsi-server
apt install opsi-windows-support
If you are asked for the tftp directory during the tftpd-installation answer with /tftpboot.
Assuming all of the above steps completed successfully, we can assume that the network is properly configured.
Next continue on with configuration.
Installation on a Univention Corporate Server (UCS)
| Please check the configuration requirements and preperations! |
The installation on a Univention Corporate Server is possible through the Univention App Center as well as the classic way by using the repositories maintained by uib.
Both are equally supported methods of installations. We recommend using only one method per server. If new packages for an operating system are released they are available right away if the repositories maintained by uib are used. If the installation is made through the App Center the change to a newer UCS version (i.e. from UCS 4.4 to UCS 5) will be blocked until all installed apps are available for the new version of the operating system.
With opsi 4.2 the ucs support was adepted to the opsi-standard like on other supported distibutions. The function of opsi4ucs was implemented in opsi-server package and its variants. The opsi4ucs package exists in opsi 4.2 as a transitionpackage to make the migration easier. This package will automatically removed during the upgrade process.
The first opsi-server in an environment will have its backend configured to make use of the installed MySQL server. All subsequent servers will be registered as depots in opsi.
Manual opsi-installation on UCS (without App-Center)
| Please check the requirements and preperations! |
Necessary preparations:
-
Samba has to be configured. For the use on a server with the 'member' role,
univention-sambahas to be used instead ofunivention-samba4. -
univention-mariadborunivention-mysqlhas to be installed. -
If the machine should also work as DHCP-server, then the dhcpd daemon has to be configured and should be running.
The installation of opsi is possible on a server with the roles 'master', 'backup', 'slave' or 'member'. For the installation on a 'member' you need to read Hints about installing opsi on an UCS server with the role 'member'!
The following documentation describes an installation on a 'master' with Samba 4.
|
When installing on a 'slave' the server must be already joined to the 'master' and Samba 4 has to be installed first. UCS configuration is usually done on the 'master' while the installation and configuration of opsi takes place on the 'slave'. |
The classic installation with the user 'pcpatch' in the primary group 'pcpatch' cannot be adhered to with UCS. Samba 4 has the same fundamental restrictions as Active-Directory, so groups with the same name as a user are not allowed.
For this reason the configuration file /etc/opsi/opsi.conf has been introduced for UCS 3. This file controls how the group used for the Samba shares will be named. Since UCS 3 the group name 'pcpatch' will be renamed to 'opsifileadmins' with this file.
This means that users that need rights for opsi (opsi package builders for example) should not be members of the group 'pcpatch' but must be members of the group 'opsifileadmins'. This peculiarity applies only to UCS and is different to other distributions and different to the next chapters in the opsi-documentation.
With UCS the user 'pcpatch' is created as a full domain user. For more information about this new configuration file please refer to the opsi-manual.
-
Next add the opsi4ucs repository:*
Univention UCS 4.4:
REPO_URL=https://download.opensuse.org/repositories/home:/uibmz:/opsi:/4.2:/stable/Univention_4.4
REPO_KEY=/usr/local/share/keyrings/opsi.gpg
echo "deb [signed-by=$REPO_KEY] $REPO_URL/ /" > /etc/apt/sources.list.d/opsi.list
curl -fsSL $REPO_URL/Release.key | gpg --dearmor | sudo tee $REPO_KEY > /dev/null
Univention UCS 5.0:
REPO_URL=https://download.opensuse.org/repositories/home:/uibmz:/opsi:/4.2:/stable/Univention_5.0
REPO_KEY=/usr/local/share/keyrings/opsi.gpg
echo "deb [signed-by=$REPO_KEY] $REPO_URL/ /" > /etc/apt/sources.list.d/opsi.list
curl -fsSL $REPO_URL/Release.key | gpg --dearmor | sudo tee $REPO_KEY > /dev/null
For installation the following commands must be entered next:
Single server setup:
univention-install opsi-server-fullManual setup:
univention-install redis-server redis-timeseries grafana
systemctl daemon-reload
systemctl enable grafana-server
systemctl start grafana-server
univention-install opsi-server
If the role of the target system different than 'master' or 'backup' then we have to run the opsi4ucs Join-Script:
univention-run-join-scriptsA link to the management interface can be found at the URL https://<servername>:4447.
To use the opsi configuration editor the user has to be a member of the group opsiadmin. The group membership can be edited by using Univention-Admin. The user Administrator will automatically be added to this group during the opsi installation.
Finally, in UDM, for the 'opsi_depot'-share we have to set the following option under Advanced Settings → Advanced Samba Settings: 'follow symlinks' must be set to 'yes'. The same should be done for the 'opsi_depot_rw'-share, so the driver integration will run without problems. If the directory /var/lib/opsi/depot is located on an extra partition or hard disk then the option for wide links should be set to 'yes'.
To make sure that opsi is running with the proper settings restart opsi by entering the following commands:
opsi-setup --init-current-config
opsi-set-rights
systemctl restart opsiconfd.service
systemctl restart opsipxeconfd.service
Please be advised that samba 4 will not be automatically restarted, since it is a important service on which other software may depend. You have to restart it manually. After restarting samba there may be a slight delay before the new shares are accessible.
Because there is no direct connection between the Univention LDAP and the opsi-backend all Clients have to be created twice. First in the Univention-LDAP using UDM and then in opsi including all system information (in particular the MAC address). Deleting a LDAP client in Univention will not delete the client in opsi and vice versa. This problem is further discussed in Synchronising data from LDAP to opsi.
Since opsi was installed on an existing server we assume that the network configuration is correct.
Continue with the installation by skipping forward to configuration.
| The Unix commands used in the following chapters are for Debian systems. You may have to change them to match your Linux system. |
Hints about installing opsi on an UCS server with the role 'member'
Installing opsi on a server with the role 'member' is possible.
After an installation you need to make sure that the user that will be used to access the depot exists in the current domain.
Check the host parameter clientconfig.depot.user for this.
Let’s assume that the domain is backstage, then the value has to be backstage\pcpatch. If it is memberserver\pcpatch then it has to be changed.
Setting the password for the user pcpatch through opsi-admin fails because of the missing AD write access of a 'member' server.
To change the password you have to do so additionally on a server with write access - a 'master', 'backup' or 'slave'.
PXE-Boot configuration for operating system installation
If the PXE-Boot should be used for OS installations the DHCP-service on the relevant UCS-System has to be reconfigured. There are two characteristics which differentiate UCS from other supported distributions.
-
The configuration is not made automatically during the opsi installation on an active UCS infrastructure because often the configuration is already in use.
-
The opsi-tftpd-hpa is not configured as usual using the directory
/tftpbootas base directory, instead the/var/lib/univention-client-bootis used. All important files of opsi-linux-bootimage will be moved from/tftpbootto the base directory. The side effect is that the DHCP-Option filename must bepxelinux.0instead oflinux/pxelinux.0.
To implement these settings, a policy must be created in the UCS system. This policy interacts with the existing policies, and has to be implemented appropriately. If opsi was installed on an UCS test system without existing policies, check if the DHCP-service is installed. If the DHCP-service is already installed the easiest way to create the policy is in the UMC-webinterface (Univention Management Console) of the UCS-server. To do this choose the category "Domain" and underneath the module DHCP-server. Next you have to choose the service (in a testing system you will usually find only one entry). In the following view choose the menuitem policies. The policy we need is a DHCP-Boot policy. In the policy configuration choose cn=default-settings as default entry (there should be only one entry) and choose 'edit'. Under basic settings - DHCP-boot enter for the bootserver option the IP address of the opsi-server and enter for the boot-filename option pxelinux.0.
| If the policy is configured like mentioned above, this affects every device that uses DHCP from this server. Therefore, this instruction is meant only for testing opsi and UCS together. In a productive UCS environment you should not configure this policy as described previously. |
Optionally, these settings can be done at the console with the udm command. You can find more information about this in the UCS-documentation.
Synchronising data from LDAP to opsi
In an opsi4ucs installation Windows clients have to be created in the UDM first and then they have to be created in opsi-configed. Changes to the client in UDM will not be passed on to opsi. For example if a client’s MAC address changes in LDAP and in opsi a netboot-product is set to setup, the boot configuration would be provided with an incorrect MAC address.
The solution for this is the extension 'opsi-directory-connector'. Please consult the manual for more information.
Installation on openSUSE or Suse Linux Enterprise Server (SLES)
| Please check the requirements and preperations! |
Necessary preparations:
-
Samba must be installed and configured.
-
mariadb-servermust be installed. -
If the machine should also act as DHCP-server then the dhcpd daemon has to be configured and running.
You can use zypper to add the opsi repositories:
openSUSE Leap 15.1:
zypper addrepo https://download.opensuse.org/repositories/home:uibmz:opsi:4.2:stable/openSUSE_Leap_15.1/home:uibmz:opsi:4.2:stable.repoopenSUSE Leap 15.2:
zypper addrepo https://download.opensuse.org/repositories/home:uibmz:opsi:4.2:stable/openSUSE_Leap_15.2/home:uibmz:opsi:4.2:stable.repoopenSUSE Leap 15.3:
zypper addrepo https://download.opensuse.org/repositories/home:uibmz:opsi:4.2:stable/openSUSE_Leap_15.3/home:uibmz:opsi:4.2:stable.repoSLES 15SP1:
zypper addrepo http://download.opensuse.org/repositories/home:uibmz:opsi:4.2:stable/SLE_15_SP1/home:uibmz:opsi:4.2:stable.repoSLES 15SP2:
zypper addrepo http://download.opensuse.org/repositories/home:uibmz:opsi:4.2:stable/SLE_15_SP2/home:uibmz:opsi:4.2:stable.repoSLES 15SP3:
zypper addrepo http://download.opensuse.org/repositories/home:uibmz:opsi:4.2:stable/SLE_15_SP3/home:uibmz:opsi:4.2:stable.repoAfter adding the repository, the installation can be started:
Single server setup:
zypper refresh
  Do you want to (r)eject the Key, (t)emporary or (a)lways trust? [r/t/a/?] (a): a
zypper -v install opsi-server-full
Manual setup:
zypper refresh
zypper install redis-server redis-timeseries grafana
systemctl daemon-reload
systemctl enable grafana-server
systemctl start grafana-server
zypper -v install opsi-server
zypper -v install opsi-windows-support
Please make sure that your firewall configuration allows connections to the following ports:
-
tftp: 69/UDP
-
opsi: 4447/TCP and 4441/TCP
In case you used an utility like yast or autoyast to help you with your network configuration it is possible the tool created an entry in the /etc/hosts file like:
127.0.0.2 <fqdn> <hostname>If you want to leave the configuration of the DHCP server to opsi, this entry has to be changed to the public IP address of the server.
Please continue with configuration.
| The unix commands used in the following chapters are based on Debian systems. You may have to adapt them to the corresponding commands for your linux system. |
Installation on CentOS or RedHat Enterprise Linux (RHEL)
The installation of opsi on CentOS, Red Hat Enterprise Linux (RHEL), Alma Linux or Rocky Linux differs only by the used repository.
| Please check the configuration requirements and preperations! |
When using Red Hat Enterprise Linux, you must register with the Red Hat Network to have access to all required packages in the Red Hat repositories:
subscription-manager register
subscription-manager attach --auto
Necessary preparations:
-
Install Samba and the database:
yum install mariadb-server samba samba-client -
Configure samba and database:
systemctl start smb.service systemctl start nmb.service systemctl start mariadb.service systemctl enable smb.service systemctl enable nmb.service systemctl enable mariadb.service mysql_secure_installation -
If the machine should also act as DHCP-server then the dhcpd daemon has to be configured and running.
Add the repositories:
CentOS 8:
cd /etc/yum.repos.d/
wget https://download.opensuse.org/repositories/home:uibmz:opsi:4.2:stable/CentOS_8/home:uibmz:opsi:4.2:stable.repo
yum makecache
RHEL 8:
cd /etc/yum.repos.d/
wget https://download.opensuse.org/repositories/home:uibmz:opsi:4.2:stable/RHEL_8/home:uibmz:opsi:4.2:stable.repo
yum makecache
Alma 8:
cd /etc/yum.repos.d/
wget https://download.opensuse.org/repositories/home:uibmz:opsi:4.2:stable/AlmaLinux_8/home:uibmz:opsi:4.2:stable.repo
yum makecache
Rocky 8:
cd /etc/yum.repos.d/
wget https://download.opensuse.org/repositories/home:uibmz:opsi:4.2:stable/RockyLinux_8/home:uibmz:opsi:4.2:stable.repo
yum makecache
After adding the repository you may start the opsi installation:
Single server setup:
yum install opsi-server-fullManual setup:
yum makecache
yum install redis-server redis-timeseries grafana.x86_64
systemctl daemon-reload
systemctl enable grafana-server
systemctl start grafana-server
yum install opsi-server
yum install opsi-windows-support
You may be asked to import the GPG key of the repository. The message is pretty similar to the following one:
   Importing GPG key 0xD8361F81 "home:uibmz OBS Project <home:uibmz@build.opensuse.org>" from http://download.opensuse.org/repositories/home:/uibmz:/opsi:/4.2:/stable/CentOS_8/repodata/repomd.xml.key
   Is this ok [y/N]: y
Please answer with 'y'.
Please make sure that your iptables and SELinux configuration allow access to the following ports:
-
tftp: 69/UDP
-
opsi: 4447/TCP and 4441/TCP
Assuming all of the previous steps were completed successfully we can assume that the network is properly configured.
Next continue with configuration.
| The unix commands used in the following chapters are based on Debian systems. You may have to adapt them to match your CentOS/RHEL/Alma/Rocky system. |