Adding Clients (macOS)
This chapter outlines the process of integrating macOS clients into the opsi environment. We’ll first guide you through adding existing clients, followed by instructions on how to add new clients.
| opsi also supports the management of Linux and Windows clients. For detailed information on these, refer to the chapters Linux Clients and Windows Clients. |
Integrating existing Clients
To add existing macOS clients with an already installed operating system to opsi, install the client agent on the respective computer. Once installed, the client will appear in the client list of the management interface, even if you have not previously added it there.
There are two primary methods for installing the client agent:
-
Using the Installer on the Client: This approach involves installing the client agent directly on the client. It’s especially effective for setting up individual computers.
-
Using opsi-deploy-client-agent: This method focuses on installing the client agent via the server. It’s optimal for mass rollouts, assuming the required activations are in place on the macOS clients.
It may be necessary to grant the opsiclientd full disk access (see section Granting Full Disk Access).
If you already have another software distribution method in place, you can use it to deploy the opsi-mac-client-agent.
|
Using the Installer on the Client
This method is ideal for integrating individual computers as clients in an opsi environment. Follow these steps:
-
Log in to the client.
-
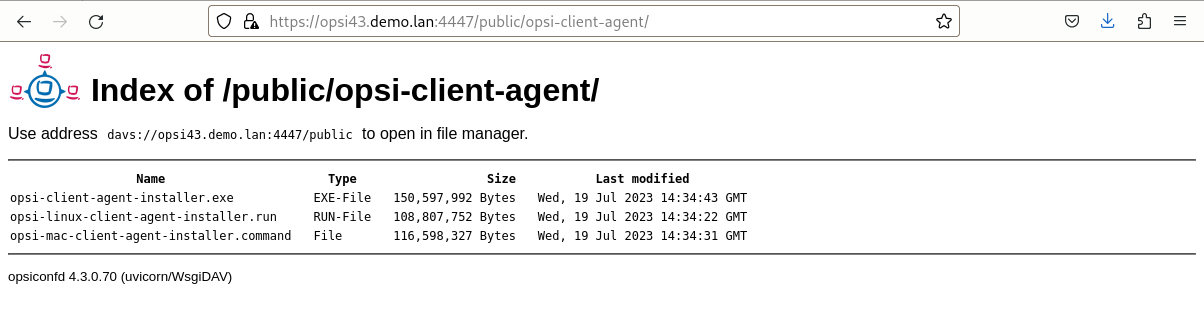
Download the installer from your opsi config server. It is located at
https://<fqdn_or_ip_of_the_config_server>:4447/public/opsi-client-agent/. For Linux, the program is namedopsi-linux-client-agent-installer.run, and for macOS, it’sopsi-mac-client-agent-installer.command.
-
Make the file executable:
chmod +x opsi-linux-client-agent-installer.run(Linux)
chmod +x opsi-mac-client-agent-installer.command(macOS) -
Execute the installer; root rights are required for both Linux and macOS:
sudo ./opsi-linux-client-agent-installer.run(Linux)
sudo ./opsi-mac-client-agent-installer.command(macOS) -
The installer then unpacks itself into a temporary local directory and launches the included
oca-installation-helper.
-
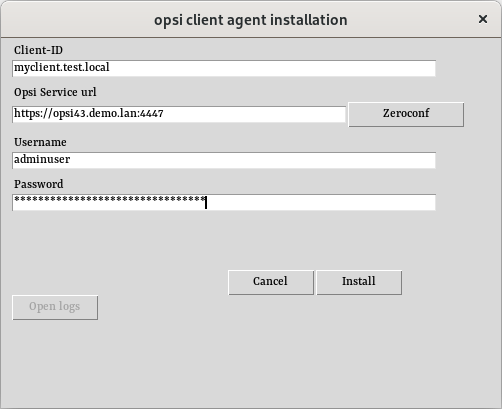
In the dialog box, enter the details for the client ID, the opsi service URL, the username, and the password. The fields may already be pre-filled, but ensure they are adjusted to match your environment:
-
The client ID usually corresponds to the FQDN (Fully Qualified Domain Name) of the client.
-
The opsi service URL should be formatted as
https://<fqdn_or_ip_of_config_server>:4447. -
For initial installations, use the username and password of an account in the
opsiadmingroup (refer to chapter Authorizations). For reinstallation, you may use the client ID and the host key.
-
-
The installer will contact the server via the opsi web service to register the client with the server. Subsequently, it executes the
setup.opsiscriptof the client agent using the includedopsi-script.
| When running the installer, you can include parameters to automate various processes. Detailed information is available in the respective client agent chapters. |
Using opsi-deploy-client-agent
The opsi-deploy-client-agent tool enables the distribution of the opsi client agent directly from the opsi server to the clients, offering an efficient approach for integrating numerous clients into the opsi environment from the server itself.
Requirements for macOS clients:
-
An administrative account
-
Activated SSH access
| SSH access is disabled by default in current versions of macOS. You can enable it via the System Preferences under Sharing or System Preferences / General / Sharing, in the Advanced section. Enable the Remote Login option. |
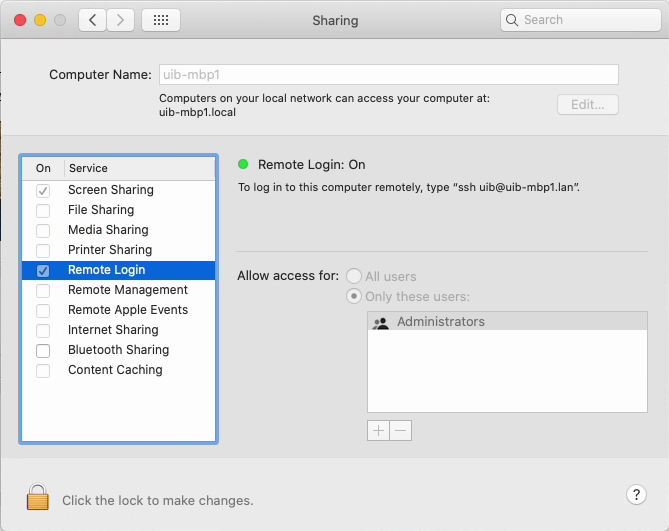
Alternatively, enter the following command in a terminal window:
sudo launchctl load -w /System/Library/LaunchDaemons/ssh.plistYou can check the current status with this command:
$ sudo systemsetup -getremotelogin
Password:
Remote Login: On
To deactivate SSH access on the command line, enter this command:
sudo launchctl unload /System/Library/LaunchDaemons/ssh.plistYou can find the opsi-deploy-client-agent on the opsi server in the directory /var/lib/opsi/depot/opsi-mac-client-agent. The program requires root privileges; alternatively, it is sufficient if the user is a member of the opsifileadmins group. The tool performs the following steps:
-
Generate clients on the server
-
Copy installation files and configuration (e.g., the host key)
-
Start the installation via the
oca-installation-helper(non-interactive)
The opsi-deploy-client-agent tool accepts IP addresses, hostnames, and FQDNs. It tries to automatically detect what type of address the user has passed.
Switch to the main directory of the program:
cd /var/lib/opsi/depot/opsi-mac-client-agentUse the --help parameter to print the online help:
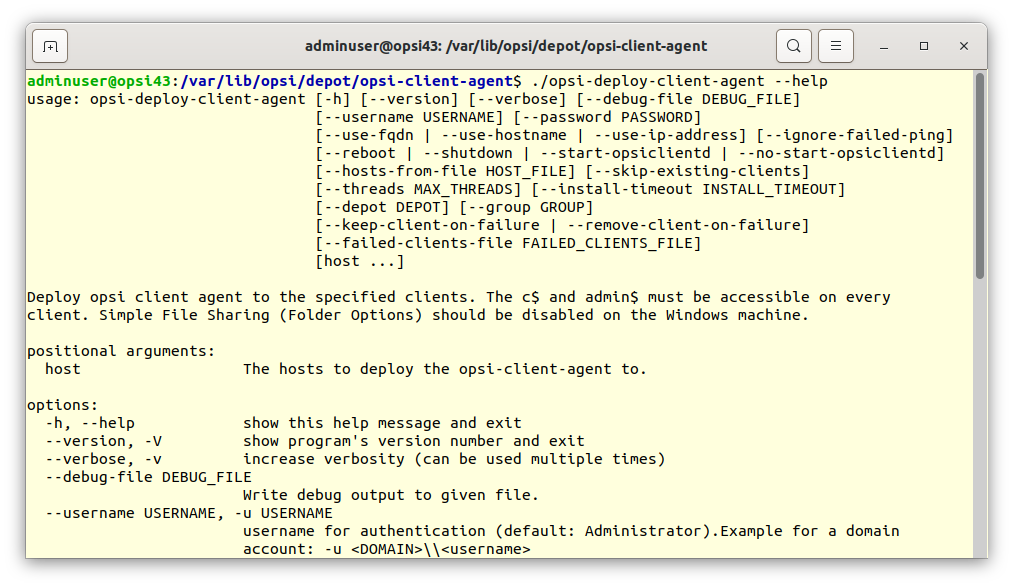
Typical commands are:
-
For a single client:
./opsi-deploy-client-agent -v --user=root mac-client-
For a list of clients:
./opsi-deploy-client-agent -v --user=root --hosts-from-file HOSTFILE.TXT --skip-existing-clientsThe file HOSTFILE.TXT contains a list of clients, one name (FQDN) per line. If the clients are not yet known to the opsi server, opsi-deploy-client-agent attempts to install the opsi-mac-client-agent on these machines.