Clients
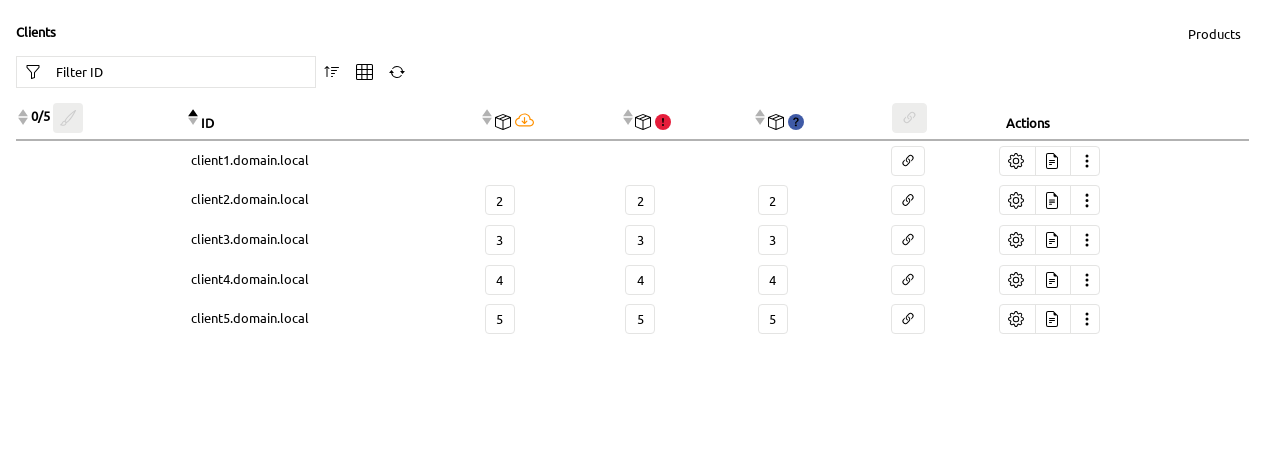
All clients of the selected servers are listed in the Clients table. You can access this view through the left navigation bar under Clients / All Clients.
Creating a Client
To manage computers with opsi, they must be registered as clients in the system. Additionally, a client agent must be running on these computers to enable communication between the server and the client (see chapter opsi Clients).
In the WebGUI, create a new opsi client by navigating to Clients / Creation. Fill out the form with a name (field ID), a description, the IP and MAC address, select a depot server, and optionally assign a group.
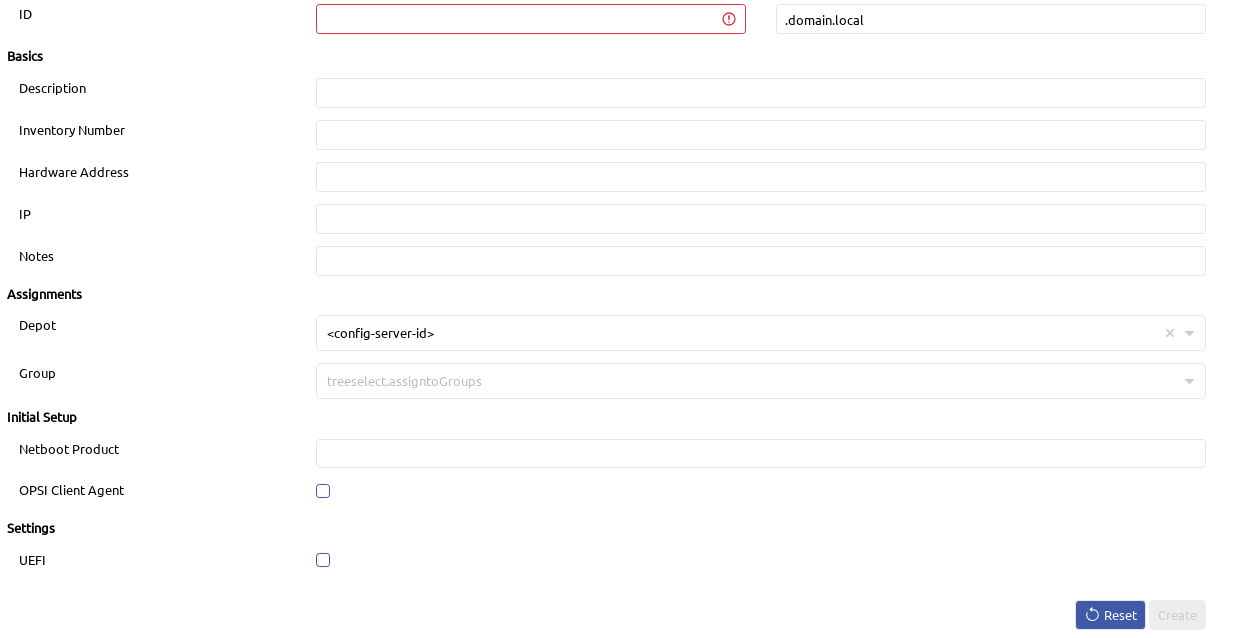
In the Initial Setup section, click in the Netboot Product field to open a list of available Netboot Products for automatic operating system installation. Optionally, you can activate the checkboxes for OPSI Client Agent (see section Deploy Client Agent) and UEFI. Finally, click Create.
| To create a new opsi client, at least one entry is required in the ID field. New clients are added to the opsi config server by default. |
Performing Actions
There are several actions you can perform for a specific client through the WebGUI. Access these actions via the client table (Clients / All Clients). Select a client and click on the icon with the three dots (image::gui:webgui/opsi-webgui_buttonclientactions.png[Actions]). Alternatively, you can access the Actions menu through the right-click context menu.
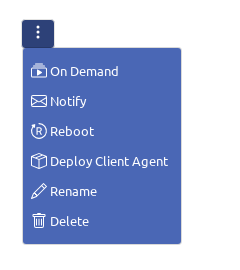
The following sections describe each action in detail.
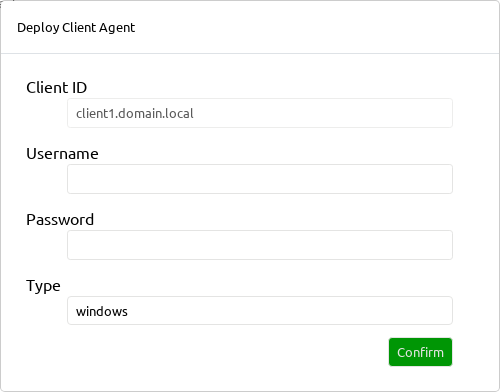
Deploy Client Agent
As mentioned, the opsi client agent must be installed on a client for opsi to manage that computer. If you did not request this during client creation, you can do so later using the action image::gui:webgui/opsi-webgui_buttondeployagent.png[Deploy Client Agent].
| If you use opsi to deploy the operating system on the client, the client agent is automatically installed and does not need to be explicitly requested. |
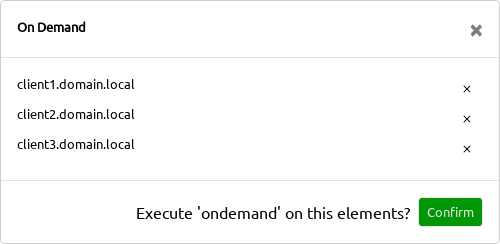
On Demand
You can push software installation, updates, etc., on demand using the action image::gui:webgui/opsi-webgui_buttonondemand.png[OnDemand], meaning they will be executed immediately on the client. To do this, explicitly request the on_demand event (see section Configuring Events).
You can execute on_demand on multiple clients. Select the computers and click the On Demand button in the Quick Panel. A pop-up window will open, showing the list of selected clients. Here, you can remove clients from the list. Click the Confirm button to execute the event.
|
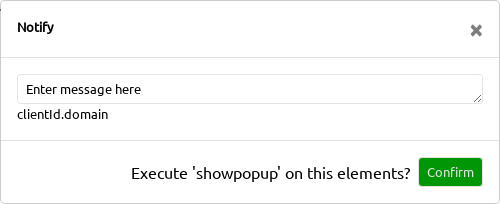
Notify
You can send messages to one or more clients using the image::gui:webgui/opsi-webgui_buttonnotify.png[Notify] action to inform users about upcoming actions. A pop-up window will open, allowing you to type in the message.
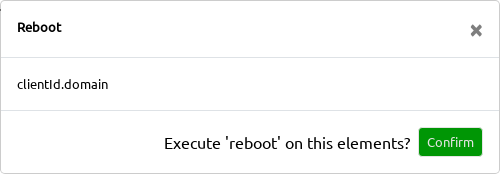
Reboot
Click on image::gui:webgui/opsi-webgui_buttonreboot.png[Reboot] in the menu to restart one or more clients. Confirm the action in a pop-up window before the reboot.
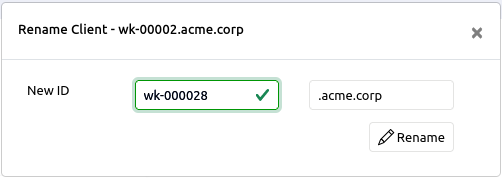
Rename
Select a client and then the image::gui:webgui/opsi-webgui_buttonrename.png[Rename] action from the menu. A pop-up window will open, allowing you to enter the new name. If the name is already taken, you will see a message indicating that the client already exists. Otherwise, the input field will be outlined in green, and you can click Rename.

Client Groups
By default, there are the following client groups: groups, clientdirectory, and clientlist. A group is uniquely defined by its name and cannot be duplicated, while a client can be assigned to multiple groups. Exception: In the clientdirectory group, a client can only appear once. The clientlist group automatically displays all clients of the selected depots.
In the Quick Selections, the tab image::gui:webgui/opsi-webgui_quickpanel_tab_clients.png[Quick Panel: Groups] displays the groups and the assigned clients in a tree structure. The number next to the icon corresponds to the number of selected clients.
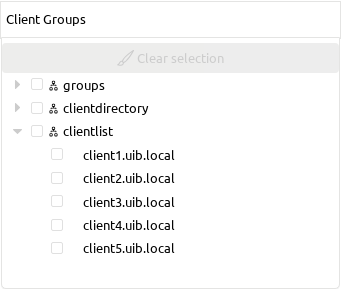
| For a detailed view of the clients, sort the Clients table by the selected clients. |
For more information on managing groups, see the chapter Groups.
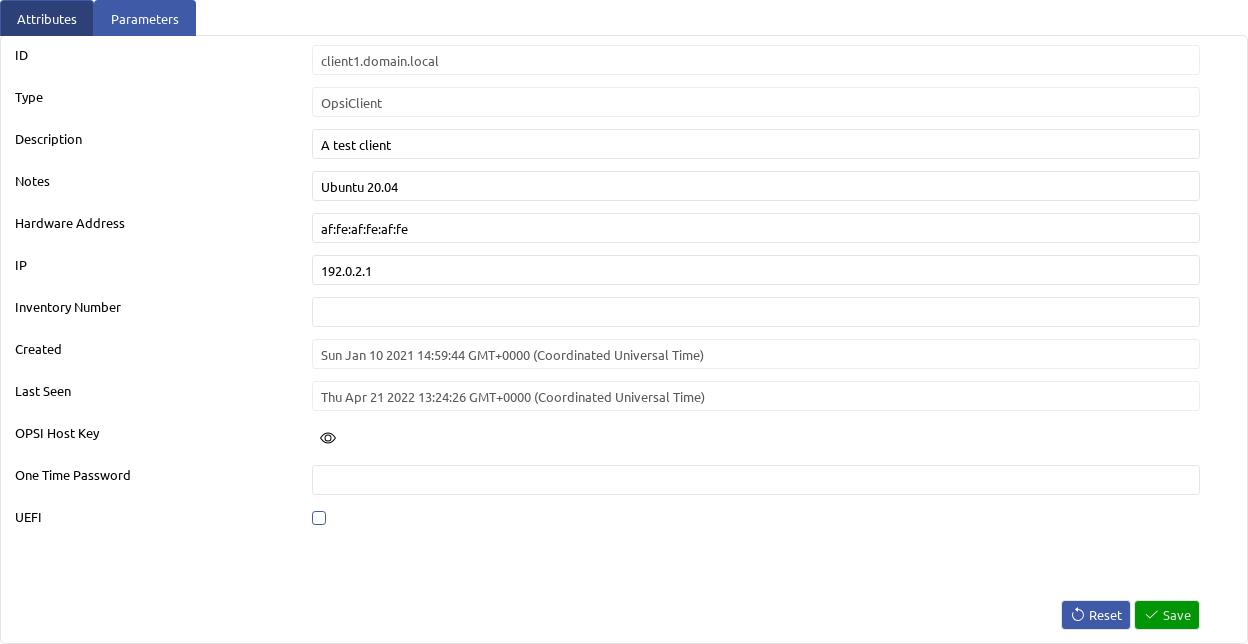
Editing Attributes and Parameters
There are two ways to edit client attributes and parameters: either via Clients / Configuration or via Clients / All Clients and the configuration icon image::gui:webgui/opsi-webgui_buttonconfig.png[Configuration]. The latter has the advantage of faster switching between clients since the settings appear in a column directly next to the clients.
| The Quick save function is activated by default (see section Quick Save). This means that all changes are saved immediately and you cannot see or restore the previous state! |
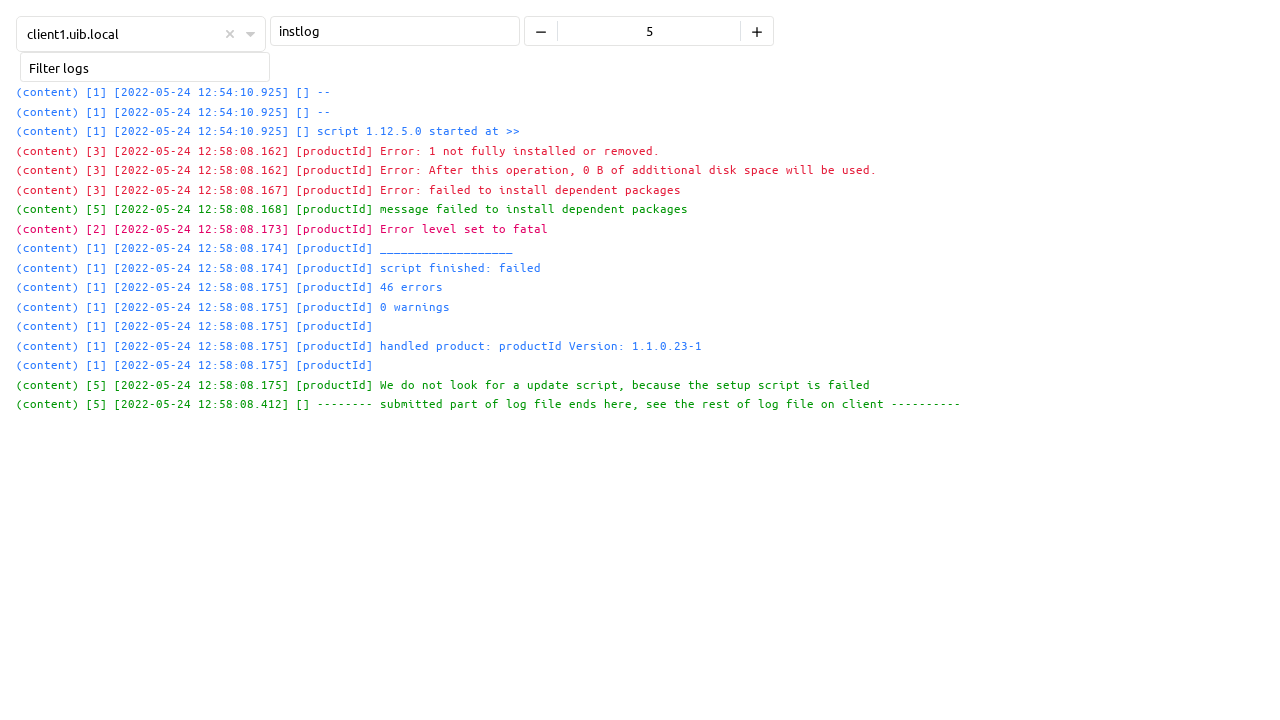
Viewing Logfiles
To view the logfiles of the clients, open Clients / Logs from the left sidebar, or click on the logs icon image::gui:webgui/opsi-webgui_buttonlog.png[Logs] in the client table (Clients / All Clients). The latter allows for faster switching between different clients, as the logs appear in a column directly next to the clients.
Clicking in the instlog field (default) opens a drop-down menu where you can select the desired logfiles (bootimage, clientconnect, instlog, opsiconfd, and userlogin). You can also adjust the log level using the plus and minus signs (default: 5).