Command Line Tools
This chapter provides an overview of essential command line tools for OPSI administration, arranged in alphabetical order for easy reference.
opsi-admin
The opsi-admin command line tool allows you to interact with the OPSI API. It offers both an interactive mode (-i) and a non-interactive mode, suitable for scripting purposes.
Please also refer to the section on opsi-cli regarding opsi-cli. This tool is newer, more robust, and versatile, providing functionalities similar to opsi-admin. Since version 4.2.0.187, opsi-cli has been included in the opsi-utils package and is available on Linux, Windows, and macOS.
|
When using opsi-admin to access the OPSI API, specify the service URL (--address), a username (--username), and the corresponding password (--password). If you don’t provide a service URL, opsi-admin defaults to the one specified in /etc/opsi/opsi.conf. If the username and password are not included in the command, authentication will occur using the host ID and the cost key from /etc/opsi/opsi.conf.
| You can store the access data in a personal configuration file (see section Configuration File). |
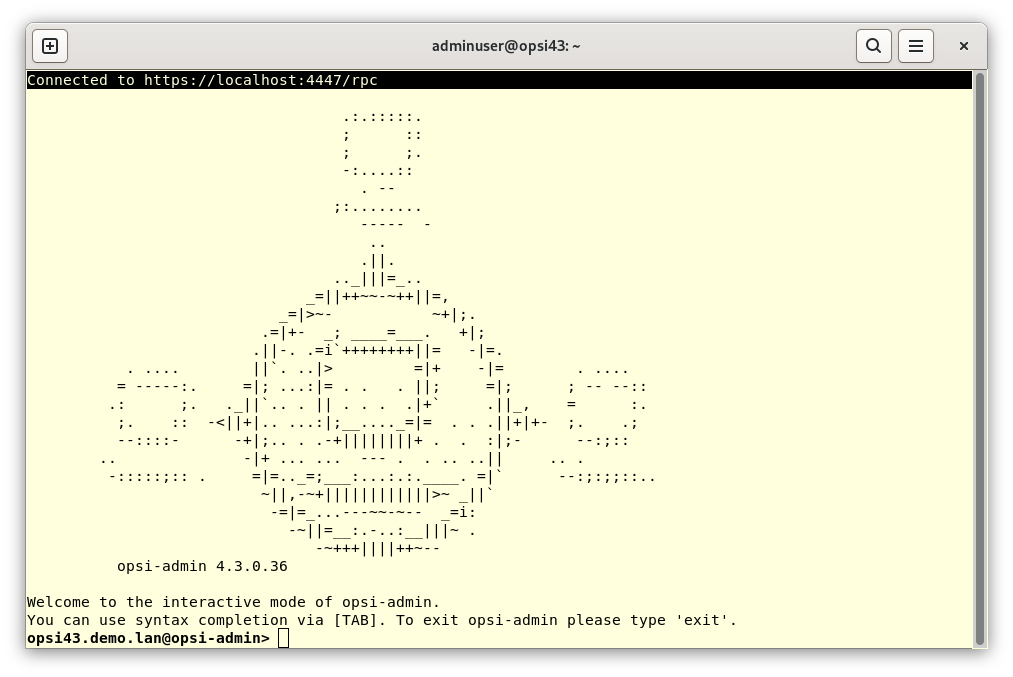
opsi-admin -i to start the tool in interactive mode.When you launch opsi-admin with the -c parameter, it enables a color-coded display. The complete command for this mode is opsi-admin -ic. While in interactive mode, you can use the [Tab] key for autocompletion of commands. Additionally, opsi-admin maintains a history of previously entered commands, which you can navigate through using the arrow keys.
For script-friendly output, opsi-admin offers -s (shell output) and -S (simple output).
To execute RPC methods of the API, use the command method <method_name>. For executing more complex administrative tasks, the command task <taskname> is appropriate. For further examples and detailed usage of opsi-admin, please refer to the section Examples.
Configuration File
You can save your access credentials for the OPSI web service in a configuration file. This setup allows you to establish a connection without having to input your username and password every time you use the command line.
The file is named opsirc and is located in the hidden folder ~/.opsi.org in the user’s home directory. The structure of this file is as follows:
address = https://<opsi-server>:4447/rpc
username = <opsi-user>
password = <secret>
The information within the opsirc file is entirely optional. If the file is either empty or doesn’t exist, opsi-admin will revert to using the default settings as previously mentioned.
The --opsirc parameter allows you to specify an alternative path to a different configuration file when executing the command. This feature enables you to prepare and use multiple configurations for various connections.
|
opsi-cli
Over the years, OPSI has received several command line tools. Since the opsi-utils and opsi-python scripts were created at different times, they each have their own structure, command line options and output formats.
The more recent addition, opsi-cli, offers access to the same functionalities found in earlier tools, and even more. As the opsi-utils and opsi-python scripts were developed at different times, they each possess unique structures, command line options, and output formats.
Additionally, opsi-cli features a plugin system, enabling OPSI users to enhance its capabilities with custom plugins.
Installation
opsi-cli is a component of the opsi-utils package and is therefore automatically installed on OPSI servers. As all communication is occurring exclusively via the OPSI web service, opsi-cli is available as opsi-package for Linux, Windows, and macOS clients.
When using opsi-cli outside of an OPSI server, you need to provide credentials for the OPSI web service. This can be done either directly in the command line with --service, --username, and --password, or by saving the credentials locally on the client (use opsi-cli config service add --help for guidance, see section Service Options).
On Arch Linux you need to install the libxcrypt-compat package for opsi-cli to function correctly.
|
The opsi-cli executable is immediately executable and portable. If you want to include the binary in the path on an OPSI client, you can use opsi-cli itself for that (see opsi-cli self --help)
Usage
opsi-cli is a Python-based binary that operates based on parameters and commands. Every command within opsi-cli can consist of one or several subcommands. The upcoming sections will first introduce the basic functionalities and then delve into the available commands.
Each command in opsi-cli comes with its own help, accessible via the --help parameter. For example, you can use opsi-cli --help or opsi-cli config --help to view detailed information about specific commands.
|
The typical structure for executing an opsi-cli command is as follows:
opsi-cli [OPTIONS] COMMAND [ARGS]...Options specified immediately after the opsi-cli command are part of the global configuration and therefore apply to all subsequent subcommands. There are three main categories of global options in opsi-cli.
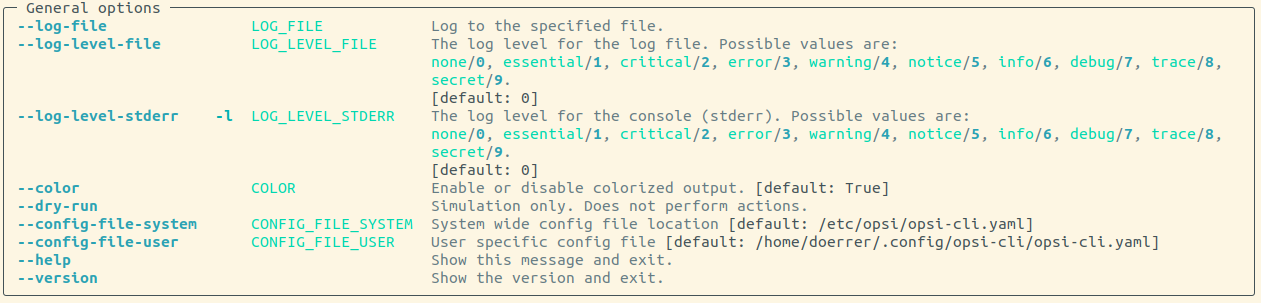
General Options
The parameters in the General options section let you adjust aspects like logging, enable colored output, and configure other settings in opsi-cli.
Output Format
The options found under IO options are used to standardize the output across all subcommands, allowing you to specify output formats and apply filters.

The following example demonstrates how to use these options for filtering and formatting output. In the first command, opsi-cli executes the JSON-RPC method host_getObjects (execute) to display information about OPSI clients from the domain domain.local with names beginning with client:
opsi-cli jsonrpc execute host_getObjects [] '{"id":"client*.domain.local"}'
[
  {
    "description": "",
    "notes": "Created by opsi-deploy-client-agent at Mon, 26 Sep 2022 17:19:29",
    "id": "client-linux.domain.local",
    "hardwareAddress": "08:00:27:f5:1d:8e",
    "ipAddress": "192.168.56.11",
    "inventoryNumber": "",
    "systemUUID": null,
    "opsiHostKey": null,
    "created": "2022-09-26 17:19:29",
    "lastSeen": "2023-03-08 12:13:10",
    "oneTimePassword": null,
    "type": "OpsiClient",
    "ident": "client-linux.domain.local"
  },
  […]
]
The next command formats the output as a table in the terminal and filters it to include only three attributes: id, type, and lastSeen:
opsi-cli --output-format table --attributes id,type,lastSeen jsonrpc execute host_getObjects [] '{"id":"client*.domain.local"}'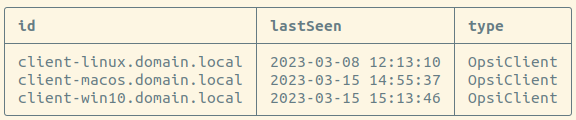
If you prefer the CSV format, simply write csv after --output-format instead of table:
opsi-cli --output-format csv --attributes id,type,lastSeen jsonrpc execute host_getObjects [] '{"id":"client*.domain.local"}'
[…]
id;lastSeen;type
client-linux.domain.local;2023-03-08 12:13:10;OpsiClient
client-macos.domain.local;2023-03-15 14:55:37;OpsiClient
client-win10.domain.local;2023-03-15 15:13:46;OpsiClient
You can use the --output-file option to directly write the output to a file.
Service Options
When using opsi-cli outside of the OPSI server, it’s necessary to provide access credentials for the OPSI web service. The relevant parameters for this are --service, --username, and --password:

As an alternative, you can save the access credentials directly on the client. This approach is particularly useful if you need to access multiple OPSI servers, as it allows you to create and manage different service configurations as profiles. To set this up, use the opsi-cli config command. For detailed instructions and options, you can view the online help by entering opsi-cli config service add --help.
|
Commands and Examples
The following sections will detail the currently available commands in opsi-cli and provide examples to illustrate their usage.
config
Use this command to adjust the opsi-cli configuration (see opsi-cli config --help).
Use the following command to view the current configuration and the default settings:
opsi-cli config list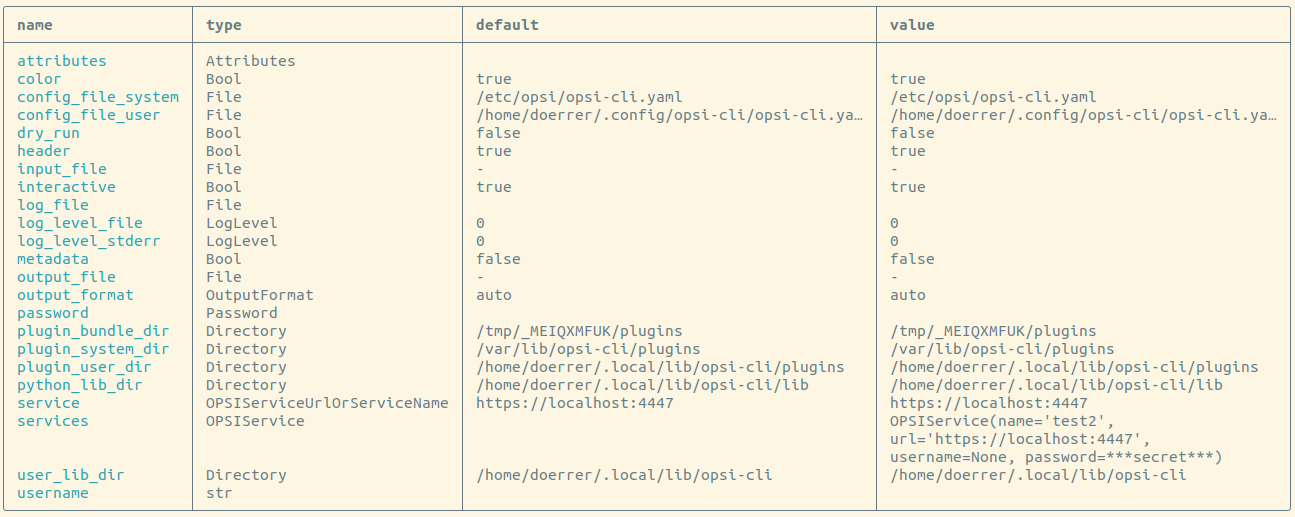
To permanently modify a configuration value, use the command opsi-cli config set <name> <value>. This adjustment will then be applied to all future uses of opsi-cli. If you need to remove a previously set value, use the command opsi-cli config unset <name>. For managing service access configurations, opsi-cli config service provides several subcommands, including add, list, and remove.
jsonrpc
The jsonrpc command in opsi-cli provides access to JSON-RPC methods, allowing their execution on the OPSI server. This functionality enables opsi-cli to fully replace the opsi-admin tool. The jsonrpc command includes two subcommands:
-
opsi-cli jsonrpc methods: This command prints a list of all available API methods along with their parameters. -
opsi-cli jsonrpc execute <method>: Use this command to execute a specified method.
The output of opsi-cli jsonrpc methods also indicates if a method is marked as obsolete in the deprecated column, while the alternative_method column shows the recommended alternative method.
To execute a specific method, append its name after the opsi-cli jsonrpc execute command, for example:
opsi-cli jsonrpc execute authenticatedThe syntax for using opsi-cli is similar to that of opsi-admin, as can be seen in a direct comparison:
opsi-admin method authenticatedThe way in which method parameters are specified in opsi-cli is exactly the same as in opsi-admin, as illustrated by the following, slightly more complex example:
opsi-cli jsonrpc execute host_getObjects '["created","lastSeen"]' '{"id":"testclient01.uib.local"}'Old variant:
opsi-admin method host_getObjects '["created","lastSeen"]' '{"id":"testclient01.uib.local"}'
In the two examples provided, the depecated -d parameter for opsi-admin (which used to bypass opsiconfd) is intentionally omitted. Bypassing the OPSI web service in the past, has occasionally led to issues within the OPSI system. Therefore, access to the API is recommended solely via the OPSI web service. It’s important to note that opsi-cli does not support bypassing opsiconfd.
|
When operating directly on the OPSI server, there’s no need to input any access credentials, as opsi-cli automatically retrieves this information from the server configuration. However, if you plan to use opsi-cli in scripts, cronjobs, or similar automated tasks, it’s essential to set up the access data in advance.
The output format for jsonrpc commands in opsi-cli can also be adjusted using parameters like --output-format and --attributes, similar to other opsi-cli commands. For more details on formatting options, please refer to the section Output Format.
opsi-cli --output-format table --attributes id,created,lastSeen jsonrpc execute host_getObjects '["created","lastSeen"]' '{"id":"testclient01.uib.local"}'
When using opsi-cli on Windows, be aware that the command prompt (cmd.exe) and PowerShell interpret single and double quotation marks differently. Therefore, it might be necessary to use escape sequences to ensure the commands work correctly.
|
The following examples demonstrate how to list all depots in an OPSI environment, highlighting the differences between commands on Linux/macOS and Windows. Here is how the command is executed on Linux and macOS:
opsi-cli jsonrpc execute host_getObjects [] '{"type":"OpsiDepotserver"}'For the Windows command prompt, the command is executed as follows:
opsi-cli jsonrpc execute host_getObjects [] {\"type\":\"OpsiDepotserver\"}In PowerShell (versions prior to 7), the command is formatted as follows:
opsi-cli jsonrpc execute host_getObjects [] '{\"type\":\"OpsiDepotserver\"}'client-action
The client-action command is used to manage OPSI clients. It primarily offers options to influence which list of clients is affected by actions (see opsi-cli client-action --help).
It has subcommands set-action-request and trigger-event
The set-action-request subcommand requests actions for products on OPSI clients. It is comparable to the task command of opsi-admin (see section Examples), but works according to the exclusion principle. This means that without explicitly specifying clients and products, the action affects everything. Therefore, set-action-request offers further options to filter the products that an action should affect (see opsi-cli client-action set-action-request --help).
The client-action command serves as a key tool in the management of OPSI clients. It primarily provides a range of options to selectively target and influence the list of clients subject to various actions:
Executing the command without specifying clients and products will affect all clients and products. To minimize the risk of errors, opsi-cli restricts the execution of set-action-request unless at least one of the following parameters is specified: --where-outdated, --where-failed, --products, or --product-groups.
|
For setting all outdated products of clients to setup, use this command:
opsi-cli client-action set-action-request --where-outdatedAlternatively, set only a specific product (here: opsi-client-agent) on a specific client (here test-98.domain.tld) to setup:
opsi-cli -l5 client-action --clients test-98.domain.tld set-action-request --products opsi-client-agent

[5] [2022-10-28 12:54:59.998] [               ] Selected clients: ['test-98.domain.tld']   (client_action_worker.py:48)
[5] [2022-10-28 12:55:00.055] [               ] Handling products ['opsi-client-agent']   (set_action_request_worker.py:105)
[5] [2022-10-28 12:55:00.065] [               ] Setting 'setup' ProductActionRequest: opsi-client-agent -> test-98.domain.tld   (set_action_request_worker.py:134)
The default product status is setup. To set the same product to uninstall, use the following command:
opsi-cli -l5 client-action --clients test-98.domain.tld set-action-request --products opsi-client-agent --request-type uninstall

[5] [2022-10-28 12:57:06.848] [               ] Selected clients: ['test-98.domain.tld']   (client_action_worker.py:48)
[5] [2022-10-28 12:57:06.904] [               ] Handling products ['opsi-client-agent']   (set_action_request_worker.py:105)
[5] [2022-10-28 12:57:06.914] [               ] Setting 'uninstall' ProductActionRequest: opsi-client-agent -> test-98.domain.tld   (set_action_request_worker.py:134)
To reset an action request for a specific product on a client, use the value None (none is also allowed):
opsi-cli -l5 client-action --clients test-98.domain.tld set-action-request --products opsi-client-agent --request-type None

[5] [2022-10-28 14:12:50.538] [               ] Selected clients: ['test-98.domain.tld']   (client_action_worker.py:48)
[5] [2022-10-28 14:12:50.574] [               ] Handling products ['opsi-client-agent']   (set_action_request_worker.py:105)
[5] [2022-10-28 14:12:50.580] [               ] Setting 'None' ProductActionRequest: opsi-client-agent -> test-98.domain.tld   (set_action_request_worker.py:134)
In the event of an error with a product, it’s crucial to have the capability to temporarily reverse all actions for that product on the clients. This precautionary measure helps prevent the further distribution of the faulty product:
opsi-cli client-action set-action-request --products opsi-client-agent --request-type NoneShould the product become available again, error-free, at a later stage, you can reset all outdated or incorrect status information back to setup:
opsi-cli client-action set-action-request --where-outdated --where-failedTo set a specific product on a group of clients (here: testclients) to setup, type this:
opsi-cli -l5 client-action --client-groups testclients set-action-request --products opsi-client-agent

[5] [2022-10-28 13:03:24.100] [               ] Selected clients: ['test-1.domain.tld', 'test-2.domain.tld', 'test-3.domain.tld', 'test-4.domain.tld', 'test-5.domain.tld']   (client_action_worker.py:48)
[5] [2022-10-28 13:03:24.159] [               ] Handling products ['opsi-client-agent']   (set_action_request_worker.py:105)
[5] [2022-10-28 13:03:24.169] [               ] Setting 'setup' ProductActionRequest: opsi-client-agent -> test-1.domain.tld   (set_action_request_worker.py:134)
[5] [2022-10-28 13:03:24.170] [               ] Setting 'setup' ProductActionRequest: opsi-client-agent -> test-2.domain.tld   (set_action_request_worker.py:134)
[5] [2022-10-28 13:03:24.170] [               ] Setting 'setup' ProductActionRequest: opsi-client-agent -> test-3.domain.tld   (set_action_request_worker.py:134)
[5] [2022-10-28 13:03:24.170] [               ] Setting 'setup' ProductActionRequest: opsi-client-agent -> test-4.domain.tld   (set_action_request_worker.py:134)
[5] [2022-10-28 13:03:24.170] [               ] Setting 'setup' ProductActionRequest: opsi-client-agent -> test-5.domain.tld   (set_action_request_worker.py:134)
Beyond specifying a group of clients, you have the option to define a group of products (in this example: testproducts) using the --product-groups parameter:
opsi-cli -l5 client-action --client-groups testclients set-action-request --product-groups testproducts

[5] [2022-10-28 13:05:53.147] [               ] Selected clients: ['test-1.domain.tld', 'test-2.domain.tld', 'test-3.domain.tld', 'test-4.domain.tld', 'test-5.domain.tld']   (client_action_worker.py:48)
[5] [2022-10-28 13:05:53.225] [               ] Handling products ['hwaudit', 'opsi-client-agent', 'swaudit']   (set_action_request_worker.py:105)
[5] [2022-10-28 13:05:53.236] [               ] Setting 'setup' ProductActionRequest: hwaudit -> test-1.domain.tld   (set_action_request_worker.py:134)
[5] [2022-10-28 13:05:53.237] [               ] Setting 'setup' ProductActionRequest: opsi-client-agent -> test-1.domain.tld   (set_action_request_worker.py:134)
[5] [2022-10-28 13:05:53.237] [               ] Setting 'setup' ProductActionRequest: swaudit -> test-1.domain.tld   (set_action_request_worker.py:134)
[5] [2022-10-28 13:05:53.237] [               ] Setting 'setup' ProductActionRequest: hwaudit -> test-2.domain.tld   (set_action_request_worker.py:134)
[5] [2022-10-28 13:05:53.237] [               ] Setting 'setup' ProductActionRequest: opsi-client-agent -> test-2.domain.tld   (set_action_request_worker.py:134)
[5] [2022-10-28 13:05:53.238] [               ] Setting 'setup' ProductActionRequest: swaudit -> test-2.domain.tld   (set_action_request_worker.py:134)
[5] [2022-10-28 13:05:53.238] [               ] Setting 'setup' ProductActionRequest: hwaudit -> test-3.domain.tld   (set_action_request_worker.py:134)
[5] [2022-10-28 13:05:53.238] [               ] Setting 'setup' ProductActionRequest: opsi-client-agent -> test-3.domain.tld   (set_action_request_worker.py:134)
[5] [2022-10-28 13:05:53.238] [               ] Setting 'setup' ProductActionRequest: swaudit -> test-3.domain.tld   (set_action_request_worker.py:134)
[5] [2022-10-28 13:05:53.239] [               ] Setting 'setup' ProductActionRequest: hwaudit -> test-4.domain.tld   (set_action_request_worker.py:134)
[5] [2022-10-28 13:05:53.239] [               ] Setting 'setup' ProductActionRequest: opsi-client-agent -> test-4.domain.tld   (set_action_request_worker.py:134)
[5] [2022-10-28 13:05:53.239] [               ] Setting 'setup' ProductActionRequest: swaudit -> test-4.domain.tld   (set_action_request_worker.py:134)
[5] [2022-10-28 13:05:53.239] [               ] Setting 'setup' ProductActionRequest: hwaudit -> test-5.domain.tld   (set_action_request_worker.py:134)
[5] [2022-10-28 13:05:53.239] [               ] Setting 'setup' ProductActionRequest: opsi-client-agent -> test-5.domain.tld   (set_action_request_worker.py:134)
[5] [2022-10-28 13:05:53.240] [               ] Setting 'setup' ProductActionRequest: swaudit -> test-5.domain.tld   (set_action_request_worker.py:134)
opsi-cli automatically omits a specified list of packages when using the --where-outdated and --where-failed parameters. Currently, these packages include opsi-winst, opsi-auto-update, opsi-script, shutdownwanted, windows10-upgrade, activate-win, opsi-script-test, opsi-bootimage-local, opsi-uefi-netboot, opsi-wan-config-on, opsi-wan-config-off, opsi-winpe, win10-sysprep-app-update-blocker, and windomain.
| While it’s straightforward to exclude additional products or product groups, a safer approach is to maintain a separate product group and specify this group during execution. This strategy enables you to limit changes exclusively to this group. |
log
The log plugin allows viewing live logs from the OPSI server and clients via the OPSI-Messagebus connection.
If the specified host is not connected, an error is raised.
The plugin determines the appropriate service or host to retrieve the logs from based on the log type and requests the log file transfer.
Subcommands
-
Description: View logs for a specified host.
-
Usage:
opsi-cli log view [OPTIONS] [HOST_ID]

-
Options:
-
--log-type(default: opsiclientd): Specify the type of log to display (opsiconfd or opsiclientd). -
--live(flag): Display live log file from the client directly (only available for opsiclientd); otherwise, display the client logs stored on the server. -
--follow(flag): Continuously follow the log file for real-time updates. -
--log-level(default: 6): Specify the log level to filter (1 to 8).
-
-
Arguments:
-
HOST_ID: The ID of the host for which logs are to be displayed.
-
-
Example:

Disable color formatting with the --no-color option or by setting the NO_COLOR environment variable. Usage: opsi-cli --no-color log view [OPTIONS] HOST_ID
|
package
The package plugin for opsi-cli offers a comprehensive set of commands for managing OPSI packages.
These commands include creating, extracting, listing, installing, and uninstalling packages, providing a unified solution for package management.

Subcommands
-
Description: The
makecommand packages a source directory and saves it to a destination directory, creating a.opsipackage along with.md5and.zsyncfiles. -
Usage:
opsi-cli package make [OPTIONS] [SOURCE_DIR] [DESTINATION_DIR] -
Options:
-
-o, --overwrite(flag): Overwrite existing package if it exists. -
--follow-symlinks(flag): Follow symlinks. -
--custom-name: Include directories with the custom name. -
--custom-only(flag): Include only custom directories. -
--md5/--no-md5(flag, default: true): Create md5 checksum for the package (use--no-md5to disable). -
--zsync/--no-zsync(flag, default: true): Create zsync file for the package (use--no-zsyncto disable).
-
-
Arguments:
-
SOURCE_DIR(default: current directory): Source directory. -
DESTINATION_DIR(default: current directory): Destination directory.
-
-
Example:

-
Description: The
control-to-tomlcommand generates acontrol.tomlfile from acontrolfile located in the specified source directory. -
Usage:
opsi-cli package control-to-toml [SOURCE_DIR] -
Arguments:
-
SOURCE_DIR(default: current directory): Source directory.
-
-
Description: The
extractcommand extracts an OPSI package from the specified package archive to the destination directory. -
Usage:
opsi-cli package extract [OPTIONS] [PACKAGE_ARCHIVE] [DESTINATION_DIR] -
Options:
-
--new-product-id: A new product ID to replace the existing one in the control file. -
-o, --overwrite(flag): Overwrite destination directory if it exists.
-
-
Arguments:
-
PACKAGE_ARCHIVE: Path to the package archive. -
DESTINATION_DIR(default: current directory): Destination directory.
-
-
Example:
opsi-cli package extract <package_archive.opsi> <destination_dir>-
Description: The
listcommand lists OPSI products installed on an OPSI-Depotserver. By default, it shows products on all depots. -
Usage:
opsi-cli package list [OPTIONS] [PRODUCT_IDS] -
Options:
-
--depots(default: all): Depot IDs (comma-separated) or 'all'. -
--product-type: Filter the output by product type [localboot|netboot].
-
-
Arguments:
-
PRODUCT_IDS: List of product IDs to filter the output. "*" can be used as a wildcard.
-
-
Example:

-
Description: The
installcommand installs OPSI packages from local paths or URLs. By default, the package is installed on the OPSI-Configserver. -
Usage:
opsi-cli package install [OPTIONS] [PACKAGES] -
Options:
-
--depots(default: OPSI-Configserver): Depot IDs (comma-separated) or 'all'. -
--update-properties(flag): Trigger an interactive prompt to update Product property default values. -
--force(flag): Force installation. -
--setup-where-installed(flag): Setup where the package is installed. -
--setup-where-installed-with-dependencies(flag): Setup where the package is installed with dependencies. -
--update-where-installed(flag): Update where the package is installed.
-
-
Arguments:
-
PACKAGES: List of packages to install, which can be specified as local paths or URLs.
-
-
Example:

-
Description: The
uninstallcommand uninstalls OPSI products specified by their product IDs. By default, it uninstalls from the OPSI-Configserver. -
Usage:
opsi-cli package uninstall [OPTIONS] [PRODUCT_IDS] -
Options:
-
--depots(default: OPSI-Configserver): Depot IDs (comma-separated) or 'all'. -
--force(flag): Force uninstallation. -
--keep-files(flag): Keep files on uninstallation.
-
-
Arguments:
-
PRODUCT_IDS: List of product IDs to uninstall.
-
-
Example:
opsi-cli package uninstall --depots <depot_id> --force <product1> <product2>
Use the --quiet option to suppress the progress bar and other non-essential output.
|
plugin
All opsi-cli commands are implemented as plugins, including the plugin command itself. You use it to manage plugins, i.e. to install new external plugins or to remove running plugins from the system. You can also use opsi-cli plugin to list or export plugins. See opsi-cli plugin --help
To generate a template for a new plugin:
opsi-cli plugin newAfter you have entered the name, version, and description, opsi-cli creates a new directory using the specified name. This directory includes the subdirectories python and data:
-
The
pythondirectory is intended for the code of the new plugin. It is structured as a Python package and includes ainit.pyfile to get started. Inside, you will find an example of a command, a subcommand, and some options. -
The
datadirectory is for static resources related to the plugin; it is typically not necessary to modify this directory.
Once you have populated the template with content, proceed to add the plugin to the running opsi-cli instance:
opsi-cli plugin add <directory>If the specified directory contains valid Python code, the command within it becomes available as a plugin in opsi-cli.
To display all registered plugins, use the command opsi-cli plugin list.
|
You can export a plugin to an archive and then import it into another opsi-cli instance:
opsi-cli plugin export <name>
opsi-cli plugin add <archive>
Use these commands to convert a directory into an archive and vice versa:
opsi-cli plugin compress <directory>
opsi-cli plugin extract <archive>
To modify an imported plugin, first unpack it using the extract command, then alter the contents of the directory, and finally call opsi-cli plugin add <directory> again. This process will replace the existing plugin with the updated version that shares the same name.
|
To remove a plugin from an opsi-cli instance, use the following command:
opsi-cli plugin remove <name>self
Use the self command to manage the opsi-cli instance. This includes installing and uninstalling opsi-cli on the system, activating autocomplete and displaying the command structure (see opsi-cli self --help).
You can install opsi-cli on your system using the opsi-cli binary. Execute the command opsi-cli self install for this purpose. During the installation process, the binary program is copied to a globally accessible location (or included in the PATH on Windows), and a configuration file is generated. You have the option to choose between a user-specific installation or a system-wide installation with the --system option. To uninstall, use the command opsi-cli self uninstall.
If you install the OPSI package opsi-cli or opsi-utils on a client, you can skip the step opsi-cli self install.
|
To view the command structure, including all commands, their version numbers, and subcommands, enter opsi-cli self command-structure.
The opsi-cli auto-completion works for commands, subcommands and options. To set it up, enter this command:
opsi-cli self setup-shell-completionThe autocompletion feature is currently compatible with three different shells: Bash, ZSH, and Fish. Once you restart the active shell or log in anew, tab completion can be used in the same manner as in conventional Unix shells. Press [Tab] [Tab] to display all available options or commands, depending on the context. Here’s how [Tab] [Tab] functions in various scenarios:
-
When used after
opsi-clior any command with at least one subcommand, it presents a list of available (sub)commands. -
After entering
-, it shows the available options for the current command or foropsi-cliitself. -
Following a subcommand, it reveals possible values for the arguments:
-
For the subcommands
set,show, andunsetofopsi-cli config, [Tab] [Tab] generates a list of all available configurations that can be modified. -
For
opsi-cli jsonrpc execute, it displays a list of available methods, which can be filtered by a specified prefix.
-
support
The opsi-cli support command is designed to assist in diagnosing and resolving issues within your OPSI environment. Currently, it includes a single subcommand: opsi-cli support health-check. This command examines various factors that might affect the efficient operation of an OPSI environment and compiles a comprehensive report.
The following example shows a compact representation of the report.
opsi-cli support health-checkYou can get a detailed report using the switch --detailed. Alternatively you can specify a category on which you want to get detailed information, like
opsi-cli support health-check system_packagesAnother subcommand of opsi-cli support is client-logs, which provides the functionality to gather all opsi-related logfiles from a client. The logfiles are compressed on the client side, and the resulting archive is transferred via opsi-messagebus to the current working directory. Once transferred, the archive can be extracted, analyzed, and shared as needed.
terminal
The opsi-cli terminal command launches a basic terminal client, enabling you to establish a connection with OPSI servers. Its functionality is similar to SSH or PuTTY. To connect to an OPSI server, simply enter the OPSI host ID.
opsi-cli terminal test-1.domain.tldAdditionally, this command can be used to communicate with the OPSI config server:
opsi-cli terminal configserverAs soon as you close the terminal, either by typing the exit command or using the key combination [Ctrl]+[D], the connection will be terminated.
This command initiates the default shell on the target system and transmits inputs and outputs in real time. Therefore, typically, you will access a cmd shell on Windows, a zsh shell on MacOS, and on Linux, a shell dependent on the distribution, which is often bash.
opsi-makepackage
Utilize the opsi-makepackage command to create an OPSI package with the .opsi extension from a package source (workbench). First, navigate to the source directory and then execute the command opsi-makepackage.
opsi-makepackage includes several options that modify its behavior.
To view a list of available parameters and their meanings, you can use opsi-makepackage --help.
| You can install an OPSI package on any OPSI depot server using the command opsi-package-manager. |
opsi-outdated-to-setup
You can use the command line tool opsi-outdated-to-setup to set action requests for clients that have localboot products for which a newer version is available in the depot.
opsi-outdated-to-setup --help
usage: opsi-outdated-to-setup [-h] [--version] [--log-level {0,1,2,3,4,5,6,7,8,9}] [--clients CLIENTS] [--dry-run]
                              [--client-groups CLIENT_GROUPS] [--exclude-products EXCLUDE_PRODUCTS]
                              [--include-products INCLUDE_PRODUCTS] [--add-failed] [--uninstall-where-only-uninstall]
                              [--exclude-client-groups EXCLUDE_CLIENT_GROUPS] [--include-product-groups INCLUDE_PRODUCT_GROUPS]
                              [--exclude-product-groups EXCLUDE_PRODUCT_GROUPS] [--setup-on-action SETUP_ON_ACTION]

Set outdated localboot Products to setup.
[…]
You can also use opsi-outdated-to-setup to set action requests for repeating failed installations by using the --add-failed option.
The parameters --exclude-products, --include-products, --exclude-product-groups, and --include-product-groups allow for more precise definition of the products. Similarly, you can specify the clients more accurately using --clients, --client-groups, and --exclude-client-groups.
The --uninstall-where-only-uninstall option is used to set all installed products to uninstall if they have no registered script (like setup, always, etc.) other than the uninstall script.
Employ the --dry-run parameter to initiate a trial run without making any actual changes.
|
The --setup-on-action is a unique option that enables setting a product to setup on all clients where any change has occurred (i.e., clients that do not have the current package installed). This is particularly useful in scenarios like using shutdownwanted for a shutdown post-installation, or with waudit to refresh the audit data.
opsi-package-manager
Use the opsi-package-manager tool to install and uninstall product packages on an OPSI depot server.
To install a package, it must be readable by the user opsiconfd (refer to the chapter Authorizations for more details). It is recommended to store product packages in /var/lib/opsi.
|
How to install an OPSI package:
opsi-package-manager -i <opsi-package>To install an OPSI package and interactively set the default values for product properties:
opsi-package-manager -p ask -i <opsi-package>To install an OPSI package and set it to setup for all clients where it is installed:
opsi-package-manager -S -i <opsi-package>To install an OPSI package and set it to setup for all clients on which it is installed, including the packages that depend on it:
opsi-package-manager -s -i <opsi-package>To uninstall an OPSI package:
opsi-package-manager -r <opsi-package>opsi-package-manager -x <opsi-package> --new-product-id <product-id>For an overview of all options, use opsi-package-manager --help.
opsi-package-updater
The command line tool opsi-package-updater is designed for downloading OPSI products from one or more repositories and installing them on the OPSI depot server. Its primary function is to automate the updating of OPSI packages on a scheduled basis, e.g. through a cronjob.
| Repositories are defined as sources providing OPSI packages for download. You can configure each repository individually, customizing access and behavior. |
To access the online help, enter the command opsi-package-updater --help:
opsi-package-updater --help
usage: opsi-package-updater [-h] [--version] [--config CONFIGFILE]
                            [--verbose | --log-level {0,1,2,3,4,5,6,7,8,9}]
                            [--force-checksum-calculation] [--repo repository_name]
                            [--use-inactive-repository] [--ignore-errors] [--no-zsync]
                            {install,update,download,list} ...

Updater for local OPSI products. Operates in different MODEs: install, update, download and list. Each
mode has their own options that can be viewed with MODE -h
[…]
The --repo parameter allows you to limit operations to a specific repository.
opsi-package-updater supports the following commands:
-
list: Displays a list of available repositories or OPSI packages. -
download: Downloads OPSI packages from a repository. -
install: Downloads and installs OPSI packages from a repository. -
update: Updates locally installed OPSI packages from the repositories.
Each command has its own detailed help information, which you can access by entering opsi-package-updater <command> --help.
To get more detailed output, use the -v (verbose) parameter. This switch can be used multiple times for increased verbosity (-vvv, -vvvv, etc.).
|
Examples
To display the activated repositories:
opsi-package-updater list --active-reposTo list the packages available in the repositories (this ignores configured includes/excludes):
opsi-package-updater list --productsTo install the package ubuntu from the repository uib_linux, with -vv providing a very detailed output:
opsi-package-updater -vv --repo uib_linux install ubuntuTo download and install all packages available in the activated repositories:
opsi-package-updater installTo display the available updates (this takes into account configured includes/excludes):
opsi-package-updater list --updatable-productsTo update the locally installed packages firefox and javavm from the repositories; -vv produces detailed output:
opsi-package-updater -vv update firefox javavmRepositories
The general settings for the opsi-package-updater are located in the file /etc/opsi/opsi-package-updater.conf. This file includes various sections that specify settings such as the location of the OPSI packages (packageDir), the name of the logfile (logFile), and the directory for the repositories (repositoryConfigDir). Additionally, settings for e-mail notifications and Wake on LAN (WoL) for clients are also configured here.
The configuration files for individual repositories are located in the directory /etc/opsi/package-updater.repos.d/. Within this directory, you’ll find a commented template (file example.repo.template) that lists and explains all the available options.
There are two types of repositories that can be configured: internet repositories and OPSI server repositories.
Internet Repositories
Internet repositories are defined by the following parameters:
-
baseURL: This is the URL of the repository, for example,http://opsipackages.43.opsi.org/stable. -
dirs: A comma-separated list of directories within the repository, such asopsi4.3/products/localboot, opsi4.3/products/netboot. -
usernameandpassword: These are used for repositories that require authentication. -
authcertfileandauthkeyfile: These parameters are for certificate-based authentication. -
verifyCert: This option enables or disables the verification of the server certificate for HTTPS connections. -
excludes: Regular expression specifying package names that should not be handled, for example, ^test.* will exclude anything that starts with "test". -
proxy: This is used to specify a proxy server.
You can set up a proxy server for each individual repository using the proxy option. Alternatively, the proxy server details can be entered in the global configuration file /etc/opsi/opsi-package-updater.conf.
|
OPSI Server Repositories
If you specify the host ID of another OPSI server following opsiDepotId in the repository configuration file, it defines an OPSI server repository. For an OPSI depot server, the central OPSI config server is located at this address. This setup indicates that the depot server acquires packages from the /var/lib/opsi/repository repository on the config server.
Repository Behavior
You can configure specific behaviors for each repository:
-
autoupdate: Automatically downloads and installs more recent versions of already installed packages. -
autoinstall: Automatically downloads and installs available packages that are not yet installed locally. -
autosetup: Sets newly installed and updated packages tosetupfor all clients on which these packages are installed. -
onlyDownload: Only downloads new packages without installing them. -
ignoreErrors: Continues the process even if errors occur with individual packages, preventing the termination of the entire operation.
The onlyDownload option is frequently used in combination with activated notifications. This setup enables automatic email notification after new packages are downloaded, allowing an administrator to oversee the actual installation.
|
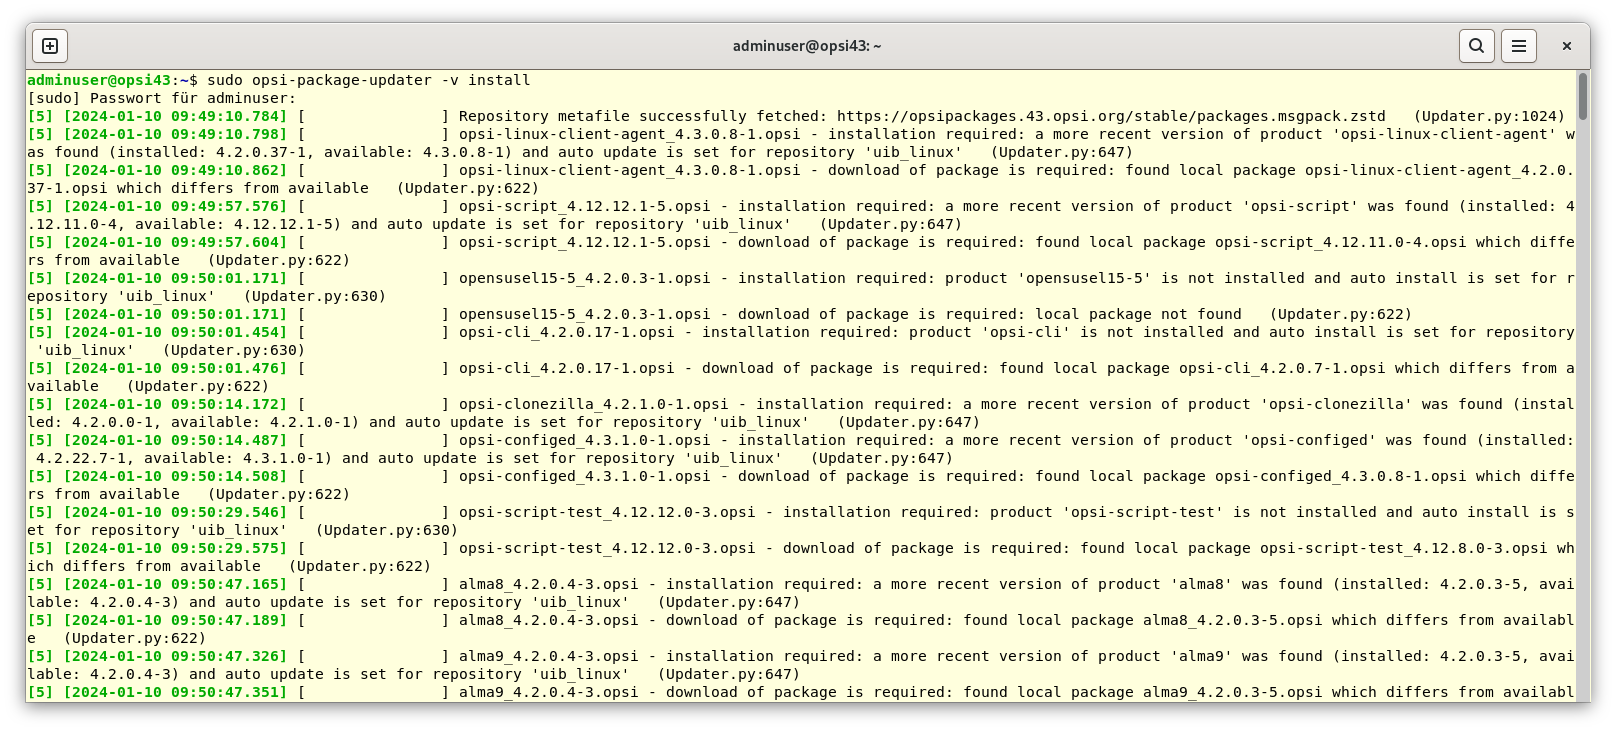
Install standard products
To install the OPSI standard products from the uib repositories, use the following command:
opsi-package-updater -v installThe command updates all existing OPSI packages including the templates for operating system installations from the OPSI repositories.
| If you’re using the preconfigured virtual machine, you can simply double-click the desktop icon to install the standard products. |
opsi-setup
Before the release of OPSI 4.3, the opsi-setup tool played a central role in executing various configuration tasks on the OPSI server.
| With OPSI 4.3, many of these tasks have been automated. Other functionalities are now managed by opsiconfd setup. |
opsi-set-rights
The command opsi-set-rights, which is essentially a script executing opsi-setup --set-rights, is used to correct the access rights of files and directories on an OPSI server. When invoked without additional parameters, opsi-set-rights automatically adjusts the permissions for all files and directories relevant for opsi. Alternatively, you can specify a path when executing the command to modify the access rights of a specific directory only.
opsi-wakeup-clients
On the OPSI config server, you can use cronjobs to schedule product installations and updates, allowing you to, for instance, shift critical administrative tasks to nighttime hours. For this to be effective, clients must either support Wake on LAN (WOL) or have a wake-up function in the BIOS that automatically powers the computer on from sleep or energy-saving mode at a pre-set time.
To facilitate this process, the command line tool opsi-wakeup-clients (previously known as wake_clients_for_setup.py) is available.
Almost all parameters of wake_clients_for_setup.py have been retained in opsi-wakeup-clients. The only change is the renaming of the parameter --depotId to --depot-id.
|
To access the online help, use the command opsi-wakeup-clients --help:
opsi-wakeup-clients --help
usage: opsi-wakeup-clients [-h] [--version] [--verbose] [--log-file LOGFILE]
                           [--log-level {0,1,2,3,4,5,6,7,8,9}] [--wol-timeout WOLTIMEOUT]
                           [--ping-timeout PINGTIMEOUT] [--connect-timeout CONNECTTIMEOUT]
                           [--event-timeout EVENTTIMEOUT] [--reboot-timeout REBOOTTIMEOUT]
                           [--host-group-id HOSTGROUPID] [--depot-id DEPOTID] [--host-file INPUTFILE]
                           [--product-group-id PRODUCTGROUPID] [--event EVENTNAME] [--reboot]
                           [--shutdownwanted] [--no-auto-update] [--max-concurrent MAXCONCURRENT]

Wakeup clients for software installation.
[…]
opsi-wakeup-clients primarily carries out the following tasks:
-
For a specified group of clients, it sets
-
a certain group of products to the
setupstatus. -
It then activates the chosen clients using Wake on LAN.
If a client is only woken up but not fully started, opsi-wakeup-clients has the capability to send a signal to trigger a specific event.
The clients to be selected are identified in several ways:
-
Specify a host group that you have created, for example, using
opsi-configed(refer to the section Grouping Clients):
--host-group-id <HOSTGROUPID>
-
Define an OPSI depot, which automatically selects all clients associated with that depot:
--depot-Id <DEPOTID>
-
Specify a file that lists the desired clients:
--host-file <DATEI>
-
To set multiple products to
setup, you can specify a product group that you have previously created usingopsi-configed. For more information on this, see the section Managing Product Groups.
--product-group-id <PRODUCTGROUPID>
-
Finally, enter the event that you want to trigger; the parameter
--eventis used for this:
--event <EVENTNAME>
In opsi, the names of groups must be unique. This applies to both host groups (located in the Directory or Groups areas in opsi-configed) and product groups.
|
The following example illustrates how to set the products from the product group nightly-cron-products to setup for all clients in the host group nightly-cron-group-0:
opsi-wakeup-clients --event=gui_startup --product-group-id=nightly-cron-products --host-group-id=nightly-cron-group-0The clients are then awakened via Wake on LAN, and after a brief pause, the command is issued to execute the gui_startup event.
Setting up the Cronjob
To schedule the operation at a specific time each day, you need to enter the command in the server’s crontab. To do this, run the command crontab -e as the root user. In the standard editor that opens, you can enter the following:
# For more information see the manual pages of crontab(5) and cron(8)
#
# m h  dom mon dow   command

# Cronjobs zum Wecken und Installieren der PCs
5 0 * * * /usr/bin/opsi-wakeup-clients --log-level=5 --event=gui_startup --product-group-id=nightly-cron-prodcts --host-group-id=nightly-cron-group-1 --wol-timeout=120 --event-timeout=120
5 2 * * * /usr/bin/opsi-wakeup-clients --log-level=5 --event=gui_startup --product-group-id=nightly-cron-products --host-group-id=nightly-cron-group-2 --wol-timeout=120 --event-timeout=120
The command opsi-wakeup-clients is scheduled to run at 0:05 for the client group nightly-cron-group-1 and again at 2:05 for the client group nightly-cron-group-2.
When setting up such automation, it is important to ensure that installations do not inadvertently occur outside of the designated "maintenance window". This can be prevented by configuring the Working Window in the opsi-client-agent settings.
|