Quick Panel
The Quick Panel is a persistent sidebar that provides quick access to server/client/product selections, batch actions, interface settings, and account information, all without leaving the current page.
Opening and Closing the Quick Panel
-
Desktop: Click on your username in the top-right corner of the application to toggle the Quick Panel open or closed.
-
Mobile: Tap the user icon in the header. The Quick Panel appears as a full-width overlay. Tap outside it to dismiss.
On desktop, the Quick Panel is resizable: drag its left edge to change its width.
Quick Selections
The Quick Selections section at the top of the panel is the central tool for choosing which servers, clients, and products are in scope for the current session. It is organized as a tab bar with four tabs:
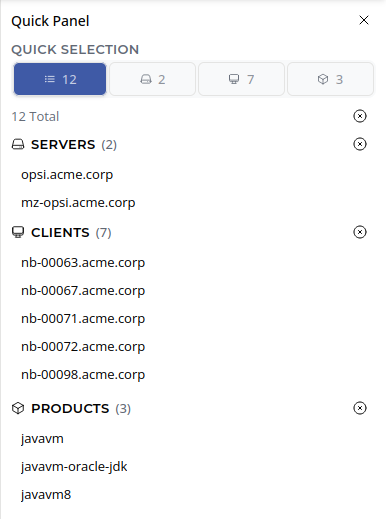
Overview Tab
The Overview tab provides a read-only summary of the current selection state:
-
Number of selected servers and their names.
-
Number of selected clients (total selected count) with a Clear button.
-
Number of selected products with a Clear button.
Use this tab to review your current context before executing an action.
Servers Tab
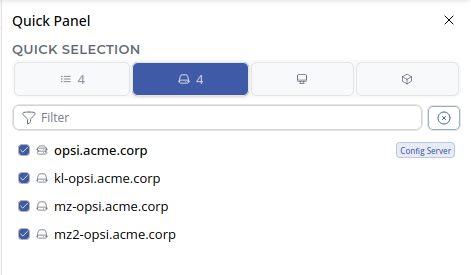
The Servers tab shows all OPSI servers in a flat, searchable list.
-
Click a server to add it to the selection (it becomes highlighted).
-
Click a selected server again, or click the × icon, to remove it from the selection.
-
Use the search/filter field at the top of the list to find servers by name.
-
The config server is displayed first and visually distinguished.
The badge on the Servers tab shows how many servers are currently selected.
Clients Tab
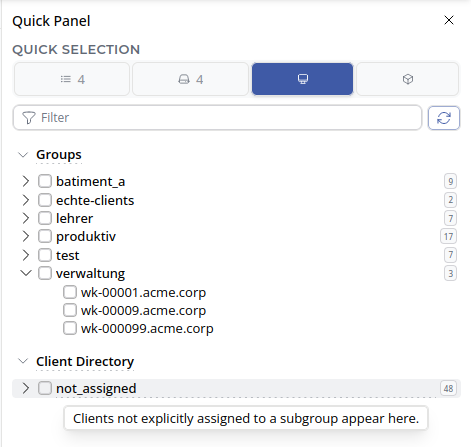
The Clients tab displays client groups and their members in a collapsible tree view. This view contains two root sections:
-
groups- Custom client groups created by the administrator. A client can belong to multiple sub-groups. -
clientdirectory- A hierarchical directory structure. Each client appears in exactly one subgroup. Clients that have not been placed in any group appear undernot_assigned.
Interacting with the tree:
-
Expand/collapse groups by clicking the chevron icon.
-
Select a group by clicking the group name. All clients in the group (and its subgroups) are added to the selection. The checkbox next to the group name reflects the selection state (fully selected, partially selected, or unselected).
-
Select individual clients by clicking a client entry within an expanded group.
-
Deselect by clicking the checkbox again or using the Clear button in the Overview tab.
-
Search/filter: Use the search field at the top of the tab to filter groups and clients by name. The tree is filtered live as you type; matching entries and their parent groups are shown.
Groups that have not yet been expanded load their member list lazily on first expand (for performance with large installations). A loading spinner appears briefly while members are fetched.
The badge on the Clients tab shows the total number of selected clients.
| After selecting clients, navigate to the Products page (or open the Products panel within a client’s detail view) to set action requests for those clients. |
Products Tab
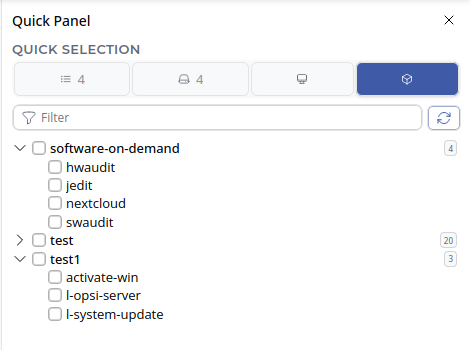
The Products tab works identically to the Clients tab but for product groups. It shows the product group tree (groups created on the Groups / Product Groups page).
Select a product group or individual products to scope operations. The badge on the Products tab shows the number of selected products.
Quick Actions
The Quick Actions section provides two dropdown menus for batch operations:

Client Quick Actions
Click the Client Actions button to open a menu with operations that apply to all currently selected clients:
-
On Demand: Opens a dialog to confirm the action and, after you click Confirm, pushes the
on_demandevent, causing the selected clients to immediately execute their pending product installations and updates. -
Notify: Opens a dialog to compose a pop-up message that is sent to all selected clients.
-
Reboot: Opens a confirmation dialog and then triggers a remote reboot of the selected clients.
-
Shutdown: Opens a confirmation dialog and then triggers a remote shutdown of the selected clients.
-
Deploy Client Agent: Opens the deploy dialog to install or update the opsi-client-agent on the selected clients (see Deploy Client Agent).
-
Rename: Renames a client (available when exactly one client is selected).
-
Delete: Deletes the selected clients after confirmation. Disabled if your account lacks the client-creation permission.
| The On Demand action is the fastest way to trigger immediate execution of already-set action requests across multiple clients in a single click. |
Product Quick Actions
Click the Product Quick Actions button to open the product quick actions dialog. This dialog lets you define filter conditions and an action to apply to matching products across selected clients or servers:
-
Set conditions (linked by logical AND):
-
Installation status - e.g., filter to products where the installation status is
unknown. -
Action result - e.g., filter to products where the last action
failed. -
Outdated only - restrict to products where the client’s version is older than the server version.
-
-
Set action: Choose the action request to set:
none,setup,uninstall,update,always,once, orcustom. -
Define scope: Apply to the selected clients, the selected servers, or both.
-
Preview: The dialog shows a preview table of all matching product/client combinations.
-
Apply: Click Apply to submit the action requests. The button is enabled once a preview has been loaded.
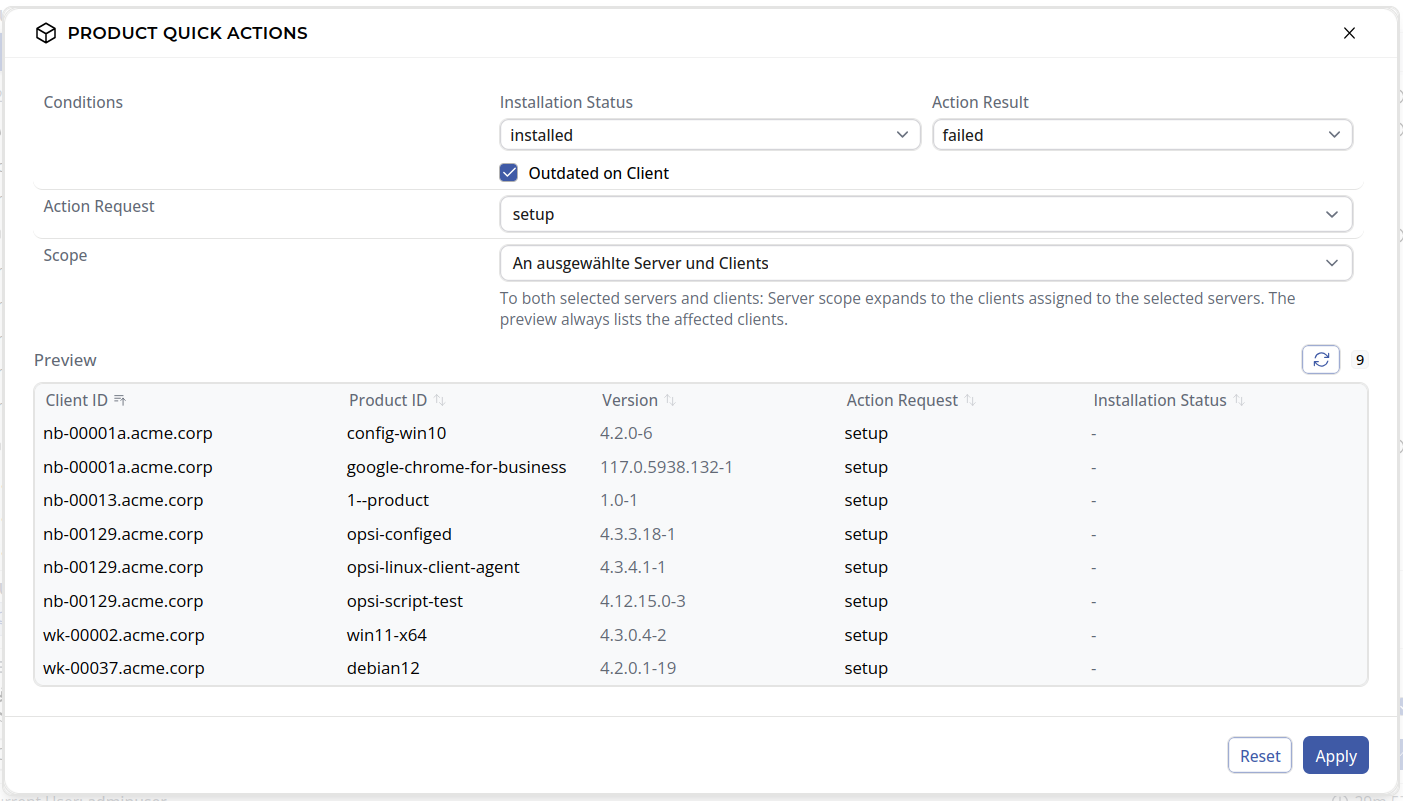
| Product Quick Actions are saved immediately when you click Apply. They bypass the local Unsaved Changes buffer and are written directly to the server. |
Settings
The Settings section contains controls for core interface preferences.
Auto Refresh
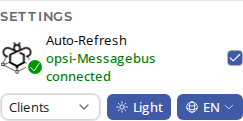
The Auto Refresh row contains:
-
MessageBus connection indicator: A small icon showing whether the real-time OPSI-Messagebus connection is active (connected / disconnected text is shown below the icon).
-
Checkbox: Toggle auto-refresh on or off.
When auto-refresh is enabled and the OPSI-Messagebus is connected, data tables update automatically when the server reports a relevant event (host created/updated/deleted, product status changed, etc.). No manual page reload is required.
When auto-refresh is disabled, a notification banner appears at the top of the page when changes are detected, and you can choose to refresh manually or dismiss the notification.
In practice, the OPSI-WebGUI reacts in particular to event families for host and product-on-client changes (for example host_* and productOnClient_*).
These events drive the "changes detected" hints and, when enabled, automatic refresh of affected views.
| Auto-refresh requires an active OPSI-Messagebus connection. If the connection drops, the indicator shows Disconnected and auto-refresh is effectively paused until the connection recovers. Reconnect is attempted automatically with exponential backoff. If certificate trust fails, the connection remains disconnected until the certificate warning is resolved. |
Default Page, Theme, and Language
The second row of the Settings section contains three inline controls:
-
Default Page selector: Choose which page opens after login: Dashboard, Servers, Clients (default), Products, Terminal, Diagnostics, or Maintenance.
-
Theme toggle: Switch between the light and the dark theme immediately.
-
Language dropdown: Choose the interface language. Built-in languages are German, English, and French.
These settings are stored in your browser and persist across sessions (see Browser Storage).
Account Information and Logout
At the bottom of the Quick Panel:
-
Read-only warning: If your account has read-only permissions, a yellow banner is displayed here as a reminder. Buttons for mutating operations are disabled throughout the application while in read-only mode.
-
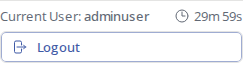
Current user: Shows the username you are logged in as.
-
Session timer: Shows the remaining session lifetime. When the session is close to expiry, the timer pulses with a warning color. Sessions expire after 30 minutes of inactivity by default (configurable by the administrator).
-
Logout button: Click to end the session immediately. You are redirected to the login page and all session data is cleared from the browser.
| Unsaved configuration changes are lost when the session expires or when you log out. Save your changes before logging out. |
Typical Workflows Using the Quick Panel
Deploy a product to a client group
-
Open the Quick Panel.
-
Go to the Clients tab. Expand the desired group and click it to select all its clients.
-
Go to the Servers tab and confirm the correct depot is selected.
-
Close the Quick Panel.
-
Navigate to Products.
-
Set the desired action request (e.g.,
setup) for the product. -
Save changes.